Эта версия возможно содержит некорректные исправления. Переключить на последнюю проверенную версию.
Выберете то, что вам нужно
-
Этот шаг не переведен. Помогите перевести
-
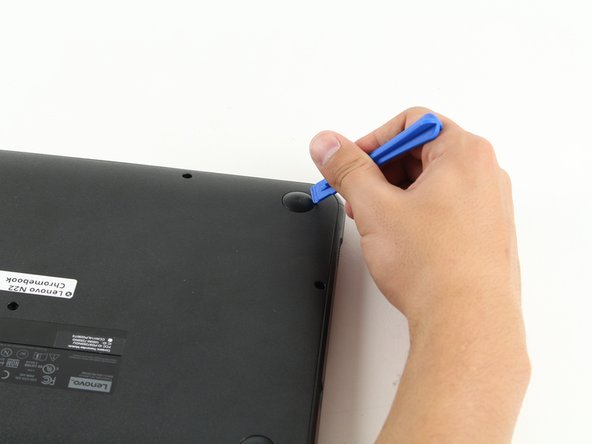
Flip the Chromebook so that the bottom is facing up.
-
Use a Phillips #1 screwdriver to remove the six 6.6 mm screws on the bottom.
-
Use a spudger to remove each of the 4 rubber feet.
-
Use a Phillips #1 screwdriver to remove the four additional screws under the rubber feet.
-
-
Этот шаг не переведен. Помогите перевести
-
Flip the Chromebook back over and open the screen.
-
Wedge the plastic opening tool between the keyboard and the bottom of the Chromebook.
-
Run the plastic opening tool along the seam between the keyboard and the bottom of the Chromebook until the keyboard moves freely. Several tabs will pop out.
-
-
Этот шаг не переведен. Помогите перевести
-
Once the keyboard is released, grab the two top corners closest to the screen and slowly lift the keyboard up.
-
Disconnect the cables by lifting up the retaining flaps on the black ZIF connectors.
-
Slowly pull the cables up and out of the connectors.
-
-
Этот шаг не переведен. Помогите перевести
-
Lift the keyboard up and off the back panel, exposing the motherboard and battery.
-
-
-
Этот шаг не переведен. Помогите перевести
-
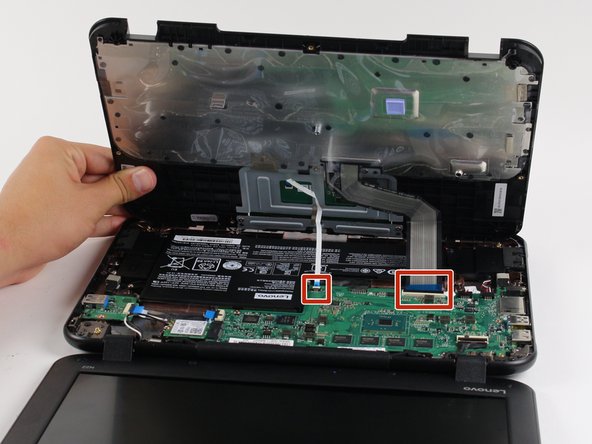
Disconnect the speaker and battery cables from their sockets on the motherboard by using the edge of the plastic opening tool to separate the cable connectors from the sockets.
-
Pull the cables towards you and away from the sockets.
-
-
Этот шаг не переведен. Помогите перевести
-
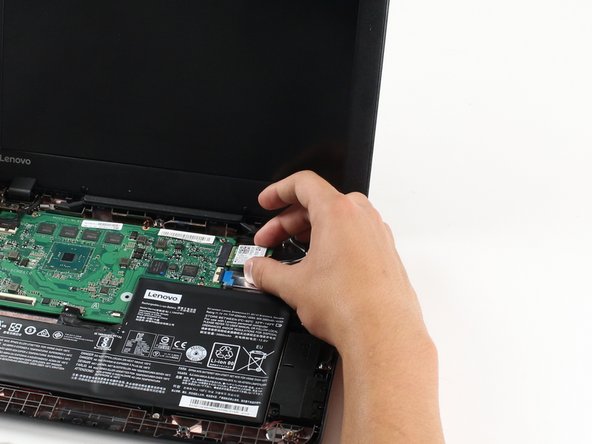
Use a Phillips #1 screwdriver to remove the 3.6 mm screw in the wireless card.
-
Gently slide the wireless card to the right to remove it from the standard socket on the motherboard.
-
-
Этот шаг не переведен. Помогите перевести
-
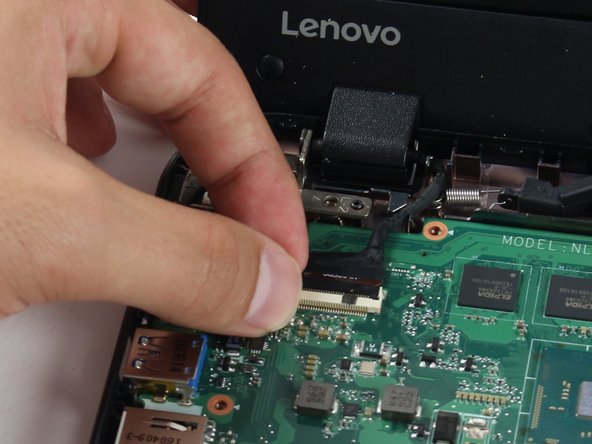
Disconnect the display cable from the motherboard by lifting up the black ZIF connector retaining flap.
-
Gently pull the cable up towards the screen.
-
-
Этот шаг не переведен. Помогите перевести
-
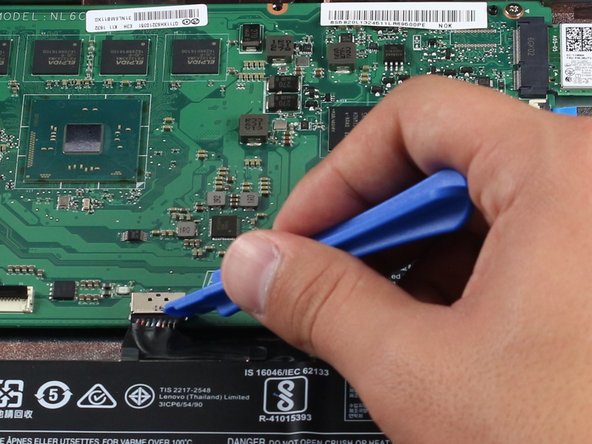
Disconnect the USB circuit from the motherboard by lifting the black ZIF retaining flap up.
-
Gently pull the blue tab to the right to remove the cable.
-
-
Этот шаг не переведен. Помогите перевести
-
Wedge the plastic opening tool between the rubber foot and the bottom of the chromebook. Lift up the plastic opening tool to remove the foot. This exposes the back end of a screw holding down the motherboard.
-
-
Этот шаг не переведен. Помогите перевести
-
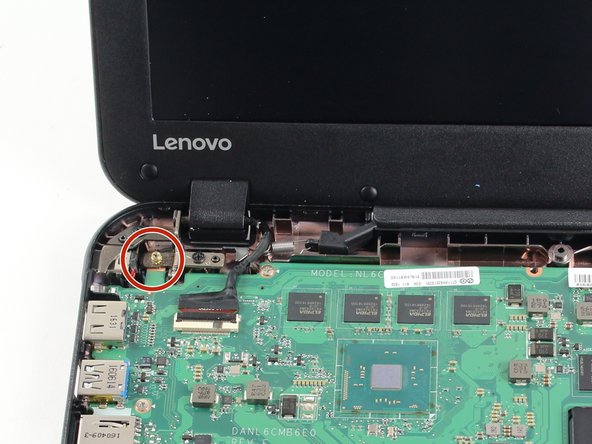
Flip the laptop on its top so that the screen is facing up and the back panel is bent at a 90 degree angle. This will allow you to see both the gold nut and the screw.
-
Hold the gold nut steady with a pair of needle nose pliers.
-
While holding onto the gold nut on the motherboard, remove the 6.5 mm screw on the bottom of the chromebook by rotating the Phillips #1 screwdriver to the left.
-
-
Этот шаг не переведен. Помогите перевести
-
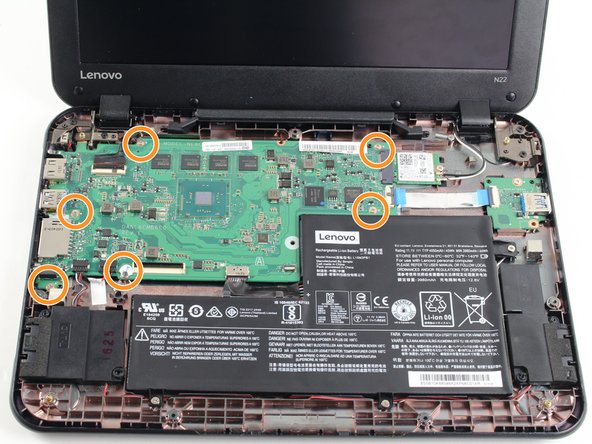
Remove the Lenovo sticker on top of the screw.
-
Use a Phillips #1 screwdriver to remove the six 3.6 mm screws from the motherboard.
-
-
Этот шаг не переведен. Помогите перевести
-
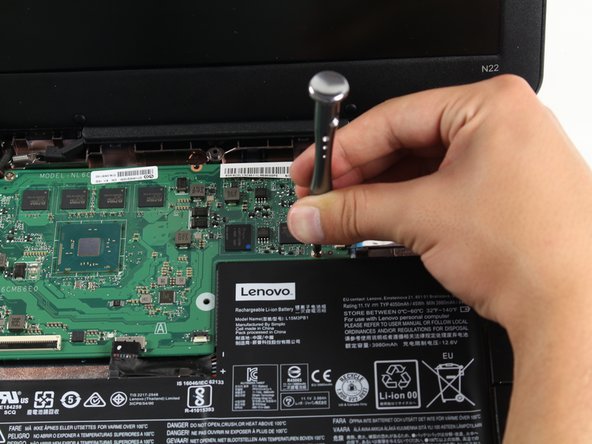
Carefully lift the motherboard up and out of the back panel to remove it.
-


Отменить: Я не выполнил это руководство.
Еще один человек закончил это руководство.
Команда

Cal Poly, Team S21-G1, Livingston Spring 2017 Участник Cal Poly, Team S21-G1, Livingston Spring 2017
CPSU-LIVINGSTON-S17S21G1
4 членов
Автор 14 руководств
4 Комментариев
The gold “nuts” as you describe them should not remain inside the machine. Those are the keyboard mounts and should have be removed when the keyboard was removed. They should have remained inside the keyboard itself.
i love it it is working very good