Введение
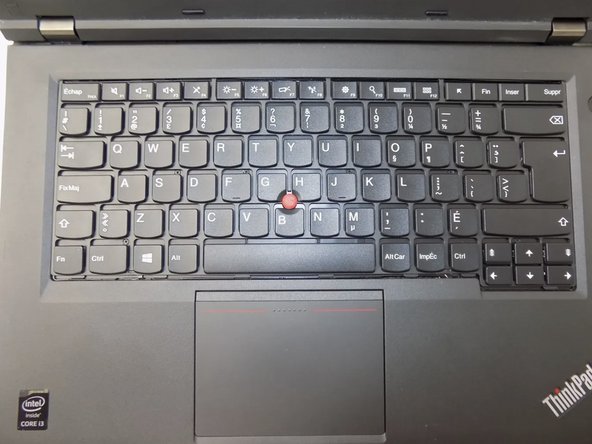
Use this guide to clean or replace the keyboard in your Lenovo ThinkPad L440 laptop.
The keyboard is a vital component to the laptop, allowing the user to input letters and numbers. A failing keyboard will prevent you from accessing your computer, if it is password protected, and prevent you from editing files or accessing the web. Some signs that your keyboard is failing are no input, either from certain or all buttons, or keys that are stuck/loose.
Before using this guide, consult our troubleshooting page. In some cases, what looks like a faulty keyboard can actually be lag from too many background applications, or outdated software.
Please note that if your keyboard has had any water damage, drink spilled, etc., this guide may not fix those issues.
Выберете то, что вам нужно
-
-
Open the laptop to access the power button.
-
Hold the power button in the top right until the computer powers off.
-
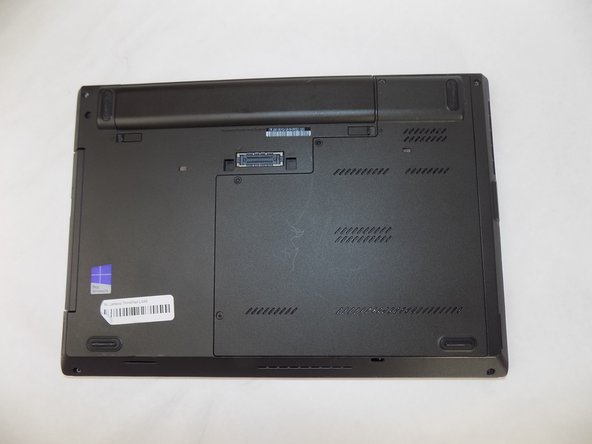
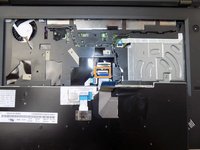
Turn the computer over so that the bottom of the computer is facing up
-
-
-
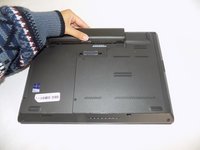
On the left side under the raised surface, move the tab to the left towards the unlocked symbol. Repeat this on the right side and move the tab to the right towards the unlocked symbol.
-
-
-
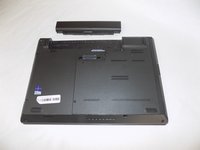
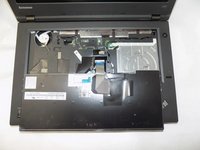
From the top of the laptop, slide the raised surface away from the rest of the laptop and out of its slot to remove the battery from the computer.
-
-
-
-
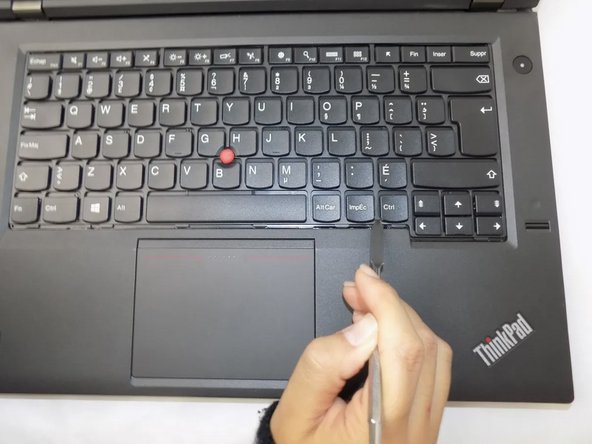
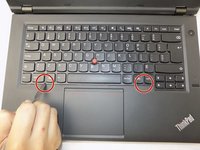
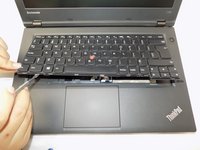
Insert the pointed end of a spudger into the notch on the left side first, and apply gentle pressure upwards until the frame around the keyboard moves up. Repeat for the other side.
-
-
-
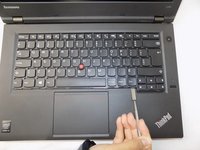
Lift the edge of the keyboard using the blunt side of the spudger, and bring it straight up and out towards you. Lay the keyboard flat on top of the trackpad.
-
-
-
Pull the black latch over the connectors up towards the screen with your nail.
-
Grab onto the blue part and, with gentle pressure, pull straight back towards you to release the ribbon cable.
-
Repeat for the second, smaller ribbon connector.
-


To reassemble, follow this guide in reverse order. Once completed, power on the laptop and test the new keyboard.
To reassemble, follow this guide in reverse order. Once completed, power on the laptop and test the new keyboard.

Команду

UMass Dartmouth, Team 2-6, Konn Fall 2024 Участник UMass Dartmouth, Team 2-6, Konn Fall 2024
UMASSD-KONN-F24S2G6
4 членов
Автор 5 руководств