Введение
If you need to replace the Solid State Drive (SSD) on your Lenovo ThinkPad T495s, this is the guide for you! SSDs use flash-based memory, which is much faster than a traditional hard drive. Installing an SSD in your laptop is one of the best ways to speed up your laptop.
Выберете то, что вам нужно
-
-
-
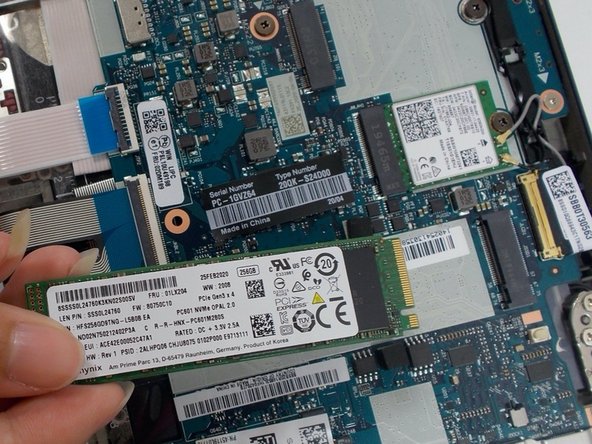
Use a Phillips #1 screwdriver to unscrew one 2.2 mm screw at the bottom of the SSD.
-
Use your hands to pull the SSD toward yourself, removing the SSD.
-


To reassemble your device, follow these instructions in reverse order.
To reassemble your device, follow these instructions in reverse order.
Отменить: Я не выполнил это руководство.
Еще один человек закончил это руководство.

Команда

UMass Dartmouth, Team 1-7, Petersen Spring 2022 Участник UMass Dartmouth, Team 1-7, Petersen Spring 2022
UMASSD-PETERSEN-S22S1G7
3 членов
Автор 7 руководств