Введение
Follow this guide to replace the solid-state hard drive, or SSD, in your Lenovo ThinkPad X1 Yoga (3rd Gen) laptop. If you are looking to increase your storage capacity, increase your read and write speeds, or your current drive has failed, this guide will help you navigate the process of installing a new SSD. This laptop supports the standard M.2 form factor of solid-state drive.
Wait! Before you begin:
- Consider backing up data that you wish to keep. To do this, you may use a USB flash drive, or, a cloud storage service of your choice (such as Google Drive, or Microsoft OneDrive).
- You are strongly encouraged to be familiar with how to install an operating system (OS). You will need to install a new OS once you have replaced the old SSD.
Выберете то, что вам нужно
-
-
Restart your laptop.
-
Press the "Enter" key repeatedly. This will bring you to the BIOS.
-
-
-
Use the left and right arrow keys to navigate to the Config section of the BIOS.
-
From the Config section, use the up and down arrow keys to navigate to the Disable Built-in Battery option.
-
Hit the "Enter" key twice to proceed.
-
-
-
-
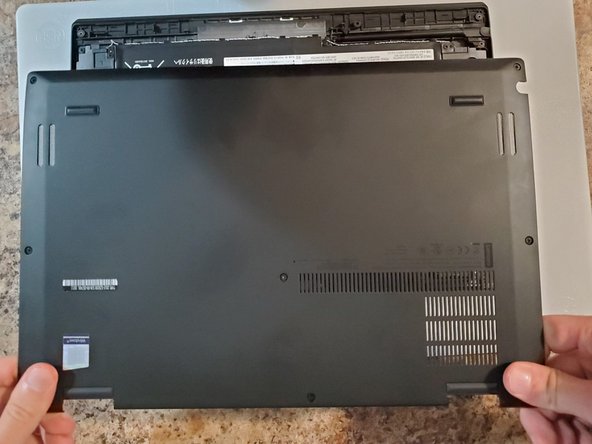
Pry the backplate cover away from the laptop using your hands.
-
Grasp the plastic shield with your hand and pull it away from the laptop.
-
-
-
Remove the 2.8 mm-long Philips #00 screw located in the M.2 slot.
-
Gently grasp the SSD from where the screw was located.
-
Pull the SSD to remove it from the M.2 slot. If the SSD does not immediately release, gently wiggle it while pulling.
-
Once you have removed the old hard drive, pull it out of the plastic heatshield.
-
-
-
Push the new SSD into the plastic heatshield. It should fit snugly.
-
Insert the new SSD into the M.2 socket.
-
Screw in the 2.8 mm-long Philips #00 screw to complete installation.
-


To reassemble your device, follow these instructions in reverse order. Once your laptop is assembled, plug in the laptop to turn it on.
To reassemble your device, follow these instructions in reverse order. Once your laptop is assembled, plug in the laptop to turn it on.
Отменить: Я не выполнил это руководство.
Еще один человек закончил это руководство.

Команда

York University, Team B-20, Woodhouse Fall 2023 Участник York University, Team B-20, Woodhouse Fall 2023
YORK-WOODHOUSE-F23SBG20
1 член
Автор 1 руководств