Введение
This guide will help you remove the upper casing from your Lenovo Thinkpad Twist s230u. The upper casing covers the inside of the laptop, making it look nicer and keeping important components from being damaged or broken. Although you will probably never need to replace the upper casing itself, it must be removed in order to perform most other replacements. If, however, you do want to replace it, or you simply need to remove it for another replacement, this guide is for you.
Выберете то, что вам нужно
-
-
Flip the laptop over.
-
Using a Phillips #1 Screwdriver, unscrew the screw on the bottom left corner.
-
-
-
-
Use a Philips #1 screwdriver to remove 2 screws on the bottom of the laptop.
-
-
-
Use a spudger to loosen the keyboard around the edges.
-
Carefully push the keyboard towards the screen to unlatch it.
-
-
-
Open the small black flap on each of the ribbon cables. It should lift with a slight effort.
-
Pull out the ribbon cables and remove the keyboard from the device.
-
-
-
Flip your device over.
-
Use the Phillips #1 screwdriver to remove the nine screws.
-
-
-
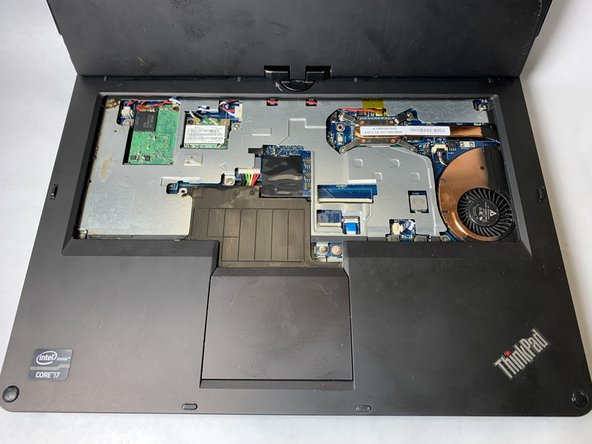
Flip the device back over and open the top.
-
Use the Phillips #1 screwdriver to remove the seven silver screws.
-
Disconnect the three cables inside the case.
-
Lift up the brown tab and disconnect the ribbon cable.
-
-
-
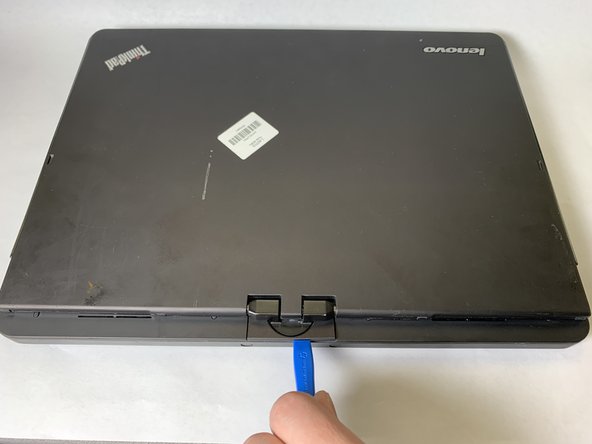
Close the lid and turn the device around.
-
Use the iFixit Opening Tool to lift up and remove the tab on the back.
-
-
-
Turn the device back around and reopen it.
-
Use the iFixit Opening Tool to disconnect the top of the case from the bottom.
-
Lift up the top of the case and slide it out from under the screen.
-


To reassemble your device, follow these instructions in reverse order.
To reassemble your device, follow these instructions in reverse order.
Отменить: Я не выполнил это руководство.
Еще один человек закончил это руководство.

Команда

Embry-Riddle Aeronautical University, Team S1-G3, Cromer Twal Spring 2020 Участник Embry-Riddle Aeronautical University, Team S1-G3, Cromer Twal Spring 2020
ERAU-CROMER TWAL-S20S1G3
3 членов
Автор 6 руководств