Перейти к основному содержанию

LexiBook Tablet One Camera Replacement

Выберете то, что вам нужно

  1. LexiBook Tablet One Camera Replacement, Camera: шаг 1, изображение 1 из 3 LexiBook Tablet One Camera Replacement, Camera: шаг 1, изображение 2 из 3 LexiBook Tablet One Camera Replacement, Camera: шаг 1, изображение 3 из 3
    • Find the seam in the casing. Insert the blue plastic opening tool, and slide to either side carefully undoing the clips. The clips are hidden within the casing and are spaced roughly 1.5 in. apart.

    • When opening the device, be wary of the speaker wire. It is best to open the device from the right side with the camera oriented to the top.

  2. LexiBook Tablet One Camera Replacement: шаг 2, изображение 1 из 2 LexiBook Tablet One Camera Replacement: шаг 2, изображение 2 из 2
    • Insert a spudger between the speaker and the casing. Gently pop the speaker out, and set the panel to the side.

  3. LexiBook Tablet One Camera Replacement: шаг 3, изображение 1 из 1
    • Using a plastic spudger, wedge the tool between the battery and LCD. Repeatedly gouge and work around the edges of the battery until the adhesive breaks free. You will have to apply generous pressure, as long as you push horizontally the components should not be further damaged.

    • Be careful not to damage any wires or to puncture the battery casing when peeling the adhesive.

    • A similar flat tool can be used in place of a plastic spudger.

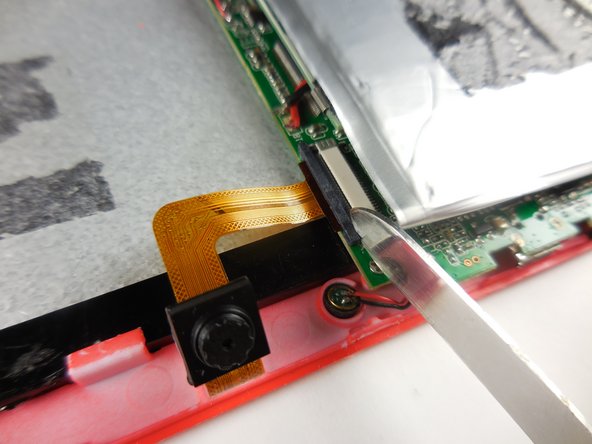
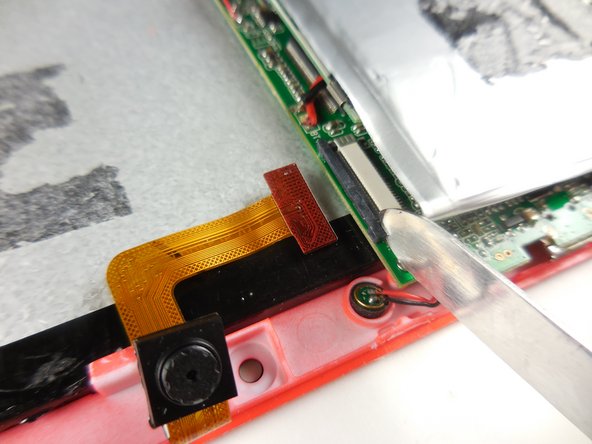
  4. LexiBook Tablet One Camera Replacement: шаг 4, изображение 1 из 3 LexiBook Tablet One Camera Replacement: шаг 4, изображение 2 из 3 LexiBook Tablet One Camera Replacement: шаг 4, изображение 3 из 3
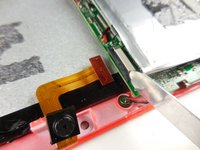
    • Remove the ribbon cable leading to the camera by carefully using a flat headed tool to open the ribbon clip.

    • Gently slide the ribbon cable out while holding the clip open.

  5. LexiBook Tablet One Camera Replacement: шаг 5, изображение 1 из 1
    • When inserting your new camera, maintain the clip's open position and slide the new ribbon cable in.

    • It is imperative the clip not close partially when installing the new ribbon, or the new cable can be damaged.

    • When the ribbon can go no further into the clip, close the clip.

Заключение

To reassemble your device, follow these instructions in reverse order.

Еще один человек закончил это руководство.

Jordan

Участник с: 03/11/15

645 Репутация

Автор 4 руководств

Команда

Colorado Springs, Team 2-5, Panko Spring 2015 Участник Colorado Springs, Team 2-5, Panko Spring 2015

UCCS-PANKO-S15S2G5

3 членов

Автор 10 руководств

0 Комментариев

Добавить комментарий

Просмотр статистики:

За последние 24часов: 0

За последние 7 дней: 1

За последние 30 дней: 1

За всё время: 171