Эта версия возможно содержит некорректные исправления. Переключить на последнюю проверенную версию.
Выберете то, что вам нужно
-
Этот шаг не переведен. Помогите перевести
-
Locate the breaker box in your house. This is typically either in the garage or the basement.
-
Open the breaker box.
-
Turn off the breaker that corresponds to the circuit of the switch that is to be replaced.
-
-
Этот шаг не переведен. Помогите перевести
-
Remove the face-plate from the light switch by unscrewing the two 7.9mm oval head slotted screws with the 3/16" slotted screwdriver until the plate comes away freely.
-
Flip the light switch on and off to ensure no electricity is flowing through the switch.
-
-
Этот шаг не переведен. Помогите перевести
-
Use a Duspol or any other Voltmeter to test if there is voltage at the contacts.
-
-
-
Этот шаг не переведен. Помогите перевести
-
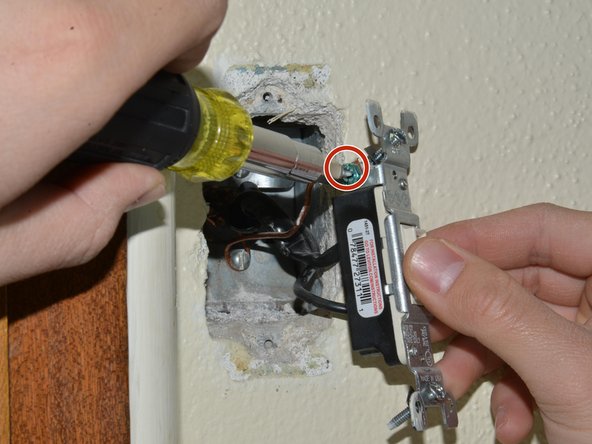
Remove the light switch from the housing by unscrewing the 25.4mm flat head Phillips screws at the top and bottom of the switch, using a Phillips #1 screwdriver.
-
Gently pull the light switch out of the housing.
-
-
Этот шаг не переведен. Помогите перевести
-
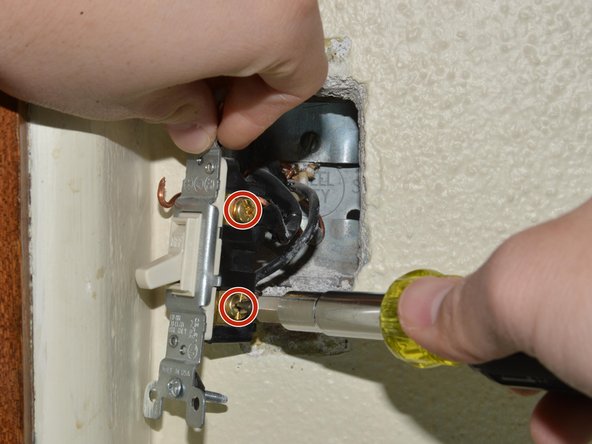
Pull the old switch out from the box far enough that its connections can be clearly seen.
-
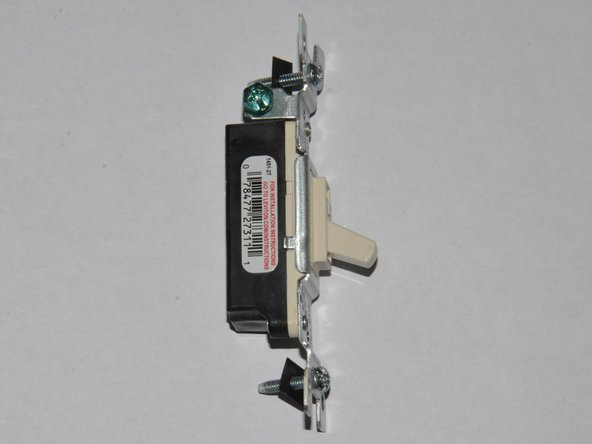
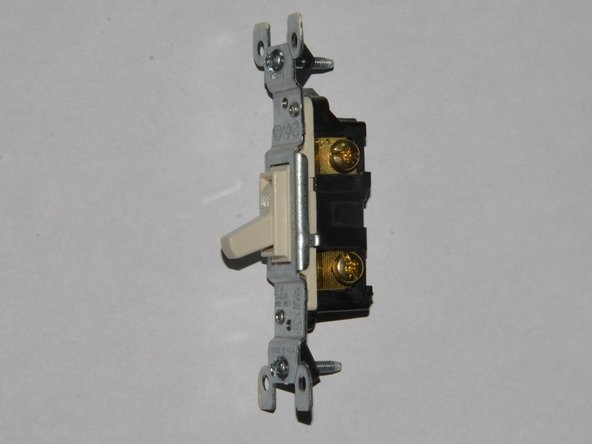
Confirm that the new switch has all the same contacts (screws) as the old switch, with matching colors.
-
-
Этот шаг не переведен. Помогите перевести
-
Take note of the existing wiring since the new switch will need to be wired in exactly the same configuration.
-
Unscrew the screws on both sides of the the light switch until the wires may be unhooked. If necessary, these screws may be fully removed to prevent the straightening of the wire loops.
-
-
Этот шаг не переведен. Помогите перевести
-
Unhook the wires from the screws.
-
Begin connecting the wires to the new switch according to the wiring configuration of the original switch.
-
Push the switch into the housing and begin reassembling.
-


Отменить: Я не выполнил это руководство.
4 участников успешно повторили данное руководство.
Команда

Eastern Washington University, Team S27-G17, Munoz Winter 2019 Участник Eastern Washington University, Team S27-G17, Munoz Winter 2019
EWU-MUNOZ-W19S27G17
2 членов
Автор 1 руководств