Перейти к основному содержанию

Likebook Muses Display Replacement

Выберете то, что вам нужно

  1. Careful: steps 1-5 are sourced from a guide that's marked as in-progress.

    Likebook Muses Display Replacement, Power off: шаг 1, изображение 1 из 1
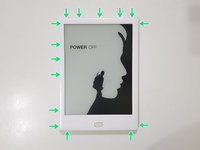
    • Power off the tablet by holding down the power button (on the bottom) and tapping "Power off" on screen, then wait 10-15 seconds for the underlying Android system to shut down.

  2. Likebook Muses Display Replacement, Rear Cover: шаг 2, изображение 1 из 1
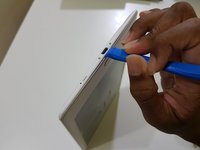
    • Unscrew the two Torx T2 screws surrounding the USB port.

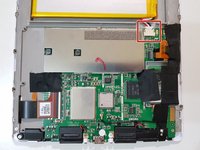
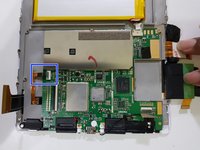
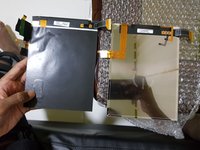
    • Image needed: showing just the bottom in order to highlight screws in blue

  3. Likebook Muses Display Replacement: шаг 3, изображение 1 из 3 Likebook Muses Display Replacement: шаг 3, изображение 2 из 3 Likebook Muses Display Replacement: шаг 3, изображение 3 из 3
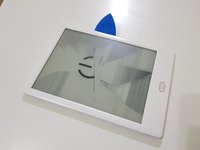
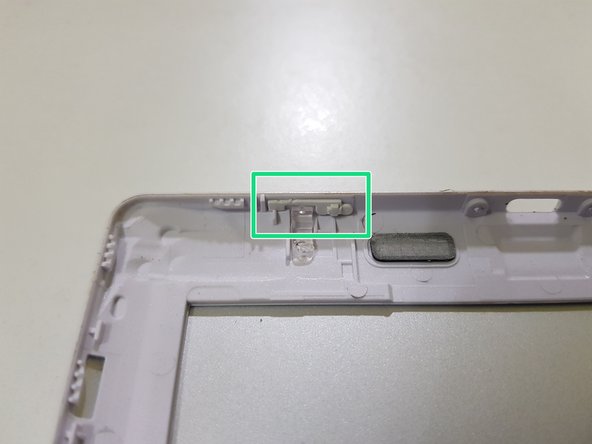
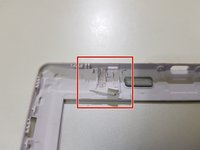
    • Use the opening tool to pry at the lip in between the bezel and rear cover,

    • then slide in your opening pick with the flat end,

    • and slide it around to undo these clips.

  4. Likebook Muses Display Replacement: шаг 4, изображение 1 из 3 Likebook Muses Display Replacement: шаг 4, изображение 2 из 3 Likebook Muses Display Replacement: шаг 4, изображение 3 из 3
    • (Note to self: Try opening the side using opening tools)

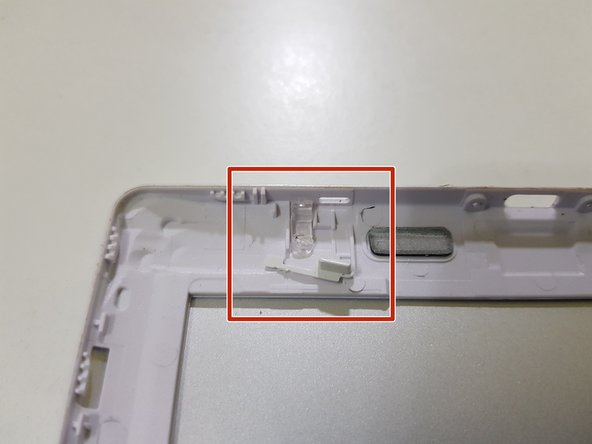
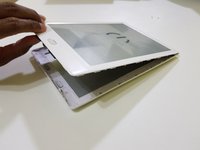
    • After releasing the clips, lift the front bezel out.

    • The extension piece for the power button can fall out. Don't lose this!

  5. Likebook Muses Display Replacement: шаг 5, изображение 1 из 1
    • The rear cover has been removed.

  6. Careful: steps 6-13 are sourced from a guide that's marked as in-progress.

    Likebook Muses Display Replacement, Mainboard: шаг 6, изображение 1 из 3 Likebook Muses Display Replacement, Mainboard: шаг 6, изображение 2 из 3 Likebook Muses Display Replacement, Mainboard: шаг 6, изображение 3 из 3
    • Disconnect the battery.

    • Due to the placement of the battery, the connector may not come out all the way.

  7. Likebook Muses Display Replacement: шаг 7, изображение 1 из 3 Likebook Muses Display Replacement: шаг 7, изображение 2 из 3 Likebook Muses Display Replacement: шаг 7, изображение 3 из 3
    • Using the pointed end of a spudger, disconnect the touch panel.

  8. Likebook Muses Display Replacement: шаг 8, изображение 1 из 3 Likebook Muses Display Replacement: шаг 8, изображение 2 из 3 Likebook Muses Display Replacement: шаг 8, изображение 3 из 3
    • Disconnect the pen input controller.

  9. Likebook Muses Display Replacement: шаг 9, изображение 1 из 3 Likebook Muses Display Replacement: шаг 9, изображение 2 из 3 Likebook Muses Display Replacement: шаг 9, изображение 3 из 3
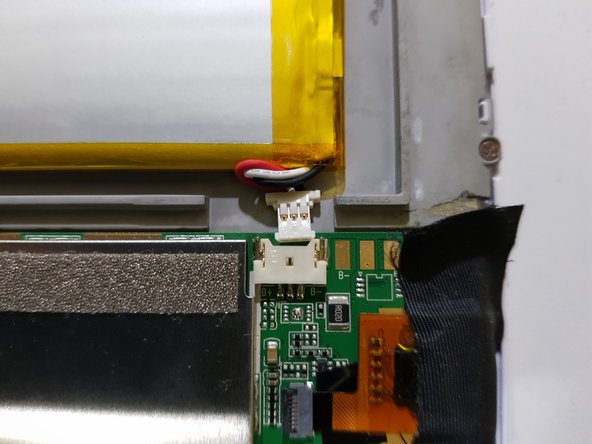
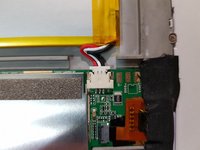
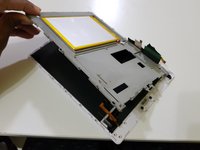
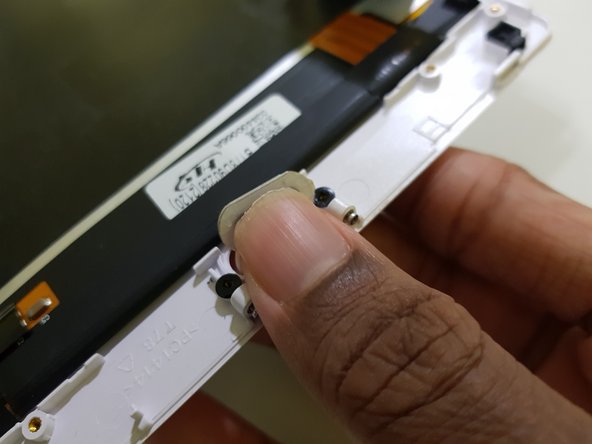
    • Lift up part of the tape covering the frontlight connector.

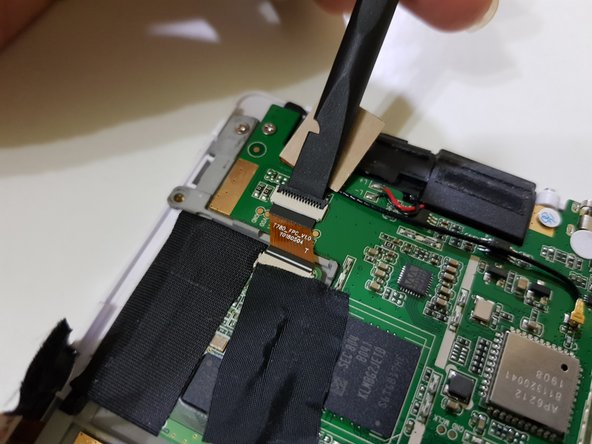
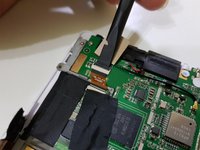
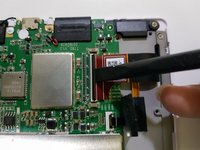
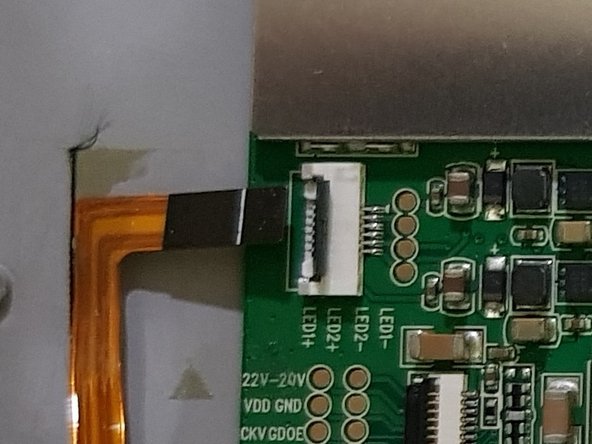
    • Using the flat end of your spudger, disconnect the display.

  10. Likebook Muses Display Replacement: шаг 10, изображение 1 из 2 Likebook Muses Display Replacement: шаг 10, изображение 2 из 2
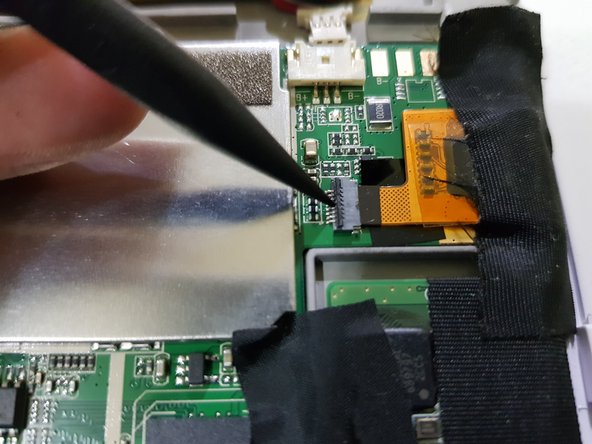
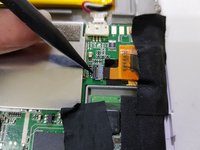
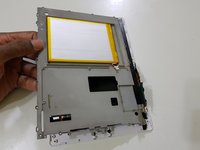
    • Peel the tape the rest of the way

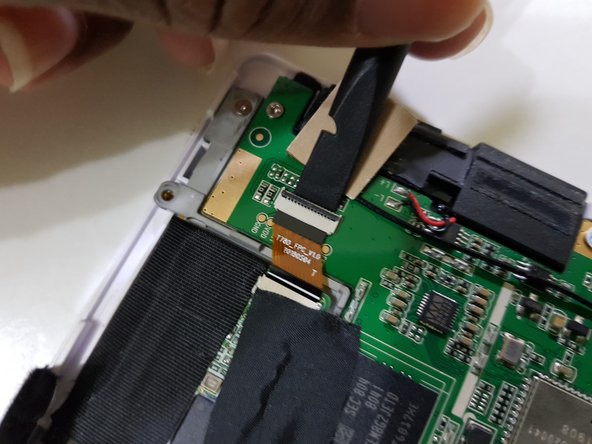
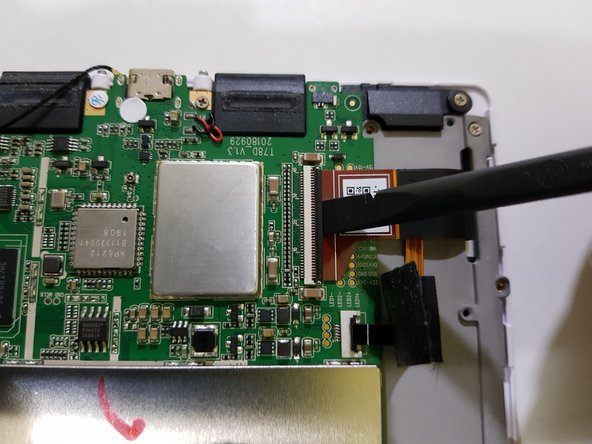
    • Using the pointed end of your spudger, disconnect the frontlight.

  11. Likebook Muses Display Replacement: шаг 11, изображение 1 из 1
    • Remove these screws using your J00 screwdriver (or a PH00 screwdriver if you don't have one).

    • Remove these screws using your PH00 screwdriver.

    • One of these screws has a tamper detection sticker pasted over the screw head.

    • You should be able to poke the screwdriver through it.

  12. Likebook Muses Display Replacement: шаг 12, изображение 1 из 1
    • Lift the mainboard out from the top,

    • The speaker connections are only held in with solder, and may break if you're not careful.

  13. Likebook Muses Display Replacement: шаг 13, изображение 1 из 3 Likebook Muses Display Replacement: шаг 13, изображение 2 из 3 Likebook Muses Display Replacement: шаг 13, изображение 3 из 3
    • The mainboard has been removed.

  14. Likebook Muses Display Replacement, Display: шаг 14, изображение 1 из 1
    • Using your J00 screwdriver, remove these screws if any are present in these holes.

    • Your device may include more or less screws than the one shown in these images.

  15. Likebook Muses Display Replacement: шаг 15, изображение 1 из 2 Likebook Muses Display Replacement: шаг 15, изображение 2 из 2
    • Lift the mid-frame from the left and pull towards the left.

  16. Likebook Muses Display Replacement: шаг 16, изображение 1 из 2 Likebook Muses Display Replacement: шаг 16, изображение 2 из 2
    • Use your finger to pop out the Back button.

    • (placeholder: steps for removing the display from the bezel)

  17. Likebook Muses Display Replacement, If you received a Likebook Mars display: шаг 18, изображение 1 из 3 Likebook Muses Display Replacement, If you received a Likebook Mars display: шаг 18, изображение 2 из 3 Likebook Muses Display Replacement, If you received a Likebook Mars display: шаг 18, изображение 3 из 3
    • Some sellers may send you a Likebook Mars display claiming that it's for the Likebook Muses.

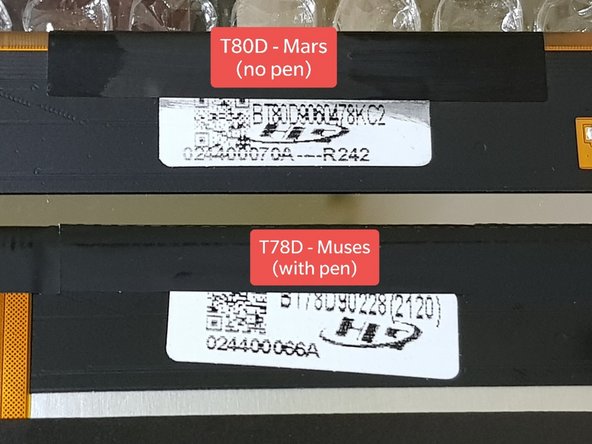
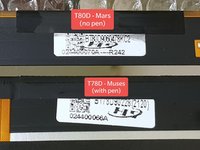
    • If so, please contact the seller or read reviews/descriptions, which will most likely mention having to transplant the pen digitiser over.

    • This is where this guide goes from "difficult" to "very difficult".

    • Here's how to tell:

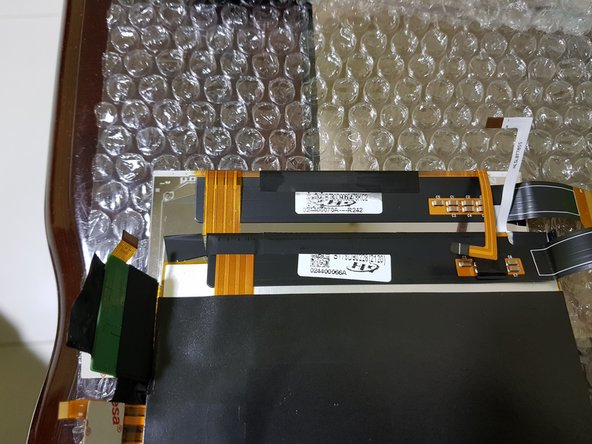
    • Shiny back instead of a black back

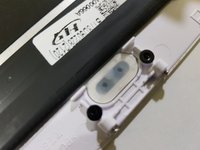
    • 3 connections instead of 4

    • "T80D" on the label on the back of the display, instead of "T78D"

    • The Likebook Mars (model T80D) is the predecessor to the Likebook Muses (model T78D), lacking pen input, and thus lacks a "Notes" tab on the Home screen's bottom navigation and a "Annotations" tab on the "Read" tab.

    • (placeholder: about testing the display)

    • If you want to, you can test the display to make sure that it's functioning before proceeding to pull away the display and touch cables, and transplanting the pen digitiser from the previous display.

    • You'll need a piece of paper large enough to prevent the EPD panel from rubbing up against the midframe and getting scratched.

    • Insert it between the midframe and display assembly.

    • Don't leave it running with the back cover removed for too long, as this can cause damage to the display controller, resulting in the display freezing and/or not being able to refresh properly.

    • You will need to peel the pen digitiser off the damaged EPD panel.

Заключение

To reassemble your device, follow these instructions in reverse order.

Kevin Bhasi

Участник с: 12/26/14

1 262 Репутация

Автор 9 руководств

0 Комментариев

Добавить комментарий

Просмотр статистики:

За последние 24часов: 0

За последние 7 дней: 0

За последние 30 дней: 12

За всё время: 490