Перейти к основному содержанию

Linear Rail V2/V3 Endstop Install

Выберете то, что вам нужно

  1. Linear Rail V2/V3 Endstop Install, Linear Rail V2/V3 Endstop Install: шаг 1, изображение 1 из 3 Linear Rail V2/V3 Endstop Install, Linear Rail V2/V3 Endstop Install: шаг 1, изображение 2 из 3 Linear Rail V2/V3 Endstop Install, Linear Rail V2/V3 Endstop Install: шаг 1, изображение 3 из 3
    • M3 Sliding T-Nut

    • Slide in the M3 T-Nut toward the middle of the printer

    • M3X12 BHCS & M3 FLAT WASHERS

    • M3x10 FHCS

    • Adjustable Endstop Mount A

    • Adjustable Endstop Mount B

    • Tighten the M3 screw into the T-Nut

  2. Linear Rail V2/V3 Endstop Install, Endstop install: шаг 2, изображение 1 из 2 Linear Rail V2/V3 Endstop Install, Endstop install: шаг 2, изображение 2 из 2
    • Adjust endstop mount until it is square with the Linear rail

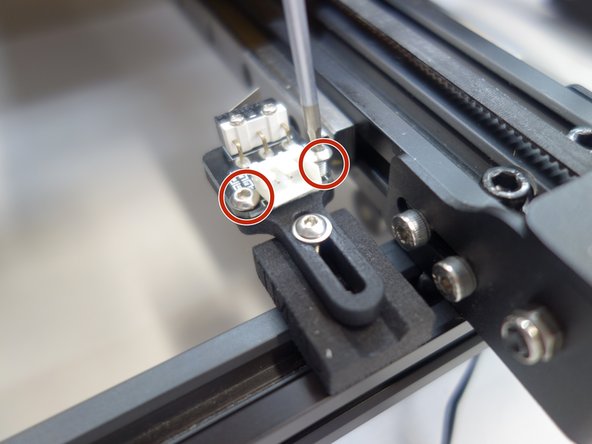
    • Remove stock endstop board form Creality mount and Reuse the stock screws to mount the endstop as shown

  3. Linear Rail V2/V3 Endstop Install, Setting endstop position: шаг 3, изображение 1 из 2 Linear Rail V2/V3 Endstop Install, Setting endstop position: шаг 3, изображение 2 из 2
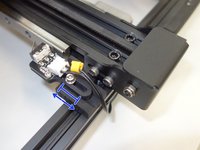
    • Use M3x12 BHCS to adjust the endstop position, so the nozzle tip is even with the front edge of the bed when the end stop is triggered

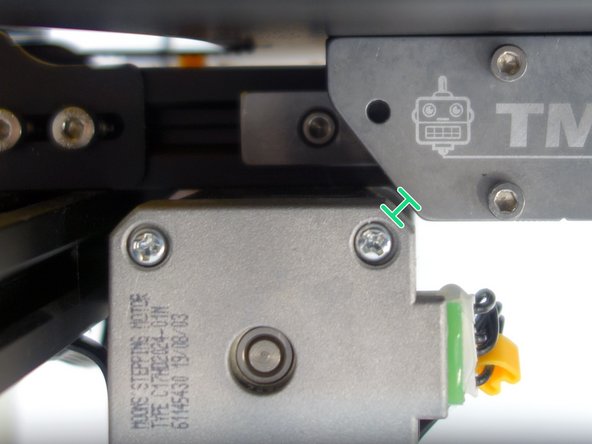
    • Check the clearance between the motor and the linear adaptor. When the bed is all the way back against the endstop. There should be a 1-2 mm gap when the endstop is triggered.

Заключение

To reassemble your device, follow these instructions in reverse order.

AJ Pereira

Участник с: 05/29/20

2 735 Репутация

Автор 16 руководств

Команда

Tiny Machines 3D Участник Tiny Machines 3D

Community

5 членов

Автор 41 руководств

0 Комментарии к руководству

Добавить комментарий

Статистика просмотров:

За последние 24 часов: 0

За последние 7 дней: 15

За последние 30 дней: 75

За всё время: 1,844