Введение
This guide will allow you to remove and replace the battery inside of the Logitech Circle. This guide is fairly simple to follow, with only a few screws being between you and the battery itself. However, be sure to be careful handling the Logitech, as the battery and lens bundle is connected to the base of the circle with a ribbon that breaks relatively easily.
Выберете то, что вам нужно
-
-
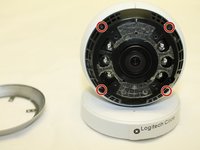
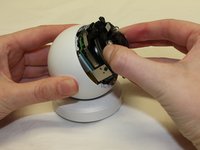
Wedge the plastic opening tool under the black circle lens to gently pry it off.
-
-
-
-
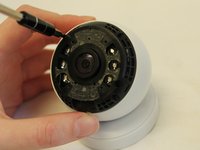
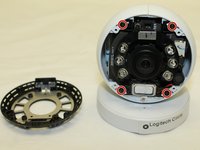
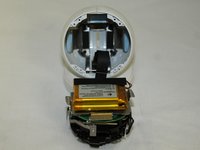
Remove the four 3mm Phillips #0 screws that hold down the final ring. Do not remove the lens/battery bundle yet.
-
-
-
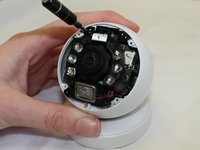
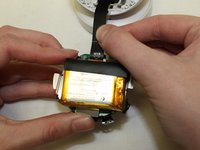
Gently remove the lens/battery bundle from the base of the circle, being mindful of the ribbon cable.
-
-
-
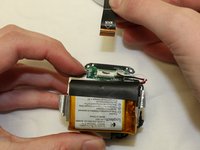
Remove the battery using a plastic opening tool. The battery is attached with sticky tape and will remove with gentle prying motions.
-


To reassemble your device, follow these instructions in reverse order.
Отменить: Я не выполнил это руководство.
6 человек успешно провели ремонт по этому руководству.
Команда

University of Maine, Team S1-G4, Diaz Fall 2017 Участник University of Maine, Team S1-G4, Diaz Fall 2017
UMAINE-DIAZ-F17S1G4
3 членов
Автор 8 руководств
21 Комментарии к руководству
What about circle wireless batter with the unscrewBle lens? I keep getting error in set up that the battery is too low to proceed.
I charged only the battery portion all day. Stil. Same results
Did you figure out the battery?
Where did you buy the battery? I can’t find something to replace it with :(
I measured my battery and it is 40mm x 14mm x 30mm. The space for the battery looks like I can fit something as long as 45mm. I can not find anything in the US. Going to try these: https://www.ebay.com/itm/3-7V-1200mAh-10.... Pretty annoying that I can not find something to drop in. The most challenging part of this repair is going to be wiring these two Lipos together properly. Does anyone know the voltage of the 3 wires? My battery is completely dead so I cannot get a voltage reading. I am going to have to plug the camera in, plug the battery connector in and get the voltage from there :)
Hey, did you manage to make this work? I want to order some battery and try the same thing. I understand that you need 2 from the pictures. How are they tied together? You can not see that from this tutorial.