Перейти к основному содержанию

Logitech Circle Speaker Replacement

Выберете то, что вам нужно

  1. Logitech Circle Speaker Replacement, Speaker: шаг 1, изображение 1 из 2 Logitech Circle Speaker Replacement, Speaker: шаг 1, изображение 2 из 2
    • Wedge the plastic opening tool under the black circle lens to gently pry it off.

    • The lens is only attached with sticky tape and should remove relatively easily.

  2. Logitech Circle Speaker Replacement: шаг 2, изображение 1 из 1
    • Remove the four 3mm Phillips #0 screws that hold down the first ring.

  3. Logitech Circle Speaker Replacement: шаг 3, изображение 1 из 2 Logitech Circle Speaker Replacement: шаг 3, изображение 2 из 2
    • Remove the four 3mm Phillips #0 screws that hold down the second ring.

  4. Logitech Circle Speaker Replacement: шаг 4, изображение 1 из 2 Logitech Circle Speaker Replacement: шаг 4, изображение 2 из 2
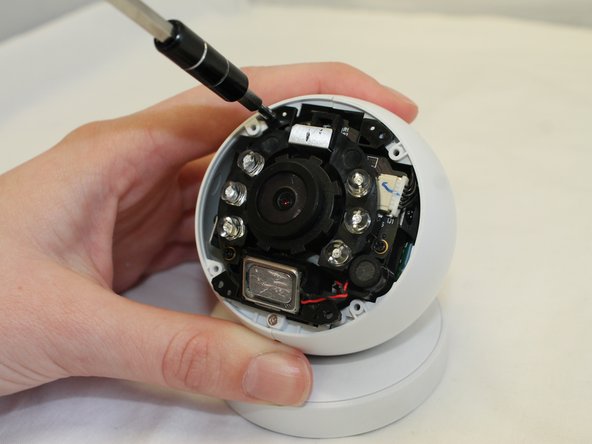
    • Remove the four 3mm Phillips #0 screws that hold down the final ring. Do not remove the lens/battery bundle yet.

    • The lens/battery bundle is attached to the base by a ribbon cable that can break, so be very careful handling the circle.

  5. Logitech Circle Speaker Replacement: шаг 5, изображение 1 из 2 Logitech Circle Speaker Replacement: шаг 5, изображение 2 из 2
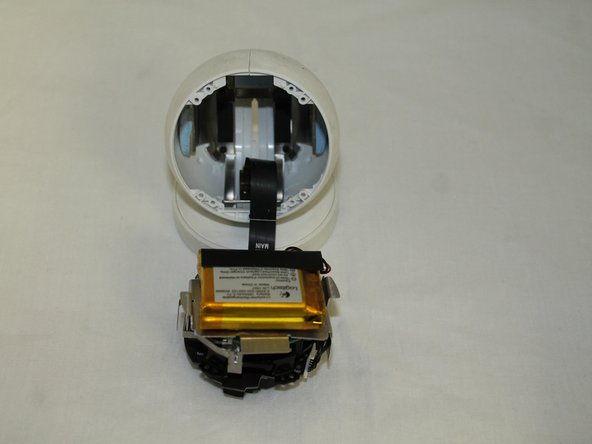
    • Gently remove the lens/battery bundle from the base of the circle, being mindful of the ribbon cable.

  6. Logitech Circle Speaker Replacement: шаг 6, изображение 1 из 2 Logitech Circle Speaker Replacement: шаг 6, изображение 2 из 2
    • Gently pull the ribbon cable loose from the lens/battery bundle.

    • While this is not an entirely necessary step, it helps to ensure the ribbon cable will not break during the rest of the replacement.

  7. Logitech Circle Speaker Replacement: шаг 7, изображение 1 из 1
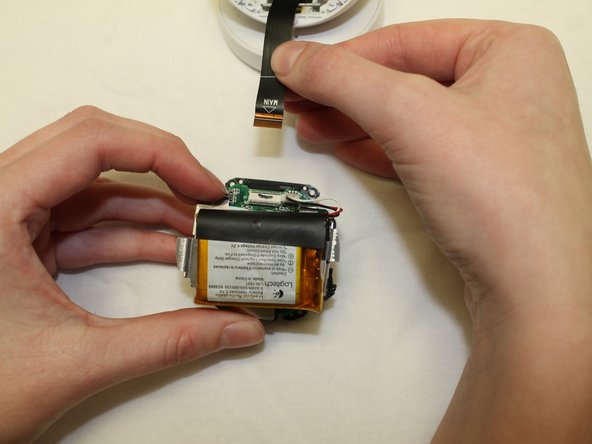
    • Locate the speaker attachment, and carefully remove the speaker plug from the lens.

  8. Logitech Circle Speaker Replacement: шаг 8, изображение 1 из 1
    • Remove the speaker using a plastic opening tool. The battery is attached with glue, so use gentle prying motions to remove speaker.

Заключение

To reassemble your device, follow these instructions in reverse order.

Emma Cochran

Участник с: 09/28/17

110 Репутация

1 руководство автора

Команда

University of Maine, Team S1-G4, Diaz Fall 2017 Участник University of Maine, Team S1-G4, Diaz Fall 2017

UMAINE-DIAZ-F17S1G4

3 членов

Автор 7 руководств

0 Комментариев

Добавить комментарий

Просмотр статистики:

За последние 24часов: 0

За последние 7 дней: 1

За последние 30 дней: 5

За всё время: 347