Введение
If one of the six buttons on the base of joystick no longer works, it may be necessary to replace the circuit board.
Выберете то, что вам нужно
-
-
Remove these three Phillips #1 screws:
-
Two 10mm screws.
-
One 7mm screw.
-
-
-
Using your fingers, lower the rubber boot to reveal two screws underneath the joystick.
-
Remove the two 10mm Phillips #1 screws.
-
-
-
Pull apart the joystick chassis by hand.
-
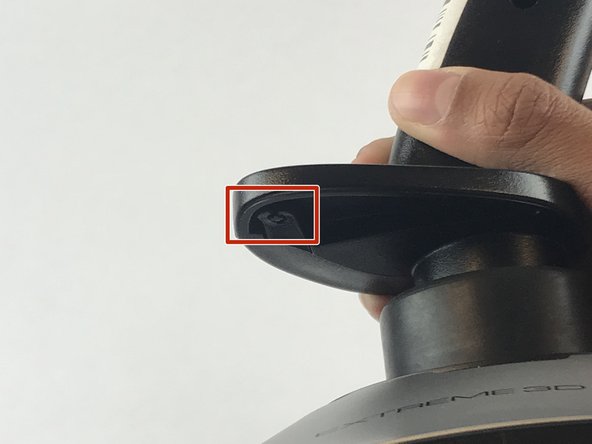
Release this clip located underneath the hand rest
-
-
-
-
Remove the eight 10mm Phillips #1 screws from the bottom.
-
-
-
Flip the joystick upright.
-
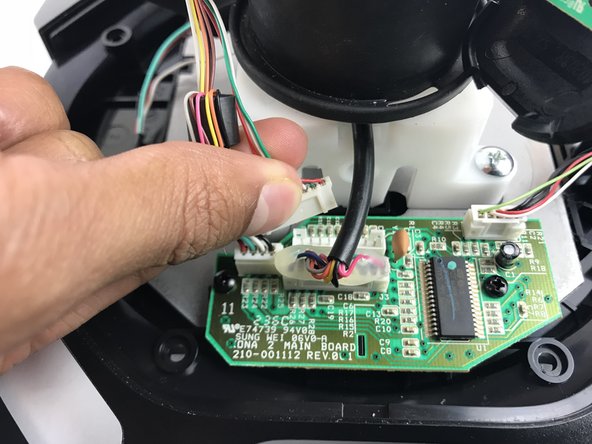
Lift up the sliver base cover and feed the loose circuit board through.
-


To reassemble your device, follow these instructions in reverse order.
To reassemble your device, follow these instructions in reverse order.
Отменить: Я не выполнил это руководство.
4 участников успешно повторили данное руководство.
Команда

USF Tampa, Team S7-G1, Passmore Spring 2018 Участник USF Tampa, Team S7-G1, Passmore Spring 2018
USFT-PASSMORE-S18S7G1
4 членов
Автор 7 руководств
4 Комментариев
What's the dimensions of those switches? Have you managed to find them online? I have 2 faulty ones on my 2005 Extreme 3D Pro
I have just recently changed 6 of them, which shown at step 8 at this guide. Now it works as good as new.
You can find them as “tact switch” (or tactile switch) at online for very cheap prices. Dimensions are milimeter, 6x6 mm and button height is 4.3 mm. i think these are shortest of 6x6 button family.
Search at Google for “6x6x4 tact switch”. For referance:
https://n11scdn1.akamaized.net/a1/1024/e...
Here is how it looks after i changed tem: https://imgur.com/a/DhemkSh
Is there anywhere I can get the logic board only. Thanks.
@mikejt86 Thank you for posting this. I have two bad switches, #7 & #12 not working. I have disassembled it to test and strangely find no switching action on any of the switches with my multimeter in continuity mode. They test as if pressing the switch does nothing, which seems odd. Did you test your switches before replacing them? I am more curious than anything at this point.