Перейти к основному содержанию

Logitech Harmony Smart Keyboard Key Printed Circuit Board (PCB) Replacement

Выберете то, что вам нужно

  1. Logitech Harmony Smart Keyboard Key Printed Circuit Board (PCB) Replacement, Back Panel: шаг 1, изображение 1 из 2 Logitech Harmony Smart Keyboard Key Printed Circuit Board (PCB) Replacement, Back Panel: шаг 1, изображение 2 из 2
    • Turn keyboard over to the backside.

  2. Logitech Harmony Smart Keyboard Key Printed Circuit Board (PCB) Replacement: шаг 2, изображение 1 из 3 Logitech Harmony Smart Keyboard Key Printed Circuit Board (PCB) Replacement: шаг 2, изображение 2 из 3 Logitech Harmony Smart Keyboard Key Printed Circuit Board (PCB) Replacement: шаг 2, изображение 3 из 3
    • Press and slide up on the upper battery latch, using both thumbs.

  3. Logitech Harmony Smart Keyboard Key Printed Circuit Board (PCB) Replacement: шаг 3, изображение 1 из 1
    • Remove the two AA batteries and set them aside.

  4. Logitech Harmony Smart Keyboard Key Printed Circuit Board (PCB) Replacement: шаг 4, изображение 1 из 2 Logitech Harmony Smart Keyboard Key Printed Circuit Board (PCB) Replacement: шаг 4, изображение 2 из 2
    • Unscrew all five 4.0 mm screws, using Phillips #1 screwdriver.

  5. Logitech Harmony Smart Keyboard Key Printed Circuit Board (PCB) Replacement: шаг 5, изображение 1 из 2 Logitech Harmony Smart Keyboard Key Printed Circuit Board (PCB) Replacement: шаг 5, изображение 2 из 2
    • Peel off the center sticker to reveal two hidden 4.0 mm screws.

    • Unscrew these two screws with a Phillips #1 screwdriver.

  6. Logitech Harmony Smart Keyboard Key Printed Circuit Board (PCB) Replacement: шаг 6, изображение 1 из 3 Logitech Harmony Smart Keyboard Key Printed Circuit Board (PCB) Replacement: шаг 6, изображение 2 из 3 Logitech Harmony Smart Keyboard Key Printed Circuit Board (PCB) Replacement: шаг 6, изображение 3 из 3
    • Lift both top left and top right rubber stickers halfway, using the sharp end of the plastic spudger.

    • Unscrew a total of two 4.0 mm screws, under the rubber stickers, using a Phillips #1 screwdriver.

  7. Logitech Harmony Smart Keyboard Key Printed Circuit Board (PCB) Replacement: шаг 7, изображение 1 из 2 Logitech Harmony Smart Keyboard Key Printed Circuit Board (PCB) Replacement: шаг 7, изображение 2 из 2
    • Unscrew the top center 4.0 mm screw, in the battery compartment, using the Phillips #1 screwdriver.

    • Now, you should have a total of ten 4.0 mm screws set aside.

  8. Logitech Harmony Smart Keyboard Key Printed Circuit Board (PCB) Replacement: шаг 8, изображение 1 из 3 Logitech Harmony Smart Keyboard Key Printed Circuit Board (PCB) Replacement: шаг 8, изображение 2 из 3 Logitech Harmony Smart Keyboard Key Printed Circuit Board (PCB) Replacement: шаг 8, изображение 3 из 3
    • Wedge the flat end of the spudger between the back panel and front panel.

    • Slide the flat end of the spudger from right to left to pry the two panels apart.

  9. Logitech Harmony Smart Keyboard Key Printed Circuit Board (PCB) Replacement: шаг 9, изображение 1 из 3 Logitech Harmony Smart Keyboard Key Printed Circuit Board (PCB) Replacement: шаг 9, изображение 2 из 3 Logitech Harmony Smart Keyboard Key Printed Circuit Board (PCB) Replacement: шаг 9, изображение 3 из 3
    • Separate the back panel from the front panel completely, using both hands.

    • A white ribbon flex cable will remain connected to both panels.

    • Pull the panels apart slowly and gently, or the white ribbon flex cable may be unsafely removed.

  10. Logitech Harmony Smart Keyboard Key Printed Circuit Board (PCB) Replacement, Keyboard Printed Circuit Board (PCB): шаг 10, изображение 1 из 3 Logitech Harmony Smart Keyboard Key Printed Circuit Board (PCB) Replacement, Keyboard Printed Circuit Board (PCB): шаг 10, изображение 2 из 3 Logitech Harmony Smart Keyboard Key Printed Circuit Board (PCB) Replacement, Keyboard Printed Circuit Board (PCB): шаг 10, изображение 3 из 3
    • Grip the lower end of the ribbon flex cable (white band) using your thumb and index finger.

    • Then slide the strip out toward yourself in a scooping motion.

    • Now, you should have two completely separated panel pieces.

  11. Logitech Harmony Smart Keyboard Key Printed Circuit Board (PCB) Replacement: шаг 11, изображение 1 из 3 Logitech Harmony Smart Keyboard Key Printed Circuit Board (PCB) Replacement: шаг 11, изображение 2 из 3 Logitech Harmony Smart Keyboard Key Printed Circuit Board (PCB) Replacement: шаг 11, изображение 3 из 3
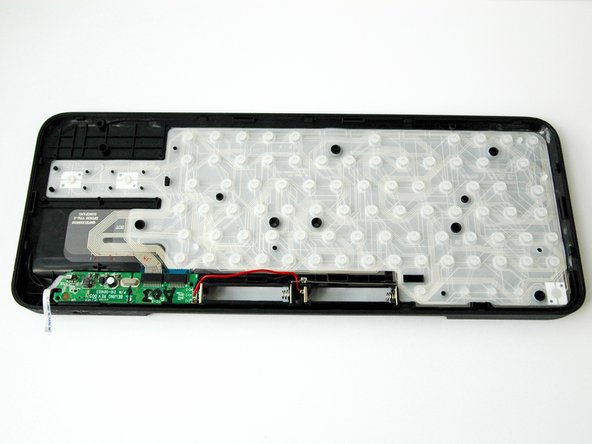
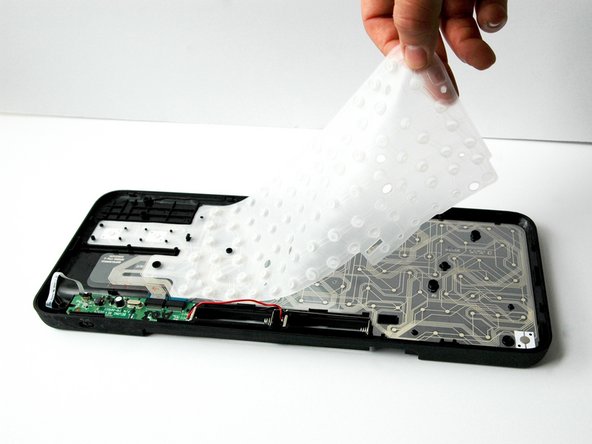
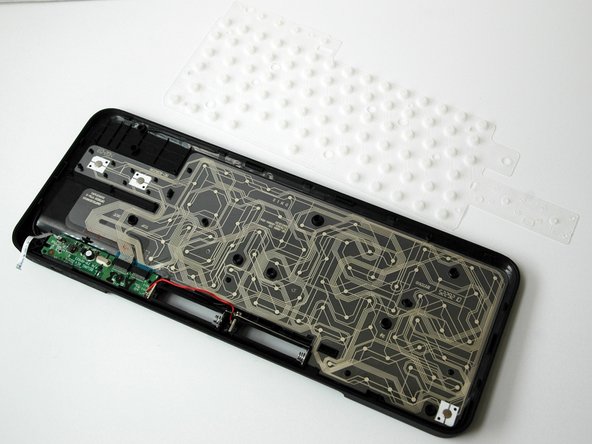
    • Lift and remove the white rubber sheet that lays over the keyboard pet flexible PCB.

  12. Logitech Harmony Smart Keyboard Key Printed Circuit Board (PCB) Replacement: шаг 12, изображение 1 из 3 Logitech Harmony Smart Keyboard Key Printed Circuit Board (PCB) Replacement: шаг 12, изображение 2 из 3 Logitech Harmony Smart Keyboard Key Printed Circuit Board (PCB) Replacement: шаг 12, изображение 3 из 3
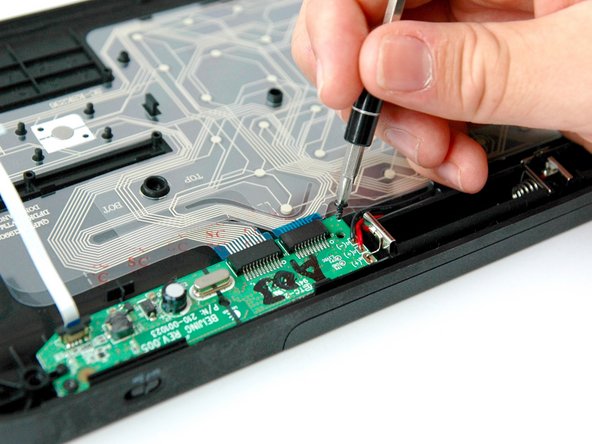
    • Unscrew the two 4.0 mm screws on either side of the green card using a Phillips #1 screwdriver.

  13. Logitech Harmony Smart Keyboard Key Printed Circuit Board (PCB) Replacement: шаг 13, изображение 1 из 1
    • Lift the green card up using the flat end of the plastic spudger.

  14. Logitech Harmony Smart Keyboard Key Printed Circuit Board (PCB) Replacement: шаг 14, изображение 1 из 1
    • Grip and lift the keyboard PCB up and out.

    • The battery wires will remain connected.

  15. Logitech Harmony Smart Keyboard Key Printed Circuit Board (PCB) Replacement: шаг 15, изображение 1 из 1
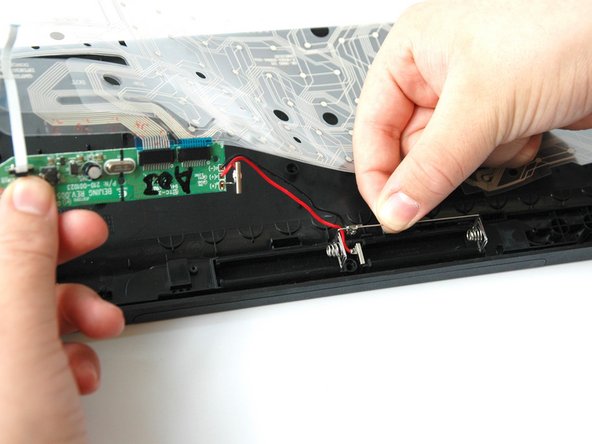
    • Grip and lift the battery wire bar out of the battery compartment, using your thumb and index finger.

  16. Logitech Harmony Smart Keyboard Key Printed Circuit Board (PCB) Replacement: шаг 16, изображение 1 из 2 Logitech Harmony Smart Keyboard Key Printed Circuit Board (PCB) Replacement: шаг 16, изображение 2 из 2
    • Pinch your precision tweezers and wedge the battery clamp up.

    • Lift the entire keyboard PCB out of the panel.

    • The keyboard PCB will remain connected to the green card.

  17. Logitech Harmony Smart Keyboard Key Printed Circuit Board (PCB) Replacement: шаг 17, изображение 1 из 3 Logitech Harmony Smart Keyboard Key Printed Circuit Board (PCB) Replacement: шаг 17, изображение 2 из 3 Logitech Harmony Smart Keyboard Key Printed Circuit Board (PCB) Replacement: шаг 17, изображение 3 из 3
    • Slide your index finger into the slot under the right blue tab.

    • Pinch and pull the right blue tab away from the green card.

  18. Logitech Harmony Smart Keyboard Key Printed Circuit Board (PCB) Replacement: шаг 18, изображение 1 из 3 Logitech Harmony Smart Keyboard Key Printed Circuit Board (PCB) Replacement: шаг 18, изображение 2 из 3 Logitech Harmony Smart Keyboard Key Printed Circuit Board (PCB) Replacement: шаг 18, изображение 3 из 3
    • Pinch and pull the left blue tab away from the green card.

Заключение

To reassemble your device, follow these instructions in reverse order.

Еще один человек закончил это руководство.

Hayley Nichols

Участник с: 09/05/17

525 Репутация

Автор 4 руководств

Команда

CSU Fullerton, Team S1-G2, Bruce Fall 2017 Участник CSU Fullerton, Team S1-G2, Bruce Fall 2017

CSUF-BRUCE-F17S1G2

3 членов

Автор 10 руководств

Один комментарий

This is really very informative to read and helpful while replacement or cleaning theprinted circuit board . I really want my friend companies engineer to read this type of information and work on it in practical. i wanna tag that company here as well @XG-technologies (https://xg-pcb.com/). Moreover keep sharing these type of informative blogs. really liked it.

mark.tony40 - Ответить

Добавить комментарий

Просмотр статистики:

За последние 24часов: 1

За последние 7 дней: 19

За последние 30 дней: 38

За всё время: 3,425