Введение
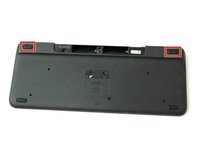
This is a replacement guide for the Logitech Harmony Smart Keyboard's ribbon flex cable.
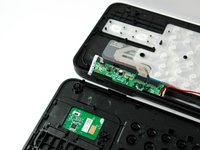
The ribbon flex cable is thin, flat, multiconductor cable that is widely used for internal peripheral connections in electronic systems. In the Logitech Harmony Smart Keyboard, the ribbon flex cable connects the touchpad printed circuit board (PCB) and the keyboard printed circuit board (PCB).
Выберете то, что вам нужно
-
-
-
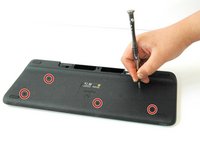
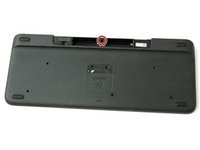
Peel off the center sticker to reveal two hidden 4.0 mm screws.
-
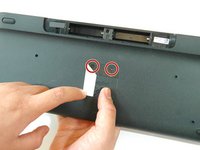
Unscrew these two screws with a Phillips #1 screwdriver.
-
-
-
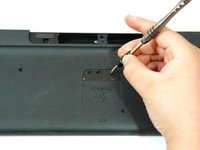
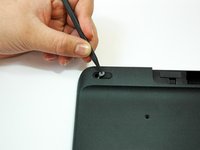
Lift both top left and top right rubber stickers halfway, using the sharp end of the plastic spudger.
-
Unscrew a total of two 4.0 mm screws, under the rubber stickers, using a Phillips #1 screwdriver.
-
-
-
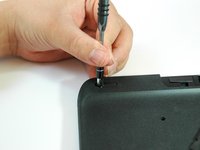
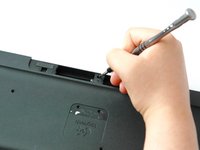
Unscrew the top center 4.0 mm screw, in the battery compartment, using the Phillips #1 screwdriver.
-
-
-
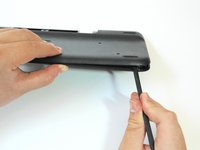
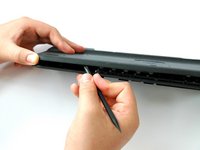
Wedge the flat end of the spudger between the back panel and front panel.
-
Slide the flat end of the spudger from right to left to pry the two panels apart.
-
-
-
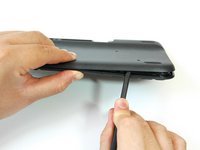
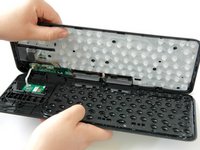
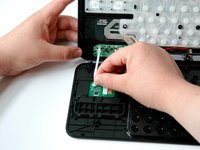
Grip the lower end of the ribbon flex cable (white band) using your thumb and index finger.
-
Then slide the strip out toward yourself in a scooping motion.
-
-
-
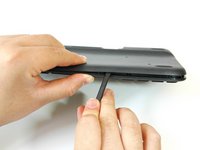
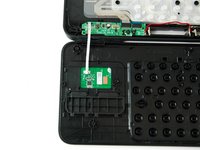
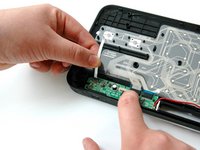
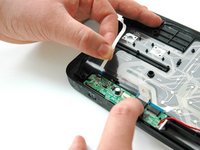
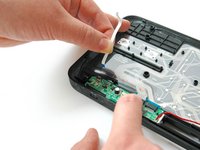
Grip the other lower end of the ribbon flex cable using your thumb and index finger.
-
Gently slide the cable up and out of the green card.
-


To reassemble your device, follow these instructions in reverse order.
Команда

CSU Fullerton, Team S1-G2, Bruce Fall 2017 Участник CSU Fullerton, Team S1-G2, Bruce Fall 2017
CSUF-BRUCE-F17S1G2
3 членов
Автор 10 руководств