Перейти к основному содержанию

Logitech M325 Scroll Wheel Replacement

Выберете то, что вам нужно

  1. Logitech M325 Scroll Wheel Replacement, Scroll Wheel: шаг 1, изображение 1 из 1
    • Caution: Before you begin, ensure that the mouse is powered off (red color displayed on the switch). The switch can be found at the bottom of the mouse.

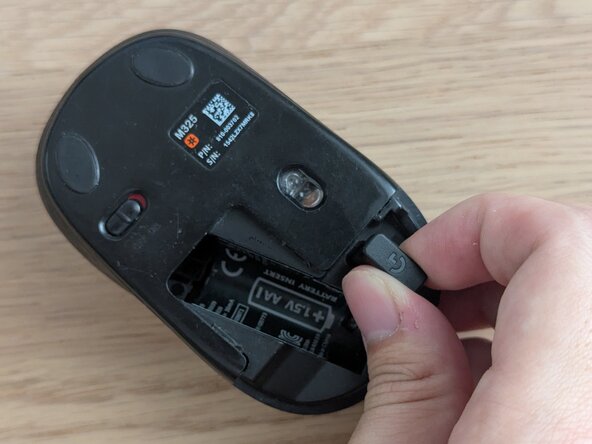
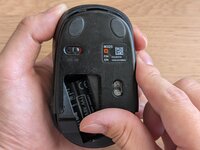
    • Remove the battery cover from the bottom of the mouse by sliding downwards.

  2. Logitech M325 Scroll Wheel Replacement: шаг 2, изображение 1 из 2 Logitech M325 Scroll Wheel Replacement: шаг 2, изображение 2 из 2
    • Lift out the AA battery.

    • Remove the USB adapter.

  3. Logitech M325 Scroll Wheel Replacement: шаг 3, изображение 1 из 1
    • Peel off the sticker in the battery compartment to reveal the screw underneath.

  4. Logitech M325 Scroll Wheel Replacement: шаг 4, изображение 1 из 2 Logitech M325 Scroll Wheel Replacement: шаг 4, изображение 2 из 2
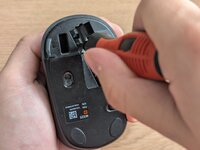
    • Use a Phillips #0 screwdriver to remove the 5 mm screw in the battery compartment.

  5. Logitech M325 Scroll Wheel Replacement: шаг 5, изображение 1 из 2 Logitech M325 Scroll Wheel Replacement: шаг 5, изображение 2 из 2
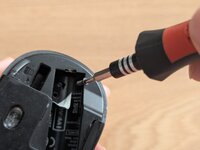
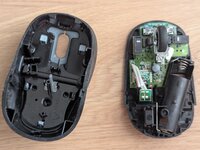
    • Slide the lower case downwards and separate the top case from the main mouse body by lifting it off.

  6. Logitech M325 Scroll Wheel Replacement: шаг 6, изображение 1 из 2 Logitech M325 Scroll Wheel Replacement: шаг 6, изображение 2 из 2
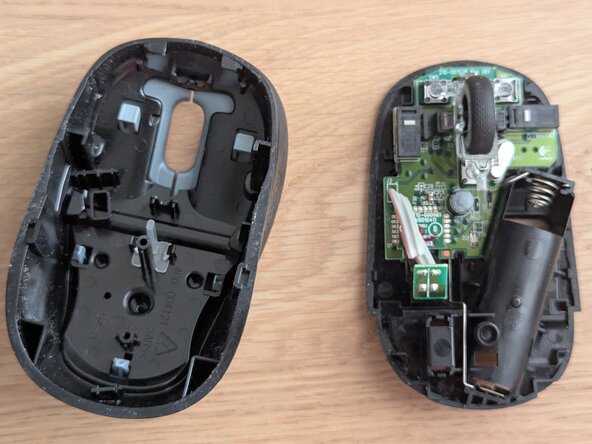
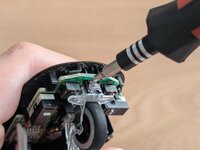
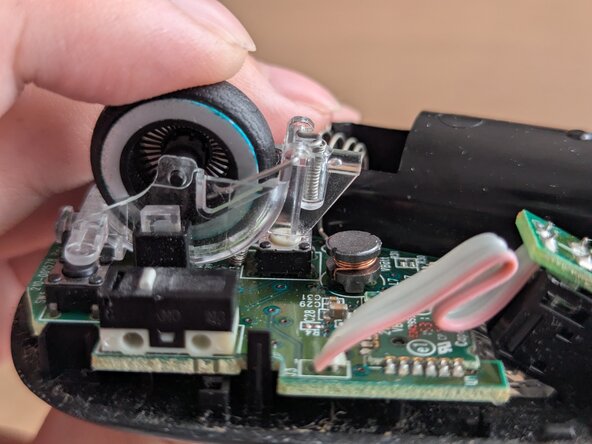
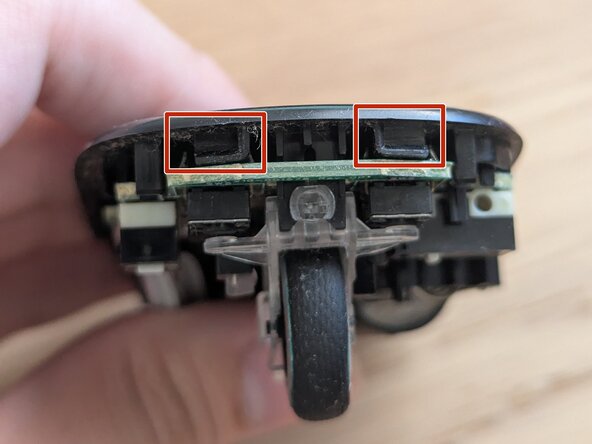
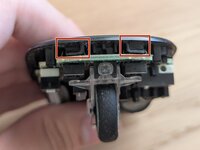
    • Use a pry tool to unclip the scroll wheel from the PCB by pushing the clip out of the holder.

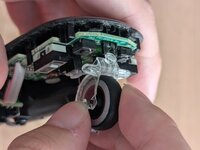
    • Remove the scroll wheel by lifting it up.

  7. Logitech M325 Scroll Wheel Replacement: шаг 7, изображение 1 из 2 Logitech M325 Scroll Wheel Replacement: шаг 7, изображение 2 из 2
    • Align the replacement in the same position as the old scroll wheel.

    • Push down and clip in the scroll wheel.

  8. Logitech M325 Scroll Wheel Replacement: шаг 8, изображение 1 из 3 Logitech M325 Scroll Wheel Replacement: шаг 8, изображение 2 из 3 Logitech M325 Scroll Wheel Replacement: шаг 8, изображение 3 из 3
    • Align the top housing clips with the mouse body clip openings.

    • Slide top housing back onto mouse by pushing it in.

Заключение

To reassemble your device, follow steps 1-4 in reverse order.

Еще один человек закончил это руководство.

mykayat_YU

Участник с: 01/09/25

157 Репутация

1 руководство автора

Команда

York University, Team 1-8, Woodhouse Winter 2025 Участник York University, Team 1-8, Woodhouse Winter 2025

YORK-WOODHOUSE-W25S1G8

2 членов

Автор 1 руководств

0 Комментарии к руководству

Добавить комментарий

Статистика просмотров:

За последние 24 часов: 1

За последние 7 дней: 5

За последние 30 дней: 27

За всё время: 333