Введение
So I soaked my mx ergo. this is how I disassembled and cleaned it.
Выберете то, что вам нужно
-
-
Slide a prying tool under the rightmost button and follow the seam back till the top half unclips
-
-
-
-
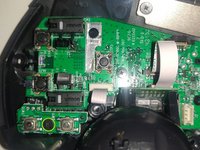
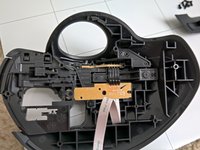
Unplug the battery from the mainboard, carefully lifting the plug marked red.
-
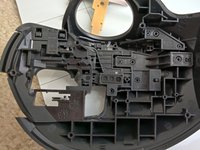
Unscrew the three screws holding the battery submodule.
-
-
-
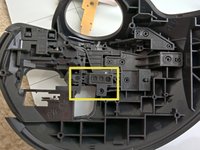
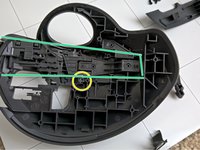
Unscrew the bottom left screw holding down the fwd/rev buttons, lifting the assembly to the side
-
Unplug the flex ribbon indicated in blue, coming from the power board below. Remove the six screws holding the main motherboard (one indicated orange here, just out of shot).
-
-
-
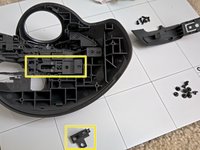
Unscrew the three screws holding the power board i place. Take care not to loose the power switch below as you take the last bits apart.
-
These three screws are a bit shorter than the rest, so keep them separate
-
-
-
The right click lever comes out after the bracket covering the ribbon cable
-
The Right click lever comes out through the front/top of the mouse
-
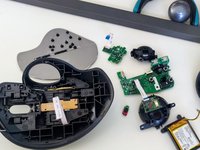
Then the circuit boards can be removed
-
-
-
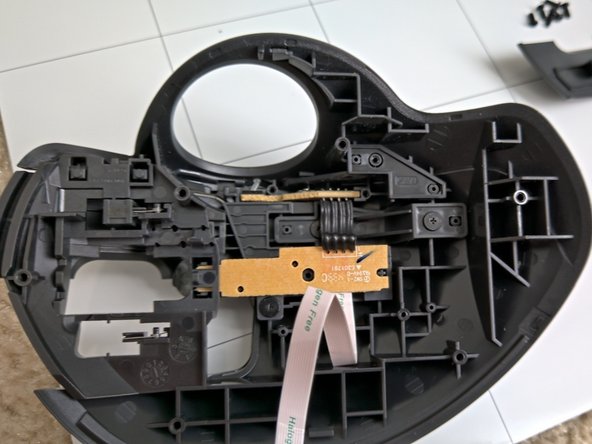
Under the circuit boards there is three piece that need to come out next
-
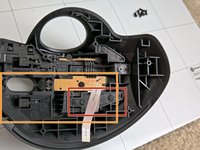
The first has one screw and two clear pieces that transmit the light from the circuit board to the outside of the mouse and hole to allow another to pass through it
-
Then the computer selector switch lever can come out the front/top of the mouse
-
After that the connecting light indicator transmitter will fall out and the left click lever can be removed
-


To reassemble your device, follow these instructions in reverse order.
Отменить: Я не выполнил это руководство.
15 человек успешно провели ремонт по этому руководству.
21 Комментарии к руководству
Thank you for the guide. The opening was hilarious— a picture says 1000 words.
I wanted to add a note that you need to use a T6 with a very long neck like the one iFixit offers for sale; an ordinary bit with a ~ 1/2” or ~1 cm long head will not be able to reach the two next to the opening to the thumb ball.
I had the same issue as you. My left click got damaged somehow and wouldn’t “return” when I clicked it. Opened it up, took both springs out and compared them. Looks like the left click spring got bent somehow. Straightened it up a bit and put it back in, seems to work perfectly now! I was going to buy a new one, but now I don’t have to. Thanks for the guide and +1 for iFixIt!!!
Hi,
My ergo fell down and I am unable to change the bluetooth selector : it is stuck on « 2 » and my pc does not see he mouse anymore.
Any idea how I could fix this ?
Thanks
tinker with the board in step 9. the button for bluetooth selection is on that board.
Frank -
Any updates on this? Having the same issue, but stuck on 1, and won't enter pairing mode either. Removed and cleaned with IPA, hoping that works. Any idea where the actual bluetooth module is located on the board(s)? Nothing appears loose but don't get a connection with a new receiver, via cable, or bluetooth to anything that should be able to see the device. Thanks in advance.