Введение
The exposure counter might not count at all, or does not reset to "zero" after changing the film roll: find some details where to look for the fix
-
-
Remove the 4 screws (Phillips, 2.7mm) on the left and right side of the front cover. Lift the cover straight up. Sometimes it fits very tight. Just apply careful lifting force.
-
When reassembling, move the lower lever at the camera body, which opens and closes the shutters, to the left ("open position"), and manually move the shutters in the front cover to open. Put them back together, moving the lever slightly until the parts gets a grip of each other and open and close together with the lever movement.
-
-
-
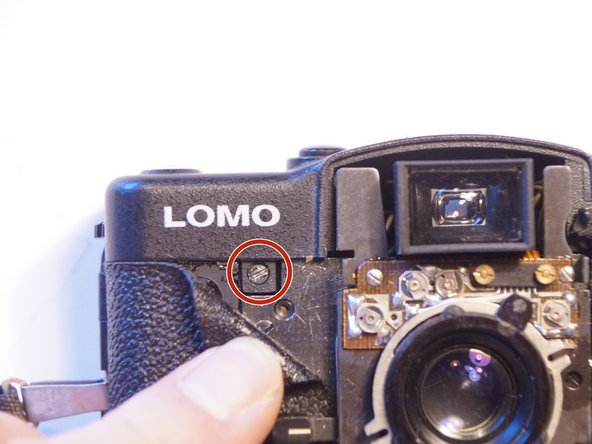
Using a scalpel or a sharp knife to remove the glue and loosen the leather in the grip area. Underneath the leather are hidden screws.
-
The one shown in picture #3 needs to be removed in the next step.
-
-
-
-
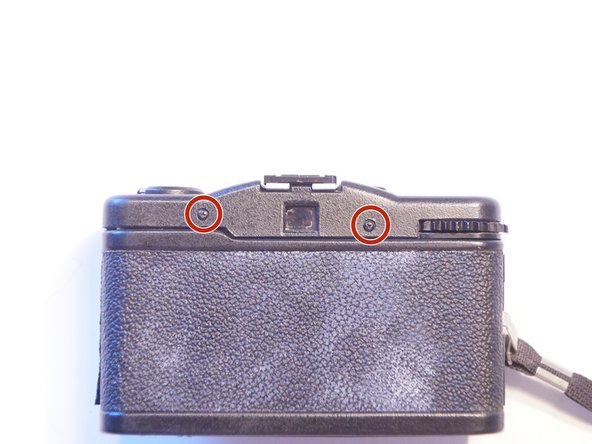
Remove the 2 black screws (Phillips, 3.8mm) on the back.
-
2 more screws (silver, flathead, 3.5mm) are hidden underneath the crank handle.
-
Remove the screw on the front side (see previous step): black, flathead, 4mm
-
-
-
This tip came from the great community, thanks to Parcival:
-
By blocking the Film axis with a screw driver, you can unscrew the film crank by turning the crank "counter clockwise" and take it completely off.
-
Note that the following steps still showing the top cover attached to the crank handle as I didn't know this trick before.
-
-
-
Turn the camera upside down to lift off the top cover. This will hold the release button in place.
-
The top cover will not come off completely, but keeps being attached to the body at the crank handle. You can only turn it around.
-
Take out the release button (it consists of 2 parts put into each other). Make sure to put them together again in the correct way when assembling everything back together.
-
-
-
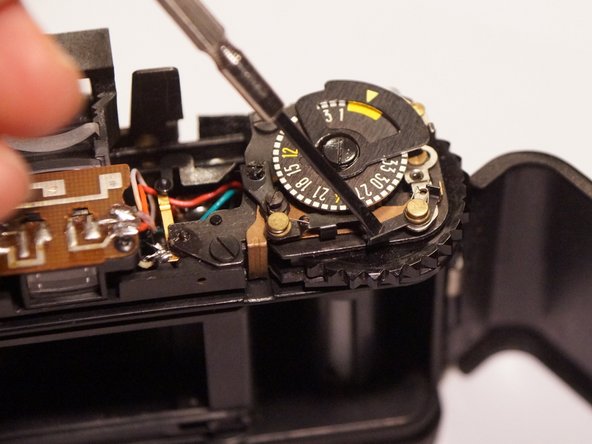
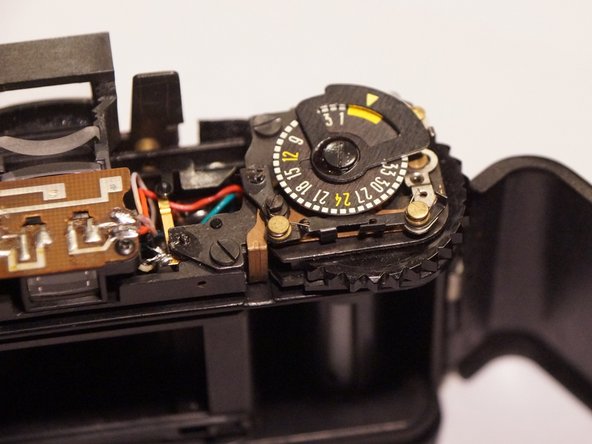
In case the counter does not count at all: check the two black little levers.
-
Wind up and release a couple of times by pessing the release mechanic (see red arrow in picture #1, works without batteries), to see if and how the counter works.
-
Move the levers with a screwdriver a little bit around. Sometimes they don't align correctly or snapped out.
-
-
-
In case the counter does not reset to "zero" when opening the back cover:
-
The copper-colored lever is released when the back cover is opened (see the little nose on the cover): tis will reset the counter.
-
Move the lever with a screwdriver to check if the counter resets correctly.
-
Check for a smooth gliding mechanics. If the lever does not release by itself, some droplets of finest precision oil (no WD 40 or similar!) might help.
-
-
-
Putting back everything in reverse order.
-
Using double sided sticky tape to glue the leather back onto the body after putting everything back togeter.
-
Enjoy your new working Lomo camera!
-


Re-assemble everything back in reverse order.
Re-assemble everything back in reverse order.
Особая благодарность этим переводчикам:
100%


Эти переводчики помогают нам починить мир! Хотите внести свой вклад?
Начните переводить ›
