Введение
The motherboard replacement is the most critical and difficult repair process of this laptop. Gaining access to laptop's motherboard allows the user to also replace the CPU/GPU fan or the RAM if need be.
Выберете то, что вам нужно
-
-
Remove the eleven 5mm screws with a Phillips #0 bit.
-
Remove the four 2.5mm screws with a Phillips #0 bit.
-
-
-
Unplug the battery connection carefully from the motherboard, and remove the old battery.
-
-
-
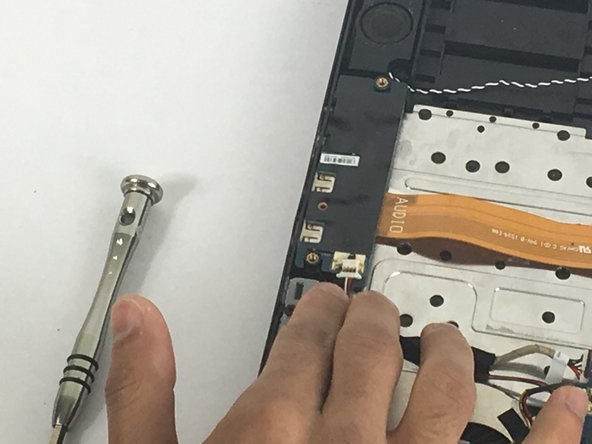
Gently lift the selected black tab that connects the cable onto the board and then slide out the cable.
-
-
-
-
Gently lift the selected black tab that connects the cable onto the board and then slide out the cable.
-
-
-
Gently lift the selected black tab that connects the cable onto the board and then slide out the cable.
-
-
-
Gently lift the selected black tab that connects the cable onto the board and then slide out the cable.
-
-
-
Gently lift the selected black tab that connects the cable onto the board and then slide out the cable.
-
-
-
Gently lift the selected black tab that connects the cable onto the board and then slide out the cable.
-
-
-
Gently remove the electronic component by sliding it out and lifting it up after unscrewing the 2.5 mm screw
-
-
-
After unplugging all of the cables and unscrewing all of the screws, gently remove the motherboard out of the computer chassis
-
This part will take some effort but remember not to apply to much pressure on the motherboard as to not damage any of the small electrical components on the board
-


To reassemble your device, follow these instructions in reverse order.
To reassemble your device, follow these instructions in reverse order.
Отменить: Я не выполнил это руководство.
2 участников успешно повторили данное руководство.
Команда

USF Tampa, Team S1-G4, Nance Fall 2017 Участник USF Tampa, Team S1-G4, Nance Fall 2017
USFT-NANCE-F17S1G4
3 членов
Автор 5 руководств
2 Комментариев
Hello,
can you please submit us the mainboard version (V1.1 or V1.2) for the MSI GS60 Ghost Pro 4K Laptop?
i need a replacement but i dont know which version is the right one for my GS60 4K (MS-16H71)
thanks in advance
best regards
Hi,
Hi,
I was wondering if you could help me? I need to find a complete bottom section for my MSI GS60 2QEAs it has completely melted. If you could let me know of any possible suppliers I’ll be very grateful.