Введение
This is a hard process and takes time. to get to the motherboard fan, the motherboard need to be completely disconnected from the computer. After, the motherboard is disconnected and taken out of the computer, then you will be able to disconnect the fan and replace it. all the steps need to be done with carefulness to avoid any wiring damage.
Выберете то, что вам нужно
-
-
Use a Phillips #0 driver to remove the 15 screws that hold the bottom cover:
-
Eleven 2.5 mm length screws
-
Four 5 mm length screws
-
Remove the bottom cover.
-
-
-
Locate the Hard drive
-
Unplug it gently by lifting it up to unlock the black cover that connects it to the motherboard
-
Unplug the hard drive
-
-
-
unplug this wire carefully
-
Unplug the brown wire located next to the previous wire. Unplug it gently by lifting it up to unlock the black cover that connects it to the motherboard
-
-
-
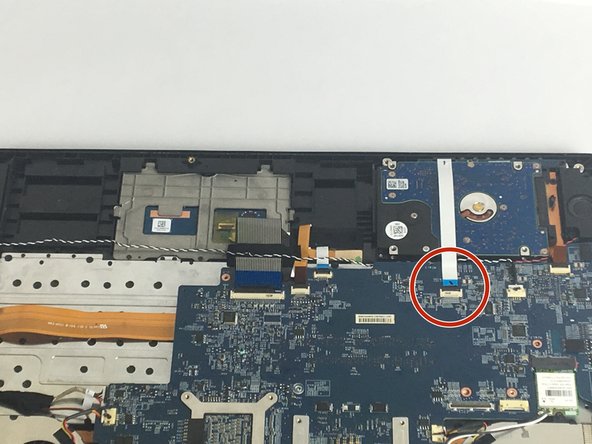
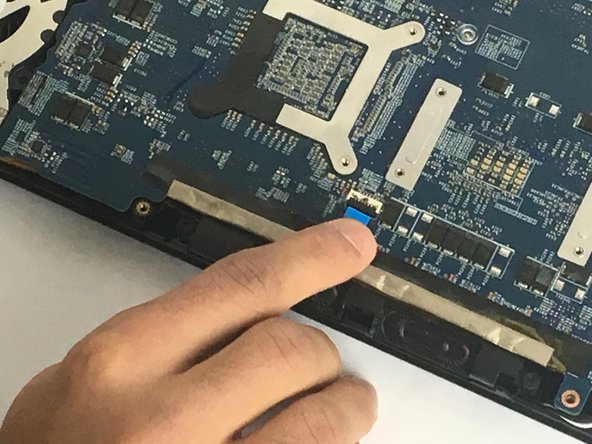
unplug the selected wire. Unplug it gently by lifting it up to unlock the black cover that connects it to the motherboard
-
-
-
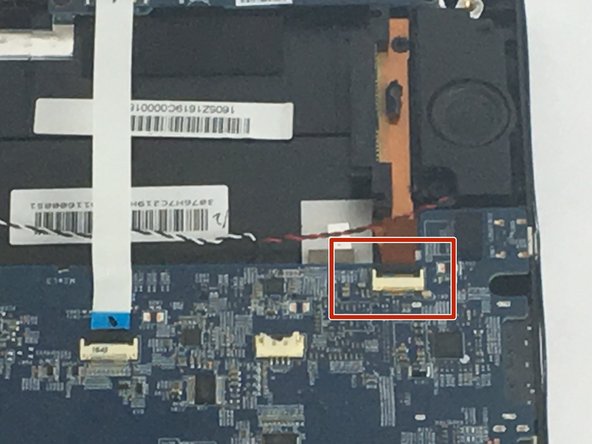
unplug the brown selected wire. Unplug it gently by lifting it up to unlock the black cover that connects it to the motherboard
-
-
-
-
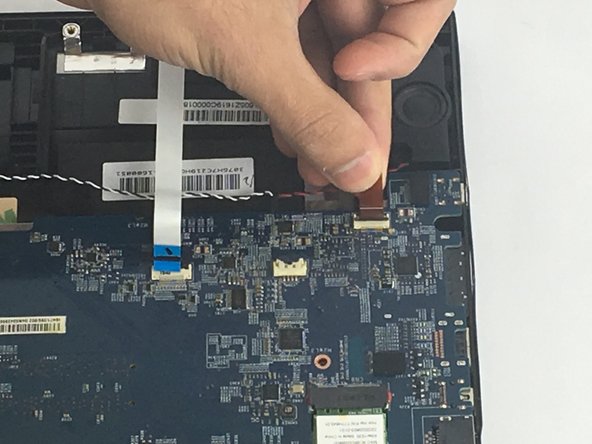
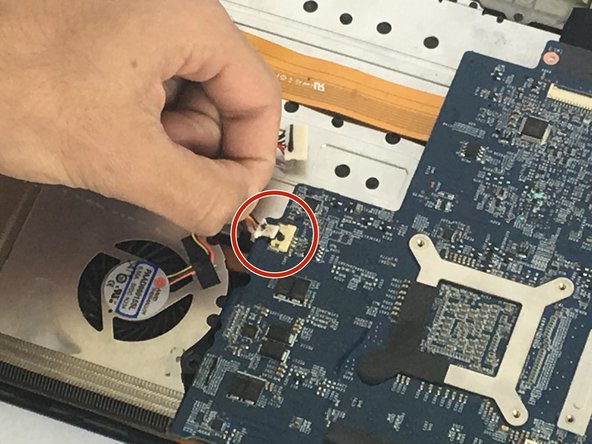
unplug the selected wire. Unplug it gently by lifting it up to unlock the black cover that connects it to the motherboard
-
-
-
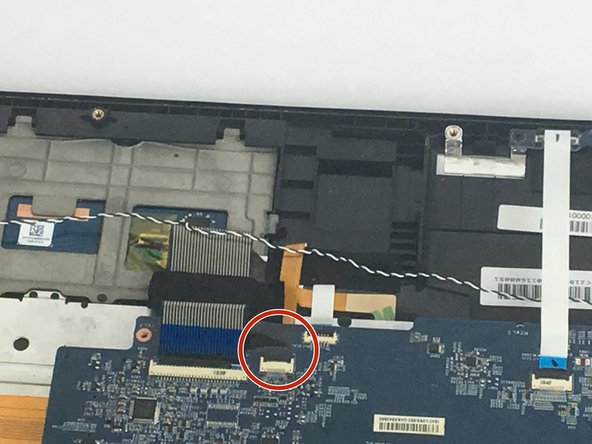
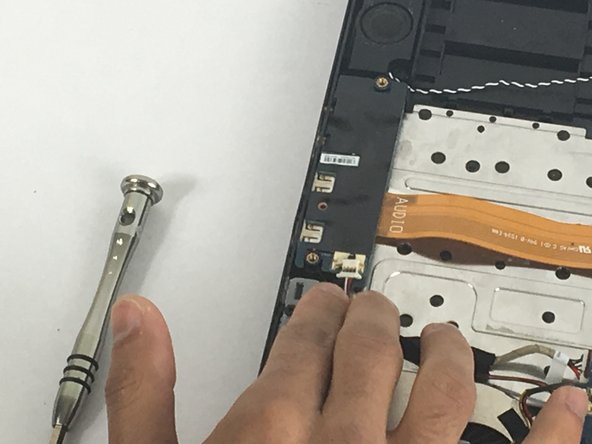
unplug the selected white wire. Unplug it gently by lifting it up to unlock the black cover that connects it to the motherboard
-
-
-
remove the selected 2.5 mm screws by PH0 Bit screwdriver
-
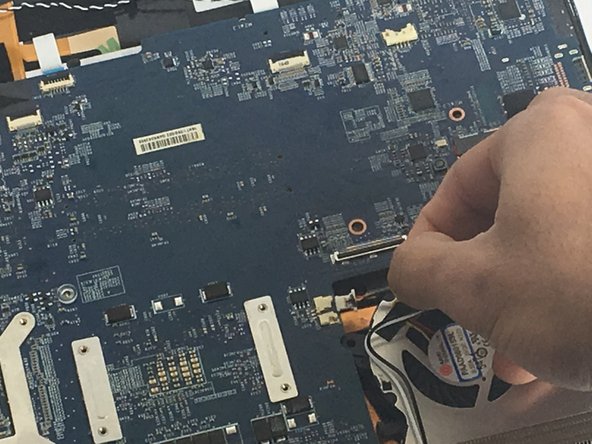
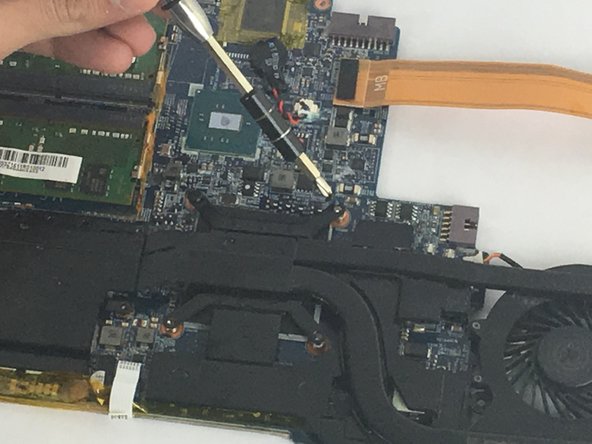
Gently unplug the electronic chip
-
-
-
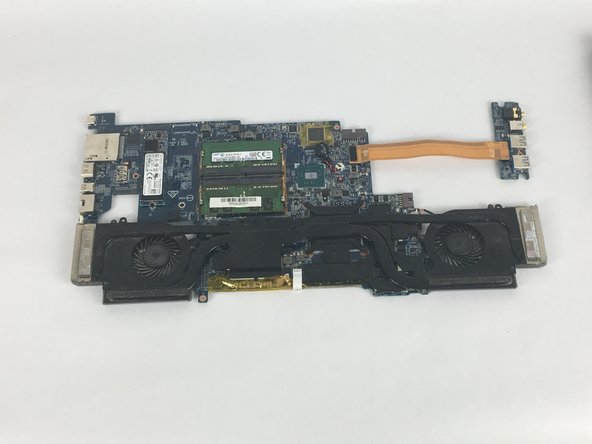
After you remove all the connected wires and unscrew all the screws that holds the motherboard to the laptop, take the motherboard out as shown in the picture.
-
-
-
Remove the eight 2.5mm screws with a PH0 bit.
-


To reassemble your device, follow these instructions in reverse order.
To reassemble your device, follow these instructions in reverse order.
Отменить: Я не выполнил это руководство.
3 участников успешно повторили данное руководство.
Команда

USF Tampa, Team S1-G4, Nance Fall 2017 Участник USF Tampa, Team S1-G4, Nance Fall 2017
USFT-NANCE-F17S1G4
3 членов
Автор 5 руководств
7 Комментариев
Where would I order the replacement fans?
Hello, you can buy those here:
https://www.ebay.fr/itm/Ventilateur-Fan-...
Hi, I just went through this disassembly (which is mostly great, thank you Mafdy) to replace the fans, and I wanted to point out a couple of clarifications:
Most importantly! It is NOT necessary to remove the fan/heatsink assembly from the motherboard to remove and replace the fans! Instead of proceeding with steps 15 and 16, look for tiny philips screws on the black side of the heatsink assembly which fasten each fan - 3 for one fan, 4 for the other. These are accessible once the motherboard is free from the case.
Steps 15 and 16 cause you to break the thermal compound seal on the CPU and GPU, and then proper re-assembly would mean cleaning off the old compound and correctly applying new compound before re-attaching the heatsink assembly - an unnecessary hassle just to replace the fans.
Secondly, be aware that, during steps 13-14, there are a number of additional screws and connectors that are not mentioned, that need to be removed in order to release the motherboard from the laptop housing.
Happy Fixing!
fans in the final section combined with copper pipe. Can they be separated? I'm having trouble finding a fan. Where can I buy new fans.
I have replaced both fans on gs60 today, and the instructions worked like charm! Steps 14-16 were unnecessary! Thx!
Just in case anyone else needs to replace the one of the fans on this laptop, I avoided having to disassemble the whole motherboard out of the laptop by using a pair of pliers to break all the plastic housinging holding the fan in place and physically ripping the fan out. I had to do this due to bearing failure on the fan.
If your fan is grinding (but still going) anecdotally, you can get slightly more life out of it by forcing in wet lubricant, but this is more of a bandaid solution.
Also if you do go through the effort of ripping out your entire heatsink and motherboard, you might as well reapply some high end thermal compound like thermal grizzly kryonaut.
Can i replace one of the fans and keep the other one or i have to replace the two of them at once because they are connected with a heatsink .
I mean, is it ez to replace just one of them and keep the other?