Введение
Use this guide to replace the Touch ID sensor/power button in a Late 2020 MacBook Air (M1).
Note that Touch ID will not function after replacing the Touch ID sensor. The MacBook’s original Touch ID sensor is uniquely paired to the logic board at the factory—and without Apple’s proprietary calibration process, even a genuine replacement Touch ID sensor from another MacBook Air won’t work.
If you replace the Touch ID sensor, you must install a paired logic board to retain Touch ID functionality.
Выберете то, что вам нужно
-
-
If your MacBook is running Big Sur v11.1 or later, disabling Auto Boot may not work. You can proceed normally, but make sure to disconnect the battery as soon as you're inside.
-
Use a P5 driver to remove the following screws:
-
Two 7.9 mm screws
-
Two 7.3 mm screws
-
Six 2.6 mm screws
-
-
-
Wedge your fingers between the display and the lower case and pull upward to pop off the lower case.
-
Remove the lower case.
-
Set it in place and press firmly to engage the two hidden clips underneath. You should feel and hear them snap into place.
-
-
-
Use the flat end of a spudger to pry up and unlatch the metal locking arm on the battery connector.
-
Lift straight up on the metal locking arm to pull the battery connector out of its socket on the logic board.
-
If necessary, push the rear, wire side of the connector into place first, then rock the front of the connector into place.
-
-
-
Use a T3 Torx driver to remove the three 1.4 mm screws securing the audio board connector cover.
-
-
-
-
Slide the pointed end of a spudger underneath the speaker cable and pry straight up to disconnect it.
-
-
-
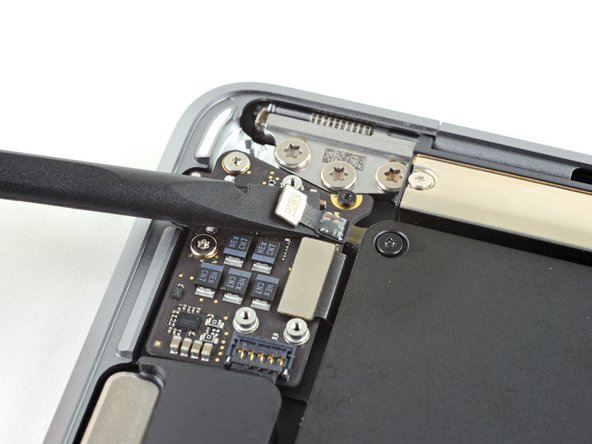
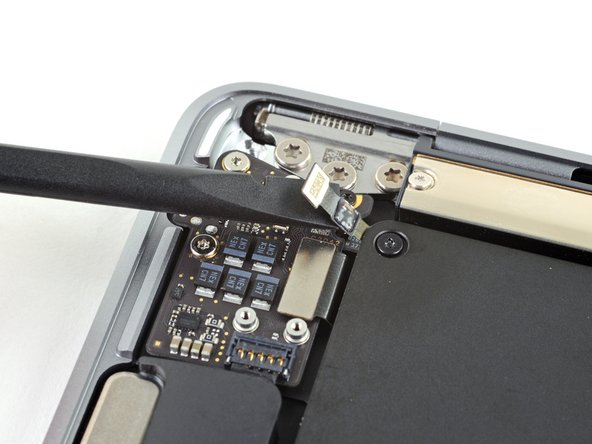
Use the flat end of a spudger to pry the Touch ID cable straight up to disconnect it from the audio board.
-
Continue to slide the spudger underneath the Touch ID cable to release it from the audio board.
-
-
-
Use the flat end of a spudger to pry the audio board connector straight up to disconnect it from the board.
-
-
-
Remove the three screws securing the audio board:
-
Two 4.8 mm T5 Torx screws
-
One 2.5 mm T3 Torx screw
-
-
-
Use a spudger to pry the audio board out of the upper case until you can grip it with your fingers.
-
Remove the audio board.
-
-
-
Use a T3 Torx driver to remove the six 1.6 mm screws securing the Touch ID sensor and its bracket.
-
-
-
Turn the MacBook right-side up and open the display.
-
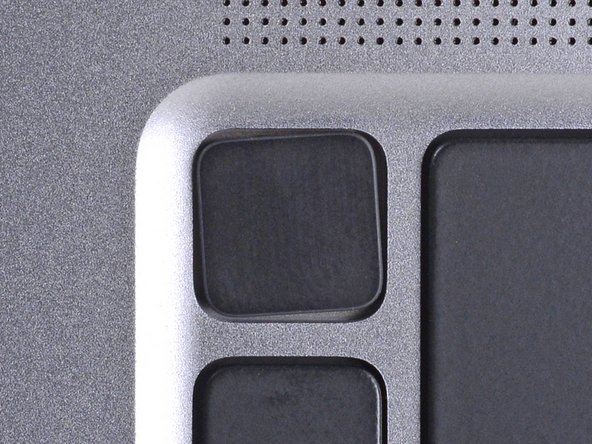
Remove the Touch ID sensor.
-


Compare your new replacement part to the original part—you may need to transfer remaining components or remove adhesive backings from the new part before installing.
To reassemble your device, follow the above steps in reverse order.
Once you've completed your repair, your laptop may not power back on until connected to power.
Take your e-waste to an R2 or e-Stewards certified recycler.
Repair didn’t go as planned? Check out our Answers community for troubleshooting help.
Отменить: Я не выполнил это руководство.
9 участников успешно повторили данное руководство.


4 Комментариев
Servus! Angenommen, der Stecker hat sich beim Sturz nur gelöst und man steckt ihn wieder drauf. Kann man dann Touch ID wieder nutzen? Ode muss man immer das Logicboard tauschen, sobald der Stecker abgelöst wurde? Grüße
Is it safe to remove the power button without going through the back? My touch sensor isn't working and I think something's blocking it. I simply want to remove the power key to clean... and put it right back in.
No, the 4 screws holding the bottom of the button are on the inside, so you have to follow this guide to check your issue.
Anyway to turn on my 2019 macbook pro with a broken touch id flex cable?