Введение
Replacing a defective fan is pretty easy and will keep your laptop running cool.
Выберете то, что вам нужно
-
-
Use a coin or spudger to rotate the battery-locking screw 90 degrees clockwise.
-
-
-
Unscrew the three evenly-spaced Phillips 000 screws from along the rear wall of the battery compartment.
-
-
-
Grasp the right end of the L-shaped memory cover, then pull it towards you so it clears the battery compartment opening.
-
Lift the memory cover up and out of the computer.
-
-
-
Remove the following 3 screws:
-
One 11 mm Phillips#00 in the middle of the lower case. (Head: 5mm dia. x .75mm thick)
-
Two 14.5 mm Phillips #00 (Head: 5mm dia. x .75mm thick)
-
-
-
Remove the following 3 screws from the rear wall of the battery compartment:
-
One 3 mm Phillips #0. (Head: 2.75 mm. dia.)
-
Two 4 mm Phillips #0 on the either side. (Head: 2.75mm dia.)
-
-
-
Remove the two Phillips screws from either side of the right wall of the battery compartment (not the ones closest to the battery connector).
-
Two 6.25 mm Phillips #000. (Head: 4 mm. dia. x .5mm thick)
-
-
-
-
Remove the four indicated Phillips screws from the front wall of the battery compartment. When working from the left, remove the 2nd, 4th, 7th and 9th screws.
-
Four 3.25 mm Phillips #000. (Head: 4 mm. dia. x 4mm thick)
-
-
-
Remove the following 4 screws from the back of the computer:
-
Two 11 mm Phillips #00, with Shank (2.2mm dia. x 2 mm len.) (Head: 3.2 mm. dia. x .5mm thick)
-
Two 7.25 mm Phillips #00, with Shank (2mm dia. x 3.75 mm len.) (Head: 3.2 mm. dia. x .5mm thick)
-
-
-
Remove the two Phillips screws from the optical drive (right) side of the computer:
-
Two 5.2 mm Phillips #00, with shank (2.3mm dia. x 3.25 mm len.) (Head: 3.2 mm. dia. x .5mm thick)
-
-
Инструмент, используемый на этом этапе:Plastic Cards$2.99
-
Use a plastic opening tool, an expired plastic credit, or a similarly-thick card to pry up on the upper case, starting in the upper-left corner and working around to the front of the computer.
-
-
-
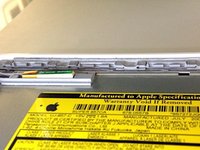
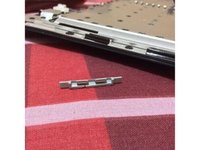
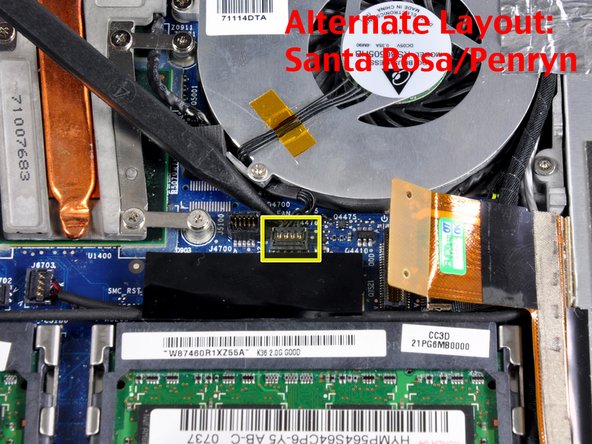
While holding up the upper case, pull up the black tab on the connector end of the silver ribbon cable away from the connector's socket on the logic board.
-
-
-
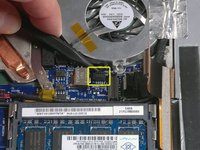
Use a spudger to disconnect the orange optical drive cable from the logic board.
-
-
-
Use a spudger to move the gray display data and black speaker cables to the right. This will reveal a silver screw securing the fan housing to the lower case.
-
-
-
Remove the following 2 screws:
-
One 3 mm Phillips on the right side of the fan.
-
One 6 mm Phillips on the left side of the fan.
-
-
-
Lift the fan and its attached mounting bracket up and out of the computer, being careful not to rip the black felt tape.
-


To reassemble your device, follow these instructions in reverse order.
Отменить: Я не выполнил это руководство.
308 человек успешно провели ремонт по этому руководству.

23 Комментарии к руководству
My wife's MacBook has been overheating for some time, and then shutting itself down. Your instructions were great, but I did note that I needed to unscrew the cable tie near the speaker in Step 17.
The system had some dust in it, used the air can to spray it all out. Dust was on the heatsink vents, too. Closed it all up, and peak temps during a software install that crashed it three times yesterday was 145F - yesterday it was passing 170F and crashing.
Thanks for the instructions, ifixit!
Download and print out the PDF version of the repair guide. Tape the screws to their corresponding image in the guide so that you can't go wrong!
what a great idea! i've been thinking about a solution for organizing screws. that's genius!
Victoria -
Good Idea. I generally sketch up rough diagrams and putsmall pieces of double sided tapes and stick the screws on my drawing.