Введение
Changing the top case will also give you a new trackpad and keyboard.
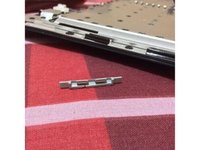
Note: the ribbon cable is fragile but replaceable, it is connected with a ZIF socket under the touchpad.
Выберете то, что вам нужно
-
-
Use a coin or spudger to rotate the battery-locking screw 90 degrees clockwise.
-
-
-
Unscrew the three evenly-spaced Phillips 000 screws from along the rear wall of the battery compartment.
-
-
-
Grasp the right end of the L-shaped memory cover, then pull it towards you so it clears the battery compartment opening.
-
Lift the memory cover up and out of the computer.
-
-
-
-
Remove the following 3 screws:
-
One 11 mm Phillips#00 in the middle of the lower case. (Head: 5mm dia. x .75mm thick)
-
Two 14.5 mm Phillips #00 (Head: 5mm dia. x .75mm thick)
-
-
-
Remove the following 3 screws from the rear wall of the battery compartment:
-
One 3 mm Phillips #0. (Head: 2.75 mm. dia.)
-
Two 4 mm Phillips #0 on the either side. (Head: 2.75mm dia.)
-
-
-
Remove the two Phillips screws from either side of the right wall of the battery compartment (not the ones closest to the battery connector).
-
Two 6.25 mm Phillips #000. (Head: 4 mm. dia. x .5mm thick)
-
-
-
Remove the four indicated Phillips screws from the front wall of the battery compartment. When working from the left, remove the 2nd, 4th, 7th and 9th screws.
-
Four 3.25 mm Phillips #000. (Head: 4 mm. dia. x 4mm thick)
-
-
-
Remove the following 4 screws from the back of the computer:
-
Two 11 mm Phillips #00, with Shank (2.2mm dia. x 2 mm len.) (Head: 3.2 mm. dia. x .5mm thick)
-
Two 7.25 mm Phillips #00, with Shank (2mm dia. x 3.75 mm len.) (Head: 3.2 mm. dia. x .5mm thick)
-
-
-
Remove the two Phillips screws from the optical drive (right) side of the computer:
-
Two 5.2 mm Phillips #00, with shank (2.3mm dia. x 3.25 mm len.) (Head: 3.2 mm. dia. x .5mm thick)
-
-
Инструмент, используемый на этом этапе:Plastic Cards$2.99
-
Use a plastic opening tool, an expired plastic credit, or a similarly-thick card to pry up on the upper case, starting in the upper-left corner and working around to the front of the computer.
-
-
-
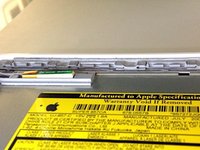
While holding up the upper case, pull up the black tab on the connector end of the silver ribbon cable away from the connector's socket on the logic board.
-


To reassemble your device, follow these instructions in reverse order.
Отменить: Я не выполнил это руководство.
409 человек успешно провели ремонт по этому руководству.

14 Комментарии к руководству
Note that the actual keyboard is sandwiched between the top case and an aluminum backing panel that is plastic welded together. Because of this, the keyboard can not be replaced without modification to these plastic weld points.
I actually purchased a replacement keyboard only to find out that I should have purchased the whole top case unit.
Many thanks for this guide. I was able to replace my old fried keyboard with no problem!
Wow. I have used this guide religiously 3 times now and I can not thank enough for it to the provider. You won't find anything more informative, explicit, graphic, descriptive but simple and basic oriented out there, and without leaving key details out. I think you did a FANTASTIC job with this guide, and thank you again. I'm very happy I found this link.
By the way, much better and appropiate than those dozens of youtube videos.
On step 10 the last screw, the one farthest away from the optical drive, would not come out. My screw driver is fine and the screw look ok but it will not come out. I'v been trying for 30 minutes now.
hello staff ifixit
I have a question happens when I change the upper case of this team and still does not work bring it to a central apple and tell me I have to change the logic board is this true and if so how is that is damaged