Перейти к основному содержанию

MacBook Pro 13" Retina Display Late 2012 Microphone Assembly Replacement

Абсолютно необходимое руководство
Это руководство предназначено только для использования в качестве обязательного условия для других руководств. Оно не полностью само по себе.

Выберете то, что вам нужно

  1. MacBook Pro 13" Retina Display Late 2012 Microphone Assembly Replacement, Microphone Assembly: шаг 1, изображение 1 из 1
    • For this step, it is recommended to use a heat gun or hair dryer to soften the adhesive securing the microphone assembly to the upper case. You may be able to remove it without doing so, but will risk damaging the microphone cable.

    • With the heat gun set to low, heat the microphone assembly to loosen the adhesive attaching it to the upper case.

    • Be very careful not to overheat the microphones or upper case. Keep in mind that the plastic keyboard is on the other side—too much heat in a single place can melt keys.

  2. MacBook Pro 13" Retina Display Late 2012 Microphone Assembly Replacement: шаг 2, изображение 1 из 3 MacBook Pro 13" Retina Display Late 2012 Microphone Assembly Replacement: шаг 2, изображение 2 из 3 MacBook Pro 13" Retina Display Late 2012 Microphone Assembly Replacement: шаг 2, изображение 3 из 3
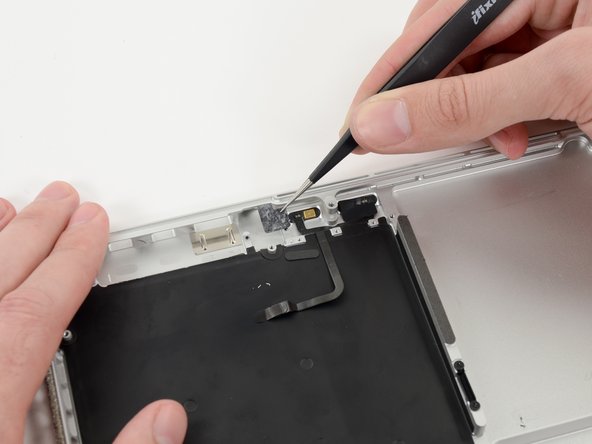
    • Use the tip of a spudger to remove the piece of tape covering one of two microphones.

    • Grasp the piece of tape with a pair of tweezers and remove it.

  3. MacBook Pro 13" Retina Display Late 2012 Microphone Assembly Replacement: шаг 3, изображение 1 из 3 MacBook Pro 13" Retina Display Late 2012 Microphone Assembly Replacement: шаг 3, изображение 2 из 3 MacBook Pro 13" Retina Display Late 2012 Microphone Assembly Replacement: шаг 3, изображение 3 из 3
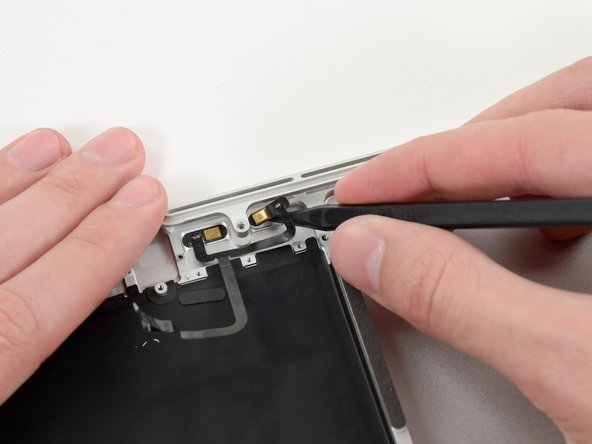
    • Repeat the same procedure as the previous step to remove the tape covering the second microphone.

  4. MacBook Pro 13" Retina Display Late 2012 Microphone Assembly Replacement: шаг 4, изображение 1 из 3 MacBook Pro 13" Retina Display Late 2012 Microphone Assembly Replacement: шаг 4, изображение 2 из 3 MacBook Pro 13" Retina Display Late 2012 Microphone Assembly Replacement: шаг 4, изображение 3 из 3
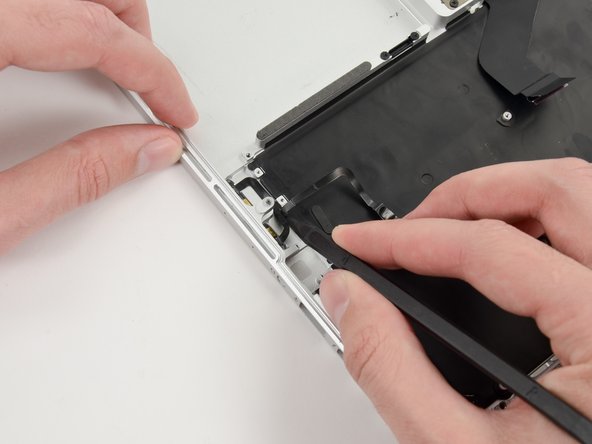
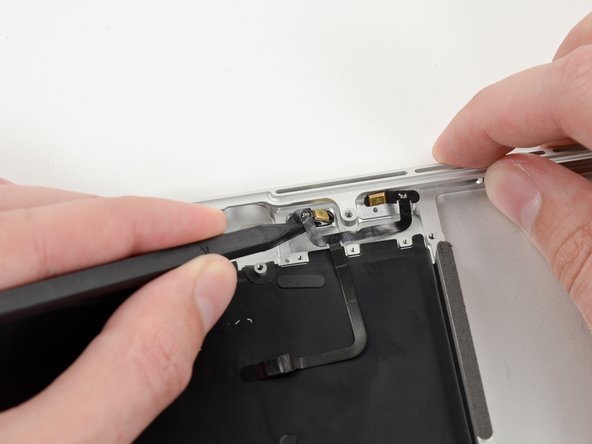
    • Wedge the tip of a spudger underneath the microphone assembly cable.

    • Run the spudger up along the bottom of the microphone assembly cable to separate it from the upper case.

  5. MacBook Pro 13" Retina Display Late 2012 Microphone Assembly Replacement: шаг 5, изображение 1 из 2 MacBook Pro 13" Retina Display Late 2012 Microphone Assembly Replacement: шаг 5, изображение 2 из 2
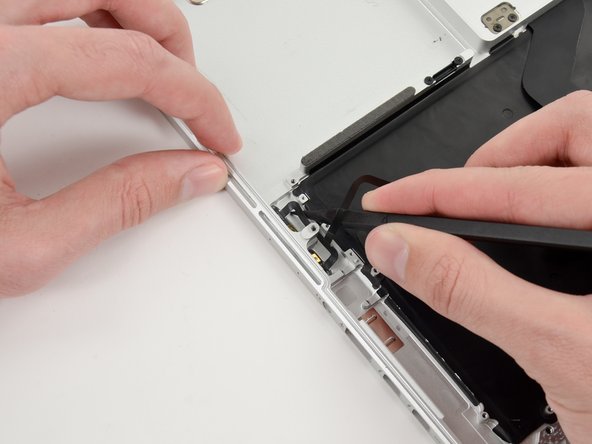
    • Gently wedge the tip of a spudger underneath the second microphone and push inwards to loosen the adhesive.

    • At this point the second microphone should be completely detached from the upper case.

  6. MacBook Pro 13" Retina Display Late 2012 Microphone Assembly Replacement: шаг 6, изображение 1 из 2 MacBook Pro 13" Retina Display Late 2012 Microphone Assembly Replacement: шаг 6, изображение 2 из 2
    • Carefully pry the first microphone up off the upper case.

  7. MacBook Pro 13" Retina Display Late 2012 Microphone Assembly Replacement: шаг 7, изображение 1 из 1
    • Lift and remove the microphone assembly out of the upper case.

Заключение

To reassemble your device, follow these instructions in reverse order.

Andrew Optimus Goldheart

Участник с: 10/17/09

502 755 Репутация

Автор 407 руководств

Команда

iFixit Участник iFixit

Staff

135 членов

Автор 16 732 руководств

0 Комментариев

Добавить комментарий

Просмотр статистики:

За последние 24часов: 0

За последние 7 дней: 0

За последние 30 дней: 0

За всё время: 106