Этот документ имеет более свежие изменения. Перейти к последней непроверенной версии.
Введение
Use this guide to upgrade or replace the solid-state drive in a MacBook Pro 13” Mid 2014. This MacBook Pro uses a proprietary storage drive connector, and is therefore not compatible with common M.2 drives without the use of an adapter.
Before you perform this repair, if at all possible, back up your existing SSD. Then, either familiarize yourself with internet recovery or create a bootable external drive so you’ll be ready to install macOS onto your new drive and migrate your data to the new SSD.
Finally, we strongly recommend installing macOS 10.13 High Sierra (or a later macOS) before replacing the original SSD from your MacBook Pro. Most new SSDs require updated storage drivers not found in versions of macOS prior to High Sierra.
Выберете то, что вам нужно
-
-
Remove the following ten screws securing the lower case to the upper case:
-
Two 2.3 mm P5 Pentalobe screws
-
Eight 3.0 mm P5 Pentalobe screws
-
-
-
Wedge your fingers between the upper case and the lower case.
-
Gently pull the lower case away from the upper case to remove it.
-
-
-
-
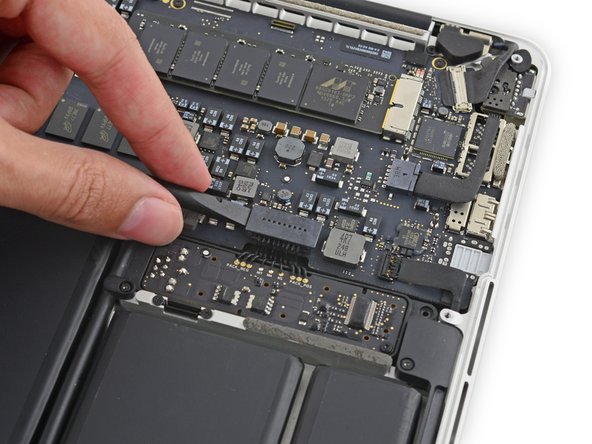
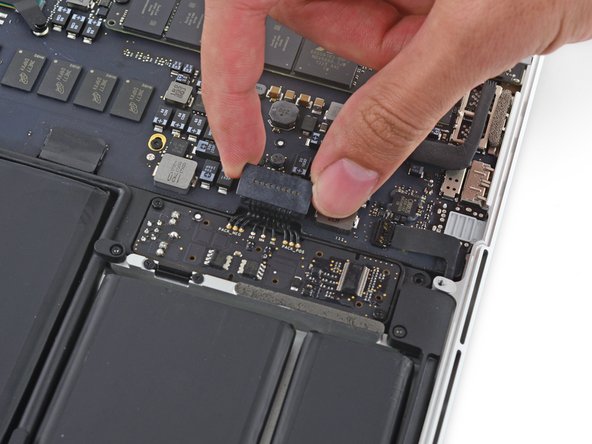
Use the flat end of a spudger to lift the battery connector straight up out of its socket on the logic board.
-
-
-
Lift the free end of the SSD up slightly and pull the SSD straight out of its socket on the logic board.
-
To reassemble your device, follow these instructions in reverse order.
To reassemble your device, follow these instructions in reverse order.
Отменить: Я не выполнил это руководство.
169 участников успешно повторили данное руководство.
78 Комментариев
Hello
Can you confirm that the ssd for the macbook pro mid 2014 really is replaceable?
I hear rumours that the ssd is stuck to the motherbord.
I changed the MacBook Pro 13' Mid 2014 SSD successfully from 120GB to 1000GB. Follow all the steps provided and everything will be fine.
I spoke with an apple expert at the genius bar and they said that the SSD is Soldered into the motherboard itself. Which is why I bought another MacBook pro for $1500 after mine had corrupted. Once I was informed you could change it out, I filed a complaint with Apple's Tech Support, which they did nothing about and said that their employees were uninformed.
Yes, I just replaced my MBP Mid 2014 128GB SSD with 480GB SSD. So, I can confirm it works.
Why is it necessary to disconnect the battery for the SSD replacement?


