Эта версия возможно содержит некорректные исправления. Переключить на последнюю проверенную версию.
Выберете то, что вам нужно
-
Этот шаг не переведен. Помогите перевести
-
Power on your Mac and launch Terminal.
-
Copy and paste the following command (or type it exactly) into Terminal:
-
sudo nvram AutoBoot=%00
-
Press [return]. If prompted, enter your administrator password and press [return] again. Note: Your return key may also be labeled ⏎ or "enter."
-
sudo nvram AutoBoot=%03
-
-
Этот шаг не переведен. Помогите перевести
-
Use a P5 Pentalobe driver to remove six screws securing the lower case, of the following lengths:
-
Four 3.7 mm screws
-
Two 7.3 mm screws
-
-
Этот шаг не переведен. Помогите перевести
-
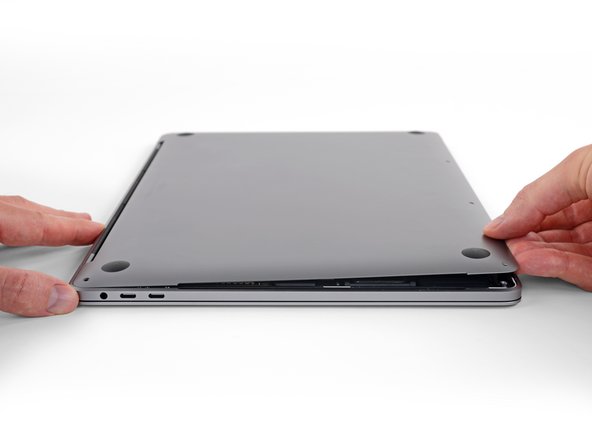
Press a suction handle into place near the front edge of the lower case, between the screw holes.
-
Pull up on the suction handle just enough to open a small gap under the lower case.
-
-
Этот шаг не переведен. Помогите перевести
-
Slide the corner of an opening pick into the gap you just created underneath the lower case.
-
Slide the opening pick around the nearest corner and then halfway up the side of the MacBook Pro.
-
-
Этот шаг не переведен. Помогите перевести
-
Repeat the previous step on the other side, using an opening pick to to release the second clip.
-
-
Этот шаг не переведен. Помогите перевести
-
Lift the front edge of the lower case (the side opposite the display hinge) enough to slide your fingertips underneath and get a good grip on it.
-
-
Этот шаг не переведен. Помогите перевести
-
Pull firmly to slide the lower case towards the front edge of the MacBook (away from the hinge area) to separate the last of the clips securing the lower case.
-
Pull first at one corner, then the other.
-
-
Этот шаг не переведен. Помогите перевести
-
Remove the lower case.
-
Set it in place and align the sliding clips near the display hinge. Press down and slide the cover toward the hinge. It should stop sliding as the clips engage.
-
When the sliding clips are fully engaged and the lower case looks correctly aligned, press down firmly on the lower case to engage the four hidden clips underneath. You should feel and hear them snap into place.
-
-
Этот шаг не переведен. Помогите перевести
-
Peel up and remove the insulating sticker covering the battery board, on the edge of the logic board nearest the battery.
-
If the cover doesn't peel up easily, apply mild heat with an iOpener, hair dryer, or heat gun to soften the adhesive underneath, and try again.
-
-
Этот шаг не переведен. Помогите перевести
-
Peel back any tape covering the battery board data cable connector.
-
-
Этот шаг не переведен. Помогите перевести
-
Use a spudger to gently pry up the locking flap on the ZIF connector for the battery board data cable.
-
-
Этот шаг не переведен. Помогите перевести
-
Disconnect the battery board data cable by sliding it out from its socket on the logic board.
-
-
Этот шаг не переведен. Помогите перевести
-
Peel back any tape covering the battery board data cable connector.
-
Pry up and disconnect the locking flap on the connector at the opposite end of the battery board data cable.
-
-
-
Этот шаг не переведен. Помогите перевести
-
Slide the battery board data cable out of its socket on the battery board, and remove it completely.
-
-
Этот шаг не переведен. Помогите перевести
-
Use a T5 Torx driver to remove the 6.7 mm pancake screw securing the battery power connector.
-
-
Этот шаг не переведен. Помогите перевести
-
Use a spudger to lift the battery power connector, disconnecting the battery.
-
-
Этот шаг не переведен. Помогите перевести
-
Use a T3 Torx driver to remove the two 3.5 mm screws securing the cover on the display board flex cable.
-
Remove the display board flex cover.
-
-
Этот шаг не переведен. Помогите перевести
-
Use a T3 Torx driver to remove the two 1.7 mm screws securing the bracket for the display board cable connector.
-
Remove the display board cable connector bracket.
-
-
Этот шаг не переведен. Помогите перевести
-
Pry the display board flex cable straight up from its socket to disconnect it from the display board.
-
-
Этот шаг не переведен. Помогите перевести
-
Use a T3 Torx driver to remove the four 2.0 mm screws from the hinge covers (two screws on each side).
-
-
Этот шаг не переведен. Помогите перевести
-
Use a T5 Torx driver to remove the single 2.9 mm screw securing the antenna cable bundle.
-
-
Этот шаг не переведен. Помогите перевести
-
Disconnect all three antenna cables by prying each one straight up from its socket.
-
Slide your tweezers or the flat end of your spudger underneath each cable until it's near the socket, and then gently twist or pry up to disconnect it.
-
-
Этот шаг не переведен. Помогите перевести
-
Use a T5 Torx driver to remove the four 3.3 mm screws securing the display board.
-
Make sure the display board flex cable lies on top of the board, not trapped underneath.
-
-
Этот шаг не переведен. Помогите перевести
-
Use a P2 Pentalobe driver to remove the sixteen 1.5 mm screws securing the antenna assembly (eight on each side).
-
-
Этот шаг не переведен. Помогите перевести
-
Use an opening pick to pry up the antenna assembly and separate it from the MacBook Pro.
-
-
Этот шаг не переведен. Помогите перевести
-
Carefully remove the antenna assembly, while simultaneously feeding the antenna cable bundle out from underneath the heat sink.
-
-
Этот шаг не переведен. Помогите перевести
-
Use a T3 Torx driver to remove the four 3.9 mm screws securing the display cable cover springs.
-
-
Этот шаг не переведен. Помогите перевести
-
Use a T8 Torx driver to remove two 5.0 mm screws from each hinge (four screws total).
-
-
Этот шаг не переведен. Помогите перевести
-
Using a T3 Torx driver, remove the two 1.5 mm screws securing the cover bracket for the Touch Bar digitizer and lid angle sensor connectors.
-
-
Этот шаг не переведен. Помогите перевести
-
Using your tweezers, slide the bracket toward the side edge of the MacBook Pro until it clears the slotted retaining tab on the logic board.
-
Remove the bracket.
-
-
Этот шаг не переведен. Помогите перевести
-
Disconnect the lid angle sensor cable by prying it straight up from the logic board.
-
-
Этот шаг не переведен. Помогите перевести
-
Use a P2 Pentalobe driver to remove the 1.9 mm-long screw securing the lid angle sensor.
-
-
Этот шаг не переведен. Помогите перевести
-
Use tweezers, or your fingers, to pull the lid angle sensor up from the frame and release it from its metal peg.
-
Remove the lid angle sensor.
-
-
Этот шаг не переведен. Помогите перевести
-
If you plan to re-use your screen, open it and apply a piece of tape to the glass directly above each hinge. This helps protect the glass from getting scratched in the following step.
-
Fully open the screen and stand your MacBook Pro up on one side.
-
-
Этот шаг не переведен. Помогите перевести
-
Use a T8 Torx driver to remove the two remaining 5.0 mm hinge screws (one from each hinge).
-
Remove the topmost screw last, using one hand to steady both halves of the MacBook Pro to make sure they don't separate and fall over unexpectedly.
-
-
Этот шаг не переведен. Помогите перевести
-
Push both halves of the MacBook Pro together so that the hinges can be lifted clear of their recesses in the chassis.
-
Push the main body of the MacBook Pro away from you while pulling the screen toward you to separate it.
-


Отменить: Я не выполнил это руководство.
41 участников успешно повторили данное руководство.


20 Комментариев
Anybody know the screen part# or where to find it?
Ou est ce qu’on trouve l’écran ?
Ou est ce qu’on trouve l’écran ?
Is it possible to boot up the machine without the screen attached (and use external displays only)?
yes USBC to HDMI
jim -