Введение
In this guide, you will be able to replace a damaged keyboard on your MacBook with a new keyboard or a backlit one.
Выберете то, что вам нужно
-
-
Let's Start:
-
Shut down the Mac and lay it upside-down.
-
Press the little lever to raise the access door.
-
-
-
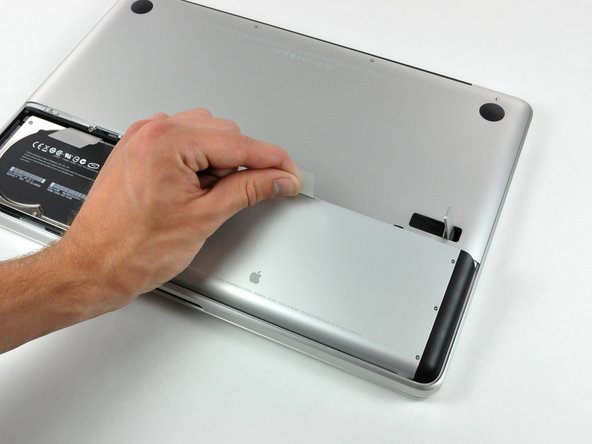
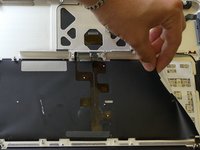
Pull the battery straight out of the MacBook using the plastic tab connected to the battery.
-
-
-
Remove the eight screws located on the bottom of the MacBook.
-
One 3 mm Phillips screw
-
Three 13.5 mm Phillips screws
-
Four 3.5 mm Phillips screws
-
-
-
Remove the three screws holding the fan in place.
-
Two 5 mm Phillips screws
-
One 7 mm Phillips screw
-
-
-
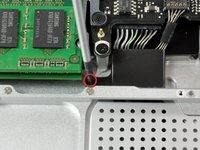
Remove the Phillips screw securing the battery cable cover.
-
Lift the cover straight from the upper-case.
-
-
-
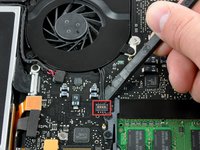
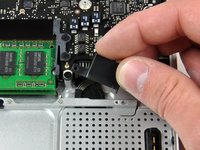
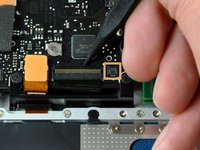
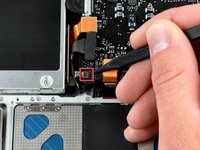
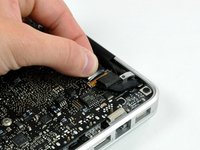
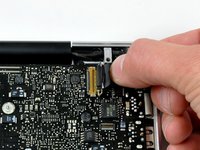
Use the spudger to pry the battery level indicator straight from the logic board.
-
-
Инструмент, используемый на этом этапе:Tweezers$4.99
-
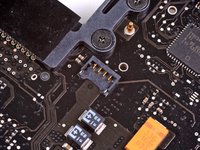
Pull the battery cable away from the logic board.
-
-
-
-
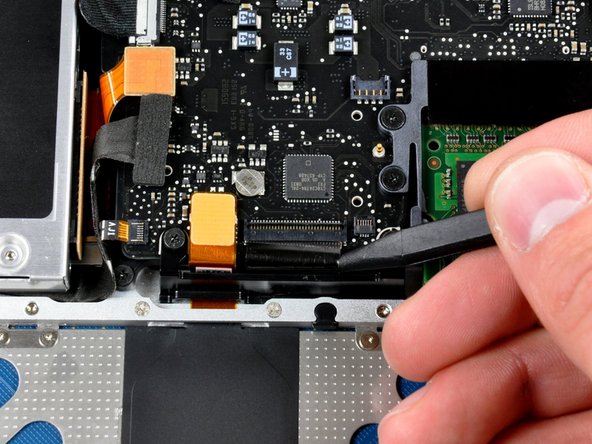
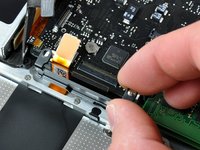
Use the tip of the spudger to lift the keyboard cable retaining flap.
-
Pull the cable away from its socket to disconnect it. Make sure you lift the retaining flap before pulling the cable or you could damage it.
-
Disconnect the cable on the right if your Mac has this. This cable is the backlight on the keyboard. Remove it in a similar way as above.
-
-
-
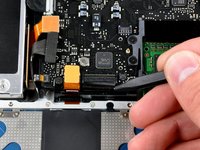
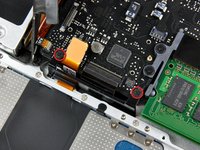
Use the flat end of the spudger to pry the trackpad cable straight from the logic board.
-
-
-
Remove the two 5mm Phillips screws securing the keyboard flex bracket to the upper case.
-
Lift it straight from the upper-case.
-
-
-
Use the tip of the spudger to lift the IR and sleep sensor retaining flap.
-
Pull the ribbon cable away from the logic board.
-
-
-
Use the flat end of the spudger to pry the hard drive cable straight from the logic board.
-
-
-
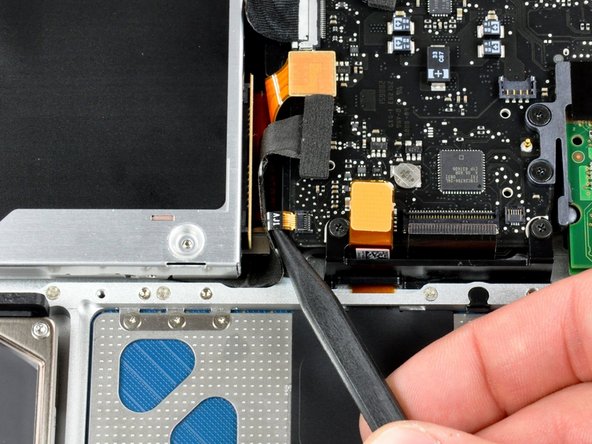
Now, pry the optical drive cable straight from the logic board using the spudger.
-
-
-
Use the flat end of the spudger to pry the subwoofer cable straight from the logic board.
-
-
-
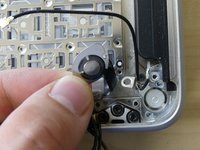
Pull the subwoofer out of the upper-case. The right speaker is still connected, so do not pull it out completely.
-
-
-
Remove the three screws securing the optical drive.
-
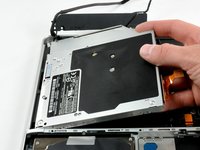
Pull the Optical Drive out of the upper-case.
-
-
-
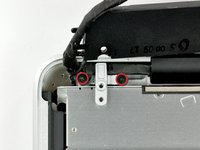
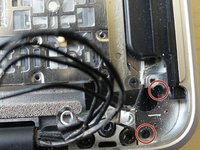
Remove the two 4 mm Phillips screws securing this bracket.
-
Lift it out of the upper-case.
-
-
-
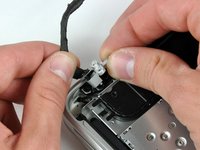
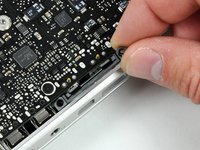
Use the plastic tab on the the display cable and rotate it towards the DC-in part of the Mac.
-
Pull it away from the logic board.
-
-
-
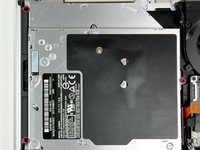
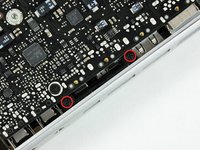
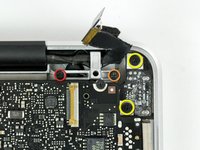
Remove the four Phillips screws as located in the picture.
-
One 7mm Phillips screw
-
One 5mm Phillips screw
-
Two 7 mm Phillips screws
-
These screws secure the DC-in board.
-
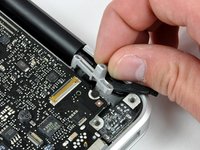
Remove the bracket securing the display cable.
-
-
-
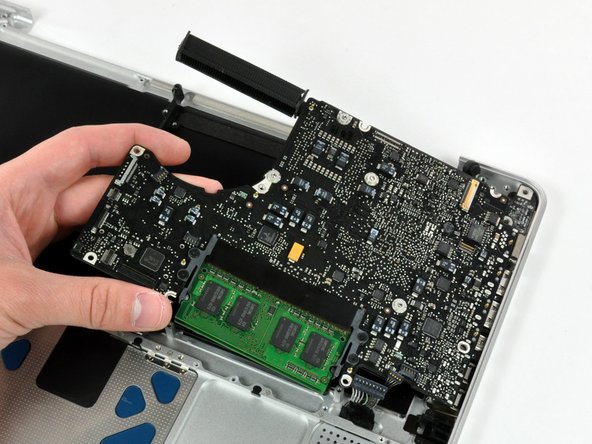
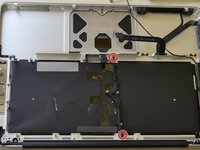
Remove the screws securing the logic board.
-
Four 3mm Phillips screws
-
One 3.5mm Phillips screw
-
The DC-in board screws should already be removed at this point.
-
Lift the logic board out of the case as show in the picture.
-
-
-
Alright guys, we are almost done. Your MacBook will probably look something like this.
-
-
-
Remove the two screws holding the keyboard bracket.
-
Lift the bracket out of the upper-case.
-
-
-
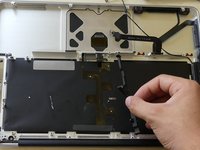
There is a very thin piece of plastic glued to the keyboard. Start at the edge and slowly lift it from the upper-case as shown in the image.
-
-
-
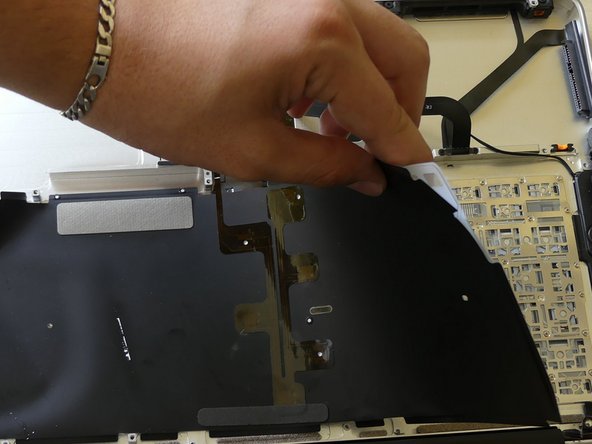
There is a hard, transparent piece of plastic on the keyboard; lift that straight out of the upper-case.
-
-
-
Remove the two tiny screws securing the power button.
-
Lift it from of the upper-case.
-
-
-
Now the very long and slightly annoying part. There are about 65 Phillips screws securing the keyboard. Yes, you have to remove all of them. Good luck!
-
-
-
After you have removed the screws, lift the keyboard out of the upper-case. The power button will come with the keyboard.
-
The keys will not fall out, they are all connected to the metal base of the keyboard.
-


Almost done! Insert the new keyboard in your MacBook and follow these steps in reverse order to put your MacBook back together.
Almost done! Insert the new keyboard in your MacBook and follow these steps in reverse order to put your MacBook back together.
Отменить: Я не выполнил это руководство.
Еще один человек закончил это руководство.
