Перейти к основному содержанию

Mad Catz Dual Force 2 Pro Motherboard Replacement

Выберете то, что вам нужно

  1. Mad Catz Dual Force 2 Pro Motherboard Replacement, Motherboard: шаг 1, изображение 1 из 1
    • Remove the six 7 mm Phillips screws from the rear cover.

  2. Mad Catz Dual Force 2 Pro Motherboard Replacement: шаг 2, изображение 1 из 1
    • Remove the back of the controller.

    • There are no loose items in the controller that can fall out, so you can open it, generally, however you want.

  3. Mad Catz Dual Force 2 Pro Motherboard Replacement: шаг 3, изображение 1 из 1
    • Remove the two 7 mm screws on the closest circuit board.

  4. Mad Catz Dual Force 2 Pro Motherboard Replacement: шаг 4, изображение 1 из 2 Mad Catz Dual Force 2 Pro Motherboard Replacement: шаг 4, изображение 2 из 2
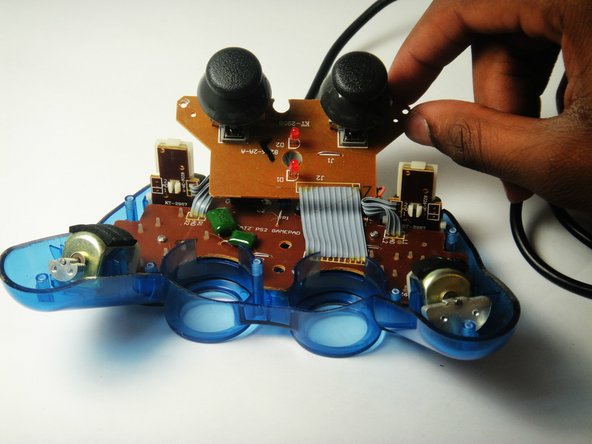
    • Lift the closest circuit board away from the motherboard.

    • Be sure you do not tear the ribbon connecting the smaller circuit board to the motherboard.

  5. Mad Catz Dual Force 2 Pro Motherboard Replacement: шаг 5, изображение 1 из 1
    • Remove the two 7 mm Philip screws on the motherboard.

  6. Mad Catz Dual Force 2 Pro Motherboard Replacement: шаг 6, изображение 1 из 1
    • Remove the motherboard assembly from the cover.

Заключение

To reassemble your device, follow these instructions in reverse order.

Еще один человек закончил это руководство.

Alexander Coyne

Участник с: 01/11/15

658 Репутация

Автор 5 руководств

Команда

USF Tampa, Team 7-2, Remmell Winter 2015 Участник USF Tampa, Team 7-2, Remmell Winter 2015

USFT-REMMELL-W15S7G2

4 членов

Автор 10 руководств

0 Комментариев

Добавить комментарий

Просмотр статистики:

За последние 24часов: 2

За последние 7 дней: 7

За последние 30 дней: 16

За всё время: 589