Перейти к основному содержанию

Mad Catz Street Fighter IV FightPad Front Case Replacement

Выберете то, что вам нужно

  1. Mad Catz Street Fighter IV FightPad Front Case Replacement, Rear and Side Case: шаг 1, изображение 1 из 1
    • Use tweezers to completely remove the sticker from the rear of controller.

  2. Mad Catz Street Fighter IV FightPad Front Case Replacement: шаг 2, изображение 1 из 1
    • Find the seven 8.3 mm Phillips screws on the rear of the controller and remove them.

  3. Mad Catz Street Fighter IV FightPad Front Case Replacement: шаг 3, изображение 1 из 2 Mad Catz Street Fighter IV FightPad Front Case Replacement: шаг 3, изображение 2 из 2
    • Use a plastic opening tool to separate the rear and front casing by inserting it in-between the two cases.

    • Use the plastic opening tool to pry the two cases apart.

  4. Mad Catz Street Fighter IV FightPad Front Case Replacement: шаг 4, изображение 1 из 2 Mad Catz Street Fighter IV FightPad Front Case Replacement: шаг 4, изображение 2 из 2
    • Remove the two rubber side grips.

  5. Mad Catz Street Fighter IV FightPad Front Case Replacement, RS-DP-LS Switch: шаг 5, изображение 1 из 2 Mad Catz Street Fighter IV FightPad Front Case Replacement, RS-DP-LS Switch: шаг 5, изображение 2 из 2
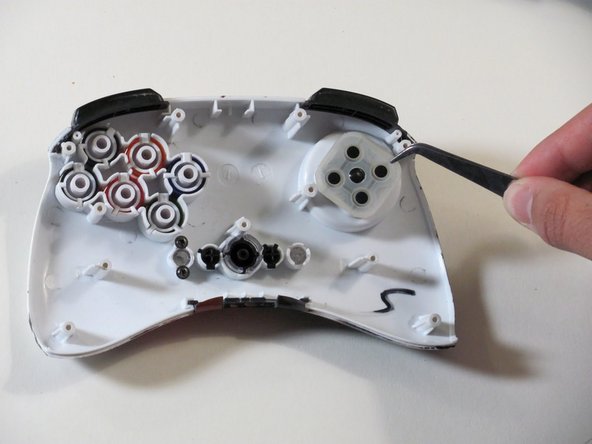
    • Locate RS-DP-LS switch.

    • Pull upwards on the switch to remove it.

  6. Mad Catz Street Fighter IV FightPad Front Case Replacement, Circuit Board: шаг 6, изображение 1 из 1
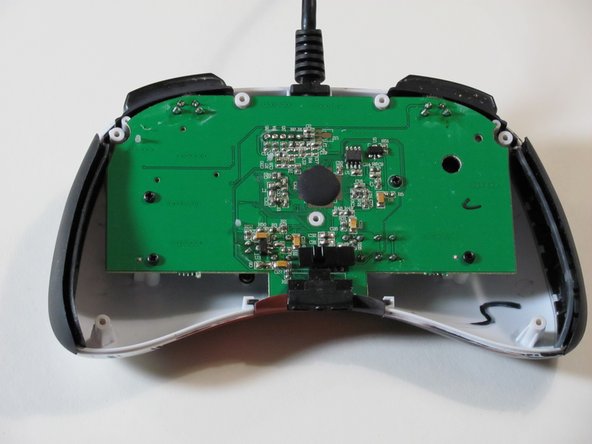
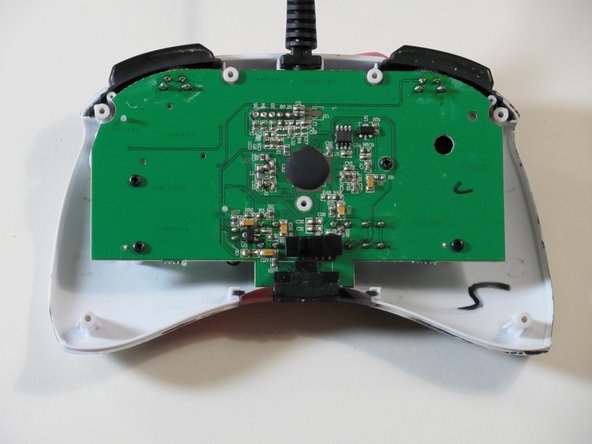
    • Locate the four 8.3 mm Phillips screws on the circuit board and remove them.

  7. Mad Catz Street Fighter IV FightPad Front Case Replacement: шаг 7, изображение 1 из 3 Mad Catz Street Fighter IV FightPad Front Case Replacement: шаг 7, изображение 2 из 3 Mad Catz Street Fighter IV FightPad Front Case Replacement: шаг 7, изображение 3 из 3
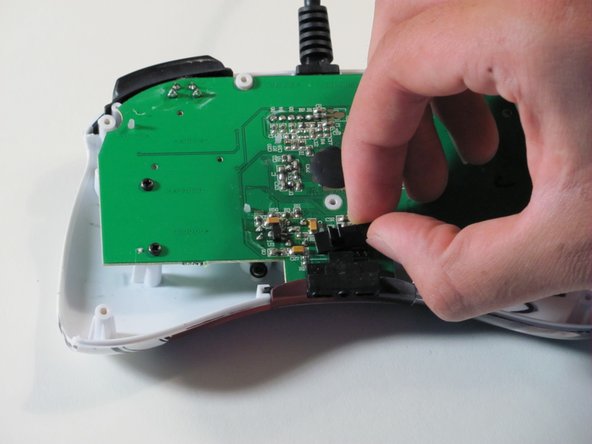
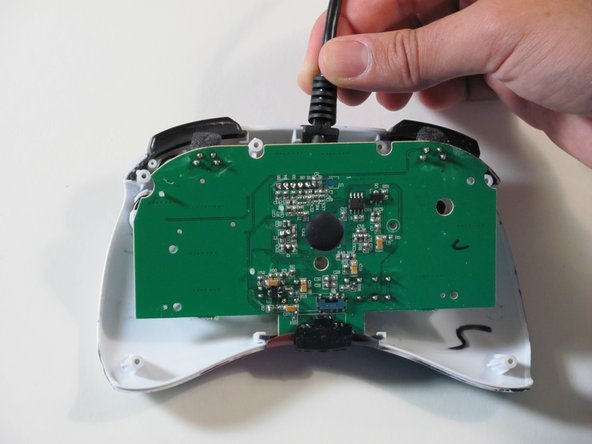
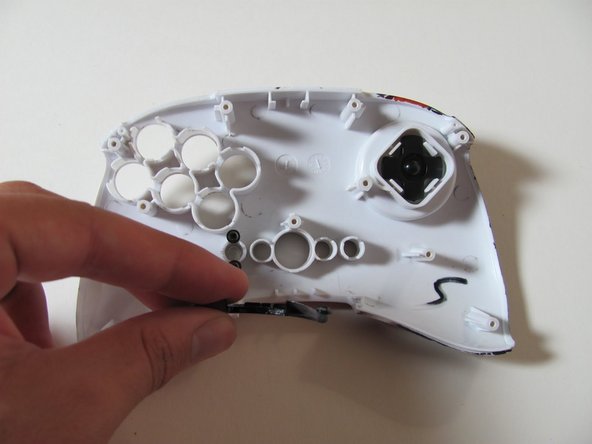
    • Hold the controller cable at the area just before it meets the controller and slowly lift upwards to slide it out of its plastic slot and remove the circuit board.

    • Be careful with the wires connected to the circuit board itself as they are thin and delicate.

    • When reassembling the controller, make sure that the bottom plastic piece is fully inserted into its slot before replacing the circuit board.

  8. Mad Catz Street Fighter IV FightPad Front Case Replacement, Buttons: шаг 8, изображение 1 из 2 Mad Catz Street Fighter IV FightPad Front Case Replacement, Buttons: шаг 8, изображение 2 из 2
    • Remove the six buttons one by one by gripping the back of each one and pushing on them from the front.

    • Use tweezers to remove the rubber part of the directional pad before you try to remove the shoulder buttons.

    • When reinserting the buttons make sure they are in the correct place and oriented correctly.

  9. Mad Catz Street Fighter IV FightPad Front Case Replacement: шаг 9, изображение 1 из 1
    • Remove the left and right shoulder buttons by sliding them out of their respective slots.

  10. Mad Catz Street Fighter IV FightPad Front Case Replacement, Front Case: шаг 10, изображение 1 из 2 Mad Catz Street Fighter IV FightPad Front Case Replacement, Front Case: шаг 10, изображение 2 из 2
    • Pull the plastic piece out from the bottom of the controller.

Заключение

To reassemble your device, follow these instructions in reverse order.

Еще один человек закончил это руководство.

Eric

Участник с: 09/26/12

117 Репутация

Автор 3 руководств

Команда

Cal Poly, Team 1-7, Propen Fall 2012 Участник Cal Poly, Team 1-7, Propen Fall 2012

CPSU-PROPEN-F12S1G7

4 членов

Автор 14 руководств

0 Комментариев

Добавить комментарий

Просмотр статистики:

За последние 24часов: 0

За последние 7 дней: 1

За последние 30 дней: 3

За всё время: 1,450