Перейти к основному содержанию

Magellan RoadMate 5120-LMTX Antenna Replacement

Выберете то, что вам нужно

  1. Magellan RoadMate 5120-LMTX Antenna Replacement, Back Cover: шаг 1, изображение 1 из 3 Magellan RoadMate 5120-LMTX Antenna Replacement, Back Cover: шаг 1, изображение 2 из 3 Magellan RoadMate 5120-LMTX Antenna Replacement, Back Cover: шаг 1, изображение 3 из 3
    • Power off the Magellan RoadMate before beginning.

    • Remove the six 5mm Phillips #00 screws from the back of device.

  2. Magellan RoadMate 5120-LMTX Antenna Replacement: шаг 2, изображение 1 из 3 Magellan RoadMate 5120-LMTX Antenna Replacement: шаг 2, изображение 2 из 3 Magellan RoadMate 5120-LMTX Antenna Replacement: шаг 2, изображение 3 из 3
    • Pry back cover off with a plastic opening tool just enough to see where the speaker is attached to the motherboard.

    • Do not fully open the back cover or you risk damaging the speaker wire.

    • Use a spudger to disconnect the speaker connection from the motherboard.

  3. Magellan RoadMate 5120-LMTX Antenna Replacement, Motherboard: шаг 3, изображение 1 из 3 Magellan RoadMate 5120-LMTX Antenna Replacement, Motherboard: шаг 3, изображение 2 из 3 Magellan RoadMate 5120-LMTX Antenna Replacement, Motherboard: шаг 3, изображение 3 из 3
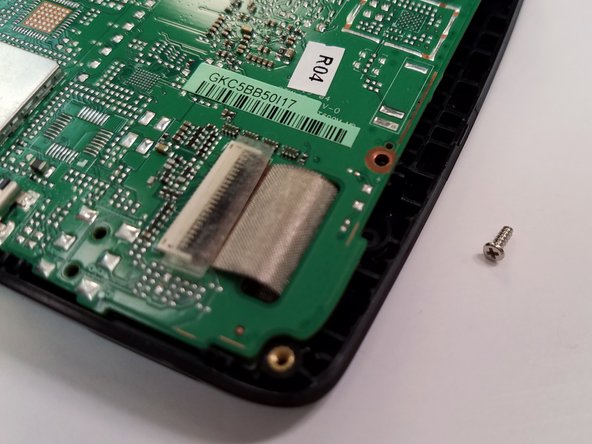
    • There will be two 5mm Phillips #00 screws that need to be removed from the motherboard.

  4. Magellan RoadMate 5120-LMTX Antenna Replacement: шаг 4, изображение 1 из 3 Magellan RoadMate 5120-LMTX Antenna Replacement: шаг 4, изображение 2 из 3 Magellan RoadMate 5120-LMTX Antenna Replacement: шаг 4, изображение 3 из 3
    • Some devices may have a piece of tape or plastic over the ribbon cable latch. If your device has this, remove it before continuing.

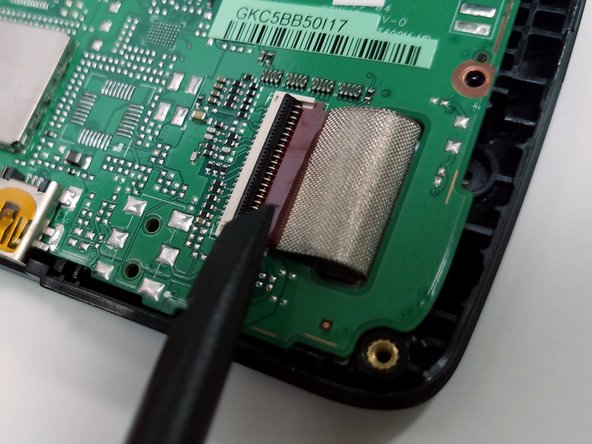
    • Carefully lift the black ribbon cable latch upwards with a spudger or other similar tool.

    • Once the ribbon cable latch is opened, insert the pointed end of the spudger, or other similar tool, underneath the ribbon cable.

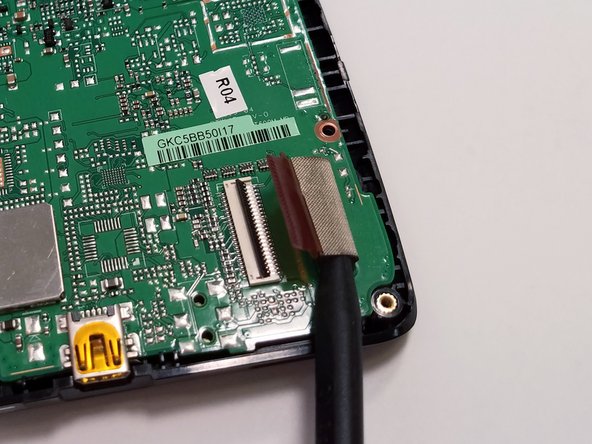
    • Slowly pull out the ribbon cable in a straight, flat motion with respect to the latch.

  5. Magellan RoadMate 5120-LMTX Antenna Replacement: шаг 5, изображение 1 из 2 Magellan RoadMate 5120-LMTX Antenna Replacement: шаг 5, изображение 2 из 2
    • Be careful not to touch any of the electrical components on the motherboard as damage may ensue.

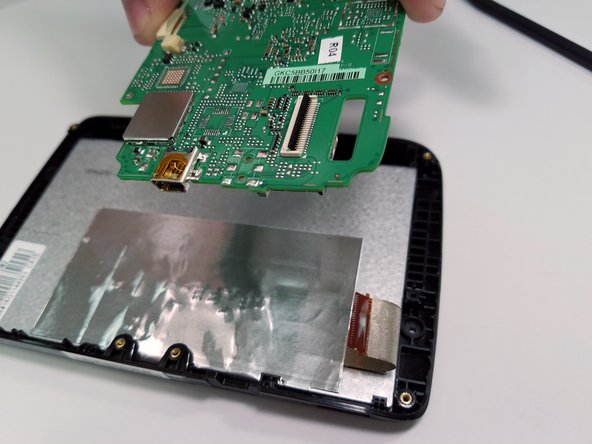
    • Carefully lift the motherboard out of the plastic housing by the edges while guiding the ribbon cable through the slot.

    • Store the motherboard on a safe non-conductive surface, preferably an anti-static mat.

  6. Magellan RoadMate 5120-LMTX Antenna Replacement, Antenna: шаг 6, изображение 1 из 2 Magellan RoadMate 5120-LMTX Antenna Replacement, Antenna: шаг 6, изображение 2 из 2
    • Remove the two 2.4mm Phillips #00 screws that hold the antenna to the motherboard.

  7. Magellan RoadMate 5120-LMTX Antenna Replacement: шаг 7, изображение 1 из 3 Magellan RoadMate 5120-LMTX Antenna Replacement: шаг 7, изображение 2 из 3 Magellan RoadMate 5120-LMTX Antenna Replacement: шаг 7, изображение 3 из 3
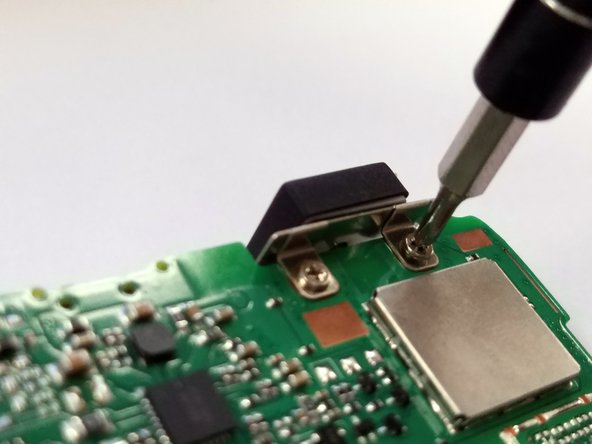
    • Flip the motherboard over and locate the soldered antenna connection.

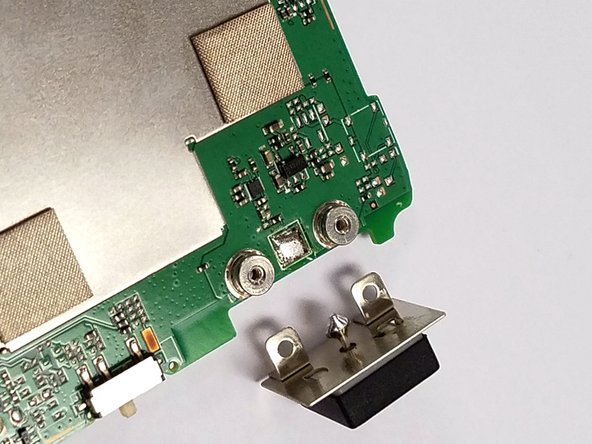
    • Melt the existing solder with the tip of your soldering iron while gently pulling on the antenna. The antenna should come off easily.

    • When reassembling your device, attach your new antenna to the motherboard using the two 2.4mm Phillips #00 screws before soldering. This will help to align the parts properly and make them easier to solder.

Заключение

To reassemble your device, follow all instructions before soldering step in reverse order.

Steven Prout

Участник с: 10/08/16

231 Репутация

Автор 2 руководств

Команда

IUPUI, Team 4-4, Wilson Fall 2016 Участник IUPUI, Team 4-4, Wilson Fall 2016

IUPUI-WILSON-F16S4G4

4 членов

Автор 6 руководств

0 Комментариев

Добавить комментарий

Просмотр статистики:

За последние 24часов: 2

За последние 7 дней: 3

За последние 30 дней: 3

За всё время: 176