Перейти к основному содержанию

Magellan RoadMate 5120-LMTX Battery Replacement

Выберете то, что вам нужно

  1. Magellan RoadMate 5120-LMTX Battery Replacement, Back Cover: шаг 1, изображение 1 из 3 Magellan RoadMate 5120-LMTX Battery Replacement, Back Cover: шаг 1, изображение 2 из 3 Magellan RoadMate 5120-LMTX Battery Replacement, Back Cover: шаг 1, изображение 3 из 3
    • Power off the Magellan RoadMate before beginning.

    • Remove the six 5mm Phillips #00 screws from the back of device.

  2. Magellan RoadMate 5120-LMTX Battery Replacement: шаг 2, изображение 1 из 3 Magellan RoadMate 5120-LMTX Battery Replacement: шаг 2, изображение 2 из 3 Magellan RoadMate 5120-LMTX Battery Replacement: шаг 2, изображение 3 из 3
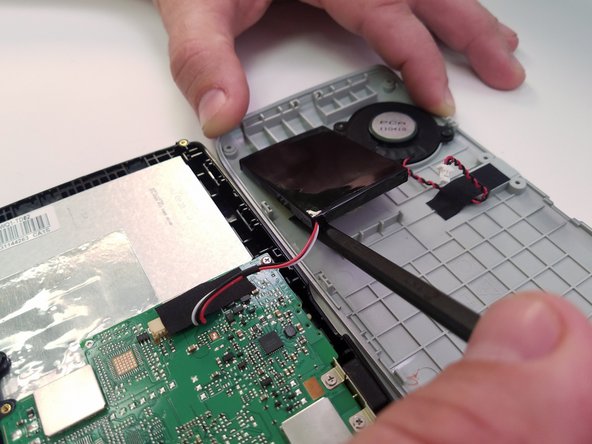
    • Pry back cover off with a plastic opening tool just enough to see where the speaker is attached to the motherboard.

    • Do not fully open the back cover or you risk damaging the speaker wire.

    • Use a spudger to disconnect the speaker connection from the motherboard.

  3. Magellan RoadMate 5120-LMTX Battery Replacement, Battery: шаг 3, изображение 1 из 2 Magellan RoadMate 5120-LMTX Battery Replacement, Battery: шаг 3, изображение 2 из 2
    • Run the tip of a spudger between the battery and the housing to loosen the double-sided tape holding the battery in.

    • Still using the spudger tool, pry the battery from the housing.

    • If you damage the tape while trying to remove the battery, you can replace it with any double-sided tape.

  4. Magellan RoadMate 5120-LMTX Battery Replacement: шаг 4, изображение 1 из 3 Magellan RoadMate 5120-LMTX Battery Replacement: шаг 4, изображение 2 из 3 Magellan RoadMate 5120-LMTX Battery Replacement: шаг 4, изображение 3 из 3
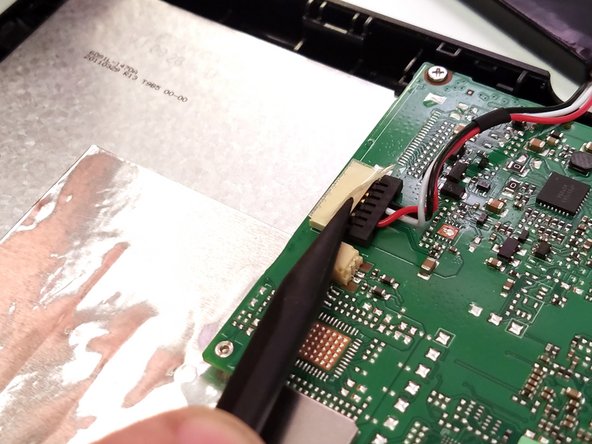
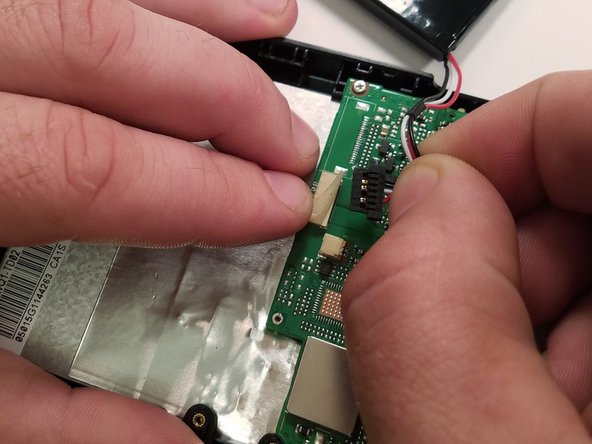
    • Pull the edge of the tape up to remove the tape that holds the battery wire to the motherboard.

    • There is a clear rectangular adhesive strip that also needs to be removed with the pointy end of a spudger.

    • Slowly pull the connection from the motherboard.

    • Do not pull too hard or you will risk damaging the wires.

Заключение

To reassemble your device, follow these instructions in reverse order.

Steven Prout

Участник с: 10/08/16

231 Репутация

Автор 2 руководств

Команда

IUPUI, Team 4-4, Wilson Fall 2016 Участник IUPUI, Team 4-4, Wilson Fall 2016

IUPUI-WILSON-F16S4G4

4 членов

Автор 6 руководств

0 Комментариев

Добавить комментарий

Просмотр статистики:

За последние 24часов: 2

За последние 7 дней: 3

За последние 30 дней: 5

За всё время: 475