Введение
The charging port bay is responsible for charging the battery of the Marshall Emberton. With constant plugging and unplugging, the charging port develops breakage. With the help of this guide you will be able to locate the charging port and on how to remove and replace it. The charging port bay is a small piece located by the battery. When replacing the charging port bay or locating it you must be very careful due to it's location inside the speaker.
Выберете то, что вам нужно
-
-
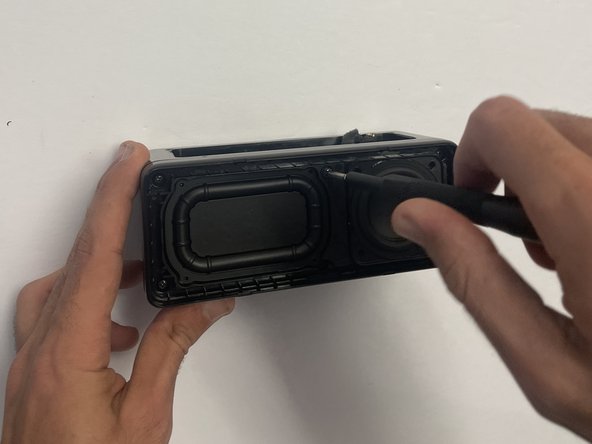
In order to start uncrewing any of the screws off the speaker we have to take off the protective cover.
-
-
-
In order to get inside the speaker you will have to unscrew the screws on the side.
-
-
-
Prying the front of the speaker where it says "Marshall" in order to get into the insides of the speaker.
-
-
-
-
Once the "Marshall" part of the speaker is off this is how it will look. It's another protective layer that needs to be removed.
-
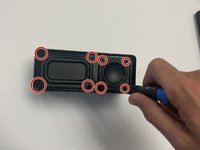
When removing all of the eight 1cm screws that are on the protective layer, will give us access to the insides of the speaker.
-
-
-
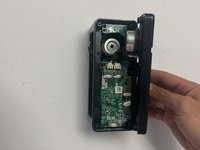
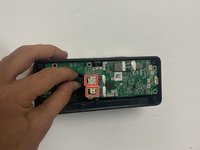
Once speaker is opened the motherboard will be the first thing that is seen. Then you will have to look for the 6 1cm screws (Shown in photograph)
-
-
-
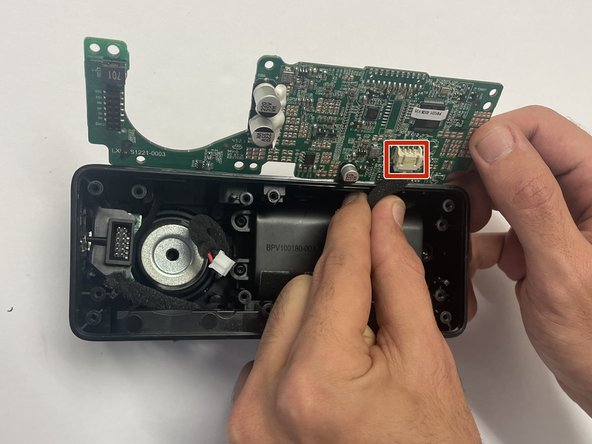
Once screws are all off, there will be a wire (red/black) that will need to be disconnected from the motherboard.
-
Once the first wire is disconnected from the motherboard, you will then have to flip it over and do the same on the bottom side of the motherboard.
-
Once those wires are disconnected from the motherboard it will simply come right out.
-
-
-
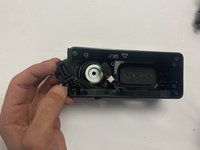
Once the motherboard is pulled out, you will be able to locate the charging port on the left side.
-
Once it is located there will be 2 1.2 cm screws that will need to be removed.
-
Once removed the charging port will be out.
-


To reassemble your device, follow these instructions in reverse order.
To reassemble your device, follow these instructions in reverse order.
Отменить: Я не выполнил это руководство.
3 человек успешно провели ремонт по этому руководству.
Команду

CSU Los Angeles, Team 5-1, Adachi Fall 2022 Участник CSU Los Angeles, Team 5-1, Adachi Fall 2022
CSULA-ADACHI-F22S5G1
5 членов
Автор 6 руководств
10 Комментариев
Hello. Nice guide for this. Next question😉 where can i buy a New bay? 🤔 Mine is very boken 😆
/Peter