Введение
The door lock system on a W123 is controlled entirely by vacuum. It is a system made of many parts and can be complicated to diagnose properly if you've never done it before, and especially if the system has been left to deteriorate for some time.
The first step to fixing the system is to properly diagnose it. Vacuum components, such as door and trunk lock actuators, can be quite expensive so replacing only those that need it will save you time and money over throwing parts at the system in an effort to fix it.
This guide will walk you through diagnosis of the vacuum door lock system on an early style W123 with the four diaphragm door lock vacuum actuators. However, the technique applies to later models as well; the actuators work the same despite looking different.
As the guide progresses, you may consider replacing all of the "Y" and "X" connectors for the lock system since you will be disconnecting most of the hard plastic lines from them anyway. Old rubber connectors can sometimes swell around the hard plastic lines and no longer hold a tight vacuum. This might lead to very slow leaks, but leaks nonetheless. New ones are inexpensive and can help create a very tight system along with repairs to any leaking actuators or cracked hard lines.
Note - if you find that part of your leak is due to old and cracked diaphragms on your early style door lock vacuum actuators, see the repair guide under the Mercedes W123 repair section to learn how to fix these without replacing the entire assembly.
Выберете то, что вам нужно
-
-
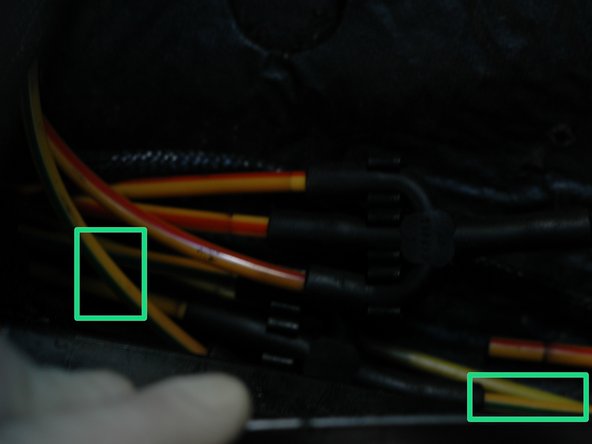
Begin under the hood of the car, on the driver's side, back near the large round brake booster. You will see a yellow check valve with two connections coming from it. One connection is a 3-way "Y" connection with two yellow lines coming out of it. This is the feed for the vacuum door lock system.
-
Pull all three lines from the check valve and test it. Use your mouth to suck and blow in to the single connection side of the check valve. If you can suck AND blow, the valve is bad and will need to be replaced. If air will only travel one way, the valve is OK.
-
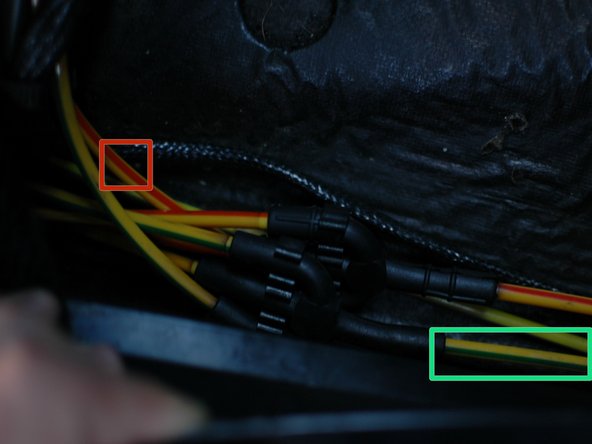
Connect your hand vacuum gauge to the yellow line with the grey stripe. Use your pump to pull a vacuum of about 10 to 15Hg in the tank. It will take a LOT of pumping but it's worth it to know if your tank is leaking. When you've pulled that vacuum walk away for about 5 minutes to see if it holds. Vacuum tank is pictured, in trunk, under hat shelf.
-
Move your vacuum pump to the yellow solid line with no stripes for the next step.
-
-
-
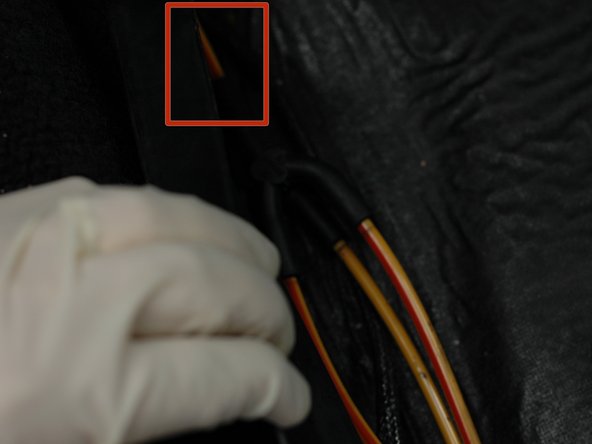
With your hand vacuum pump connected to the solid yellow line, with no stripes, you can continue. Make sure the driver's side door is closed, and turn the key to the lock position. Pull a vacuum of 10 to 15Hg; all the doors on the car should lock. Wait about 5 minutes to see if the lock side of the system holds. Make note of the results.
-
With your passenger side door panel removed, and the door left open, you can watch one of the actuators during this process. The door panel removal technique guide is available in the Mercedes W123 repair section. Click here to read that guide. Pictured are the early style actuators. The first picture shows the door in the locked position while the second shows it unlocked.
-
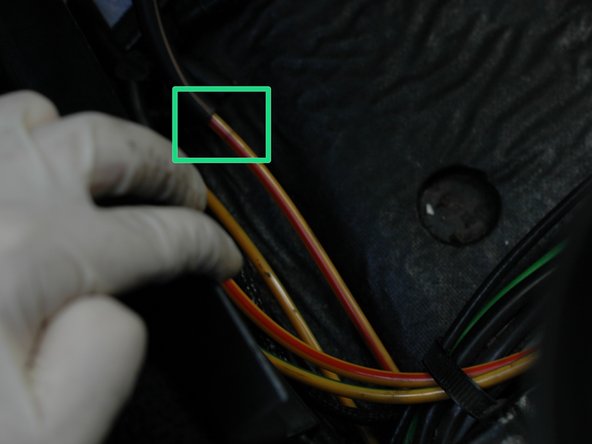
With your hand pump still connected to the solid yellow line, move the key in the driver's door to the unlocked position. Pump vacuum again at 10 to 15Hg. The doors should all unlock. Retain this vacuum again for about 5 minutes. Make note of the result.
-
-
-
While testing the main line, you'll have noted whether you have leaks in the lock side of the system, the unlock side, or both. This will help narrow down the problem(s). If you have a leak in the lock side, you can focus on testing only the lock lines which are marked with a red stripe.
-
If you have a leak in the unlock side you can focus on those lines marked with a green stripe.
-
If both sides leak, you'll need to test everything!
-
-
-
Inside your driver's door you will not find an actuator. Instead, there is a master vacuum switch that controls the actuators in the other three doors. In this picture, it is shown with the two Phillips head screws that hold its bracket in place already removed.
-
When the solid yellow line that you have been testing under the hood enters the firewall, it continues on and passes through a rubber tube between the vehicle's body and the door.
-
Once inside the door, it connects to the center vacuum connector on the main vacuum switch.
-
Steps 8 and 9 will include disconnecting vacuum lines from the switch. To make this easier, the switch should be detached from the door. The door pull must be detached before this is possible.
-
-
-
To detach the door pull, begin by removing the two large Phillips screws holding it to the door shell.
-
Gently pull the rod of the door pull towards you until it pops out of the plastic holder at its mid-point.
-
Finally, pivot the door pull outwards and towards you until the curved end can be pulled back and out of the hole where it connects to the door latch.
-
-
-
The master vacuum switch can now be detached from the door. To do this, remove the two Philips head screws holding the switch to the door (picture shows screws already removed). Remove the metal bracket the screws were holding and set it aside.
-
Pull the switch gently towards you until you can then slip off the linkage that connects the switch to the lock mechanism.
-
-
-
Inspect the switch, especially the metal end. If it looks heavily corroded/rusted or if the metal mechanism on the switch is very loose the switch may be a source of leaks. Consider replacing it. The switch on this car was leaking and was already replaced in this picture.
-
-
-
-
Pull off the center vacuum line on the switch, which is the same solid yellow line from under the hood. It might help to also remove the line closer to the metal end of the switch, for easier access.
-
Use a suitable object, such as a golf tee, bolt, or large nail, and plug off the end of the solid yellow line that is inside the door.
-
Return to your still connected vacuum gauge under the hood and pump up 10 to 15Hg of vacuum. If there is a leak at this point, you know the solid yellow line that goes from under the hood in to the main switch is cracked. Make note of the result and continue to the next step.
-
-
-
The lock and unlock lines that connect to the switch travel back out of the door and then in to the interior of the car to provide vacuum to those two branches of the system, depending on the position of the switch.
-
You can reconnect the solid yellow line to the center of the switch at this time.
-
From this point on this guide will focus on testing the lock side of the system since this was the side that showed the leak when testing the main line under the hood. All of these techniques can be applied to the unlock side if you have a leak there.
-
Plug the end of the lock line that is inside the door.
-
Retrieve your vacuum pump from under the hood to use it inside your car on the next step.
-
-
-
Once inside the car, the lock and unlock vacuum lines travel beneath the carpets and in some places underneath flexible black plastic covers. Begin by removing the floor mat, if equipped, and carpet in the driver's foot well.
-
With the carpets removed, look along the end of the foot well nearest the driver's door and find the black plastic cover that protects the vacuum lines beneath. Lift this cover up as shown to expose the vacuum lines.
-
As mentioned, the red lines are the lines for the lock side of the circuit. The highlighted line is the one that enters the car from inside the door. Note - the top of the picture is facing the front of the car. This line connects to the switch and is the one that you plugged in the previous step.
-
Disconnect this line from the rubber "Y" 3-way connector.
-
-
-
Connect your vacuum gauge to the line just disconnected from the first "Y" 3-way connector inside the car.
-
Pump a vacuum of 10 to 15Hg. If this line shows a leak, it means this line is cracked, likely where it passes between the body of the car and the door. If it does not, the line is OK. Make note of the results and continue.
-
You can reconnect this line to the "Y" connector.
-
-
-
Return to the lines under the plastic cover at the outside edge of the driver's side footwell.
-
The red line that is highlighted travels straight back in to the rear driver's side door.
-
Pull this line from the "Y" connector, attach your vacuum pump and draw a vacuum of 10 to 15Hg on this side of the system. If the rear driver's side door is unlocked, doing this should lock it.
-
Watch the gauge for a short time and look for vacuum leaking off.
-
If there is a leak, you will need to pull the panel from the rear driver's side door to test the line itself. To do this, you'll disconnect the red line from the actuator and plug it off like you did the lines of the master switch.
-
If the line holds vacuum, move on to test the lock side of the actuator. To do this, connect your vacuum pump to the connector on the actuator that the red line was connected to and draw a 10 to 15Hg vacuum and watch for leaks. Make note of the results and continue.
-
-
-
Return to the lines under the plastic cover on the driver's side.
-
The highlighted line travels across the car along the front seats to provide vacuum to the remainder of the vehicle's lock system. In the second picture, it can be seen traveling across the car along the driver's footwell nearest the driver's seat.
-
Disconnect this line from the "Y" connector and connect it to your vacuum pump. Pump a vacuum of 10 to 15Hg and watch for leaks for a few minutes.
-
If this line shows leaks, it could be anything from a cracked line along this section, to either of your door lock actuators on the passengers side, to the gas door or trunk lock actuators. If a leak shows, the diagnosis will continue on the passenger's side of the car.
-
-
-
Move to the front passenger foot well of the car. Remove the floor mat, if equipped, and the carpet. Find the cover, which is identical in design as the driver's side, that protects the vacuum lines. It is on the outside edge of the foot well. Pull it up to expose the vacuum lines that serve this side of the car.
-
On the passenger side the lock lines join together in a 4-way "X" connector. Note that one of the four lines, noted in red, is the line coming over from the driver's side supplying vacuum to the rest of the system. Note - the right hand side of this picture faces the front of the car.
-
Begin diagnostics on this side by pulling the line nearest the front of the car. In this picture, it has already been pulled from the "X" connector. Pump up a 10 to 15Hg vacuum on this line and check for leaks. If there are any, continue with testing the line itself and the door actuator as outlined in Step 12.
-
-
-
Next, pull the middle line. This feeds the trunk lock and gas door lock. Note that these lines might have been swapped at some point in the car's history - after pumping a vacuum on it, check to see whether the trunk and gas door are locked. If not, this might be feeding the rear passenger door lock actuator instead.
-
If you find a leak on this line, and it is indeed serving the trunk lock and gas door lock actuators, you will need to continue your diagnosis by testing the trunk actuator and gas door lock actuators separately. That is covered in step 17.
-
-
-
Pull the final line from the "X"connector. Test it by pulling 10 to 15Hg of vacuum on it. This one is serving the rear passenger door, though as mentioned before it helps to verify by checking that door to ensure it locked after a vacuum is pulled.
-
If there is a leak in this line proceed by testing the line itself and the door lock actuator as described in Step 12.
-
-
-
If you found a leak in the line noted in Step 15, serving the trunk and gas door locks, you will need to go to the back of the car and open the trunk to proceed.
-
To test the trunk lock actuator you will first need to remove the black plastic cover plate that covers the recess in the rear body panel that the actuator is installed into. Once it is removed you will see the trunk actuator. Pull the red line from the actuator, as this indicates the lock side, and pull a 10 to 15Hg vacuum.
-
Check for a leak. If it is leaking, you will need to replace the actuator or try and find a replacement diaphragm to repair it. Pictured is a trunk lock actuator with a torn outer diaphragm.
-
-
-
The last item to check is the gas door lock actuator. This actuator is up inside the passenger side rear fender. It is directly on the other side of the panel pictured, behind the trunk spring. It's held in place by the two screws shown.
-
This actuator comes in two styles. The one on the car being tested only has a lock side; it uses a spring mechanism to return it to the unlocked state when vacuum is lost on the lock side. Another design acts just like the trunk lock actuator, in which there is a lock and unlock side.
-
On the spring-loaded lock only style, remove the single vacuum connection from the bottom of the actuator and pull a 10 to 15Hg vacuum on it and watch for leaks. On the lock/unlock style, treat it the same as the trunk lock actuator by testing the lock side since that is where the original leak was found at the beginning.
-
-
-
Having completed the diagnostic process you can make a list of items to be fixed.
-
If you found one or more leaking lines, you will need to feed new hard plastic line to replace it. The most common spot for cracks is at points where the lines flex often, such as in the rubber tubes that carry the lines from the body to the door.
-
If you found that you have a bad check valve you will simply replace it with a new one.
-
If you discovered one or more leaking door lock actuators you'll want to find out what style you have. The old style, with four rubber diaphragms, are very easily repaired. See this early style W123 door lock actuator repair guide.
-
If you found a leaking trunk lock actuator, it will likely need to be replaced. See this guide on how to replace it. If the fuel door lock actuator is leaking, and it's the early style, see this guide on how to pull it from the car and try to stop the leak. If it's the later style it will likely need to be replaced.
-
If you found a leak door lock master switch in your driver's door you can try fixing it by reading the repair guide before you purchase a replacement part.
-
Once you've fixed everything, you can return to under the hood and test the entire system by plugging your vacuum gauge in to the end of the "Y" connector that enters the lock system check valve. This tests the vacuum tank, all the lines, and all the actuators. It takes lots of pumping but it sure is rewarding to see the vacuum gauge rock solid!
-
Note - on this car, which had a neglected door lock system, there was a leaky master vacuum switch, a leaky passenger door lock actuator due to cracked upper diaphragms, a leaky trunk lock actuator due to a torn outer diaphragm, and finally a gas door lock leak.
-


Upon completion of diagnosis, you can begin repairing or replacing those parts that were found to be leaking.
Upon completion of diagnosis, you can begin repairing or replacing those parts that were found to be leaking.
Отменить: Я не выполнил это руководство.
28 участников успешно повторили данное руководство.

Команда

16 Комментариев
I am glad you found it helpful! This was one of the more intensive guides I undertook but I like to think it will help people keep their W123's on the road.
My husband and I are amazed by the detail and knowledge of this guide, we own a well maintained and excellent running 1985 300D w123 California turbo, we will be utilizing this guide to eventually rebuild the vacuum lock system, in this amazing machine. Thank you so much
Sandie and Hal
Sandra, I am glad the guide helped you out! You're very welcome.