Выберете то, что вам нужно
-
-
Use an iOpener or heat gun to melt the adhesive.
-
Insert 21 opening picks under the display.
-
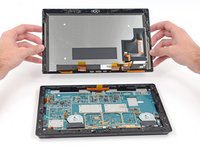
Slowly lift off the display.
-
-
-
-
Remove the four ribbon cables connecting to the motherboard with a spudger.
-
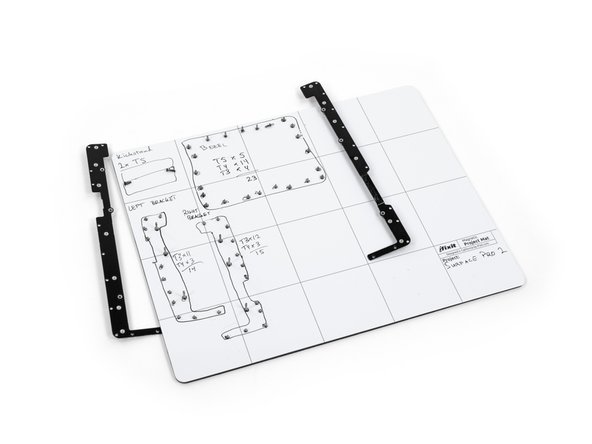
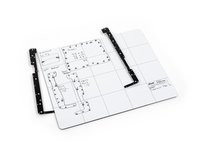
Remove the 52 screws securing the motherboard to the metal plates and the plastic bezel.
-
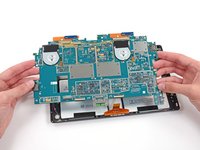
Lift off the motherboard.
-
-
-
Unscrew the two screws on the mSATA SSD and remove the SSD. (Note: This image is from a first generation Surface Pro, but it works)
-


To reassemble your device, follow these instructions in reverse order.
Отменить: Я не выполнил это руководство.
24 человек успешно провели ремонт по этому руководству.
13 Комментарии к руководству
How do you glue the back on? It looks like the adhesive that holds it on is messed up bad when it's removed.
Hi Nate,
Have you figured this out? I was wondering the same thing.
Adi V -
You have to use double sided tape for electronics. They sell it on amazon. Use 5mm or wider to make sure the screen doesn’t fall out. Heat after application to make sure the glue sets properly.
Screen came off just fine using a hair dryer, but my Surface Pro 2 differs from these directions. Specifically, I got stuck not being able to remove the bezel because I don't have a T2 bit. My bezel screws are 5 x T5, 14 x T3, and 4 x T2. That doesn't match the photo shown here in step 3.