Перейти к основному содержанию

Microsoft Surface Pro X Kickstand Replacement

Выберете то, что вам нужно

  1. Microsoft Surface Pro X Kickstand Replacement, Open the kickstand: шаг 1, изображение 1 из 2 Microsoft Surface Pro X Kickstand Replacement, Open the kickstand: шаг 1, изображение 2 из 2
    • Make sure your Surface Pro X is turned off, and laying screen-side down on a soft surface.

    • After turning off your device, make sure to remove the SSD from the Surface before starting any repairs. This will disconnect the battery and prevent damage to the device.

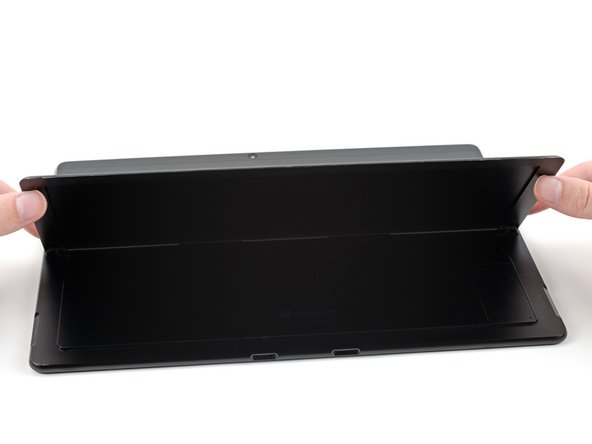
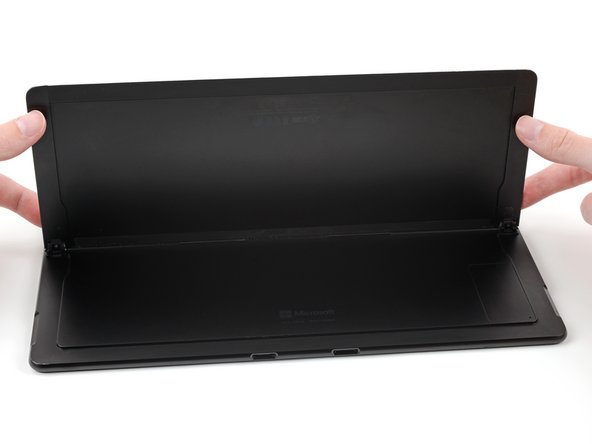
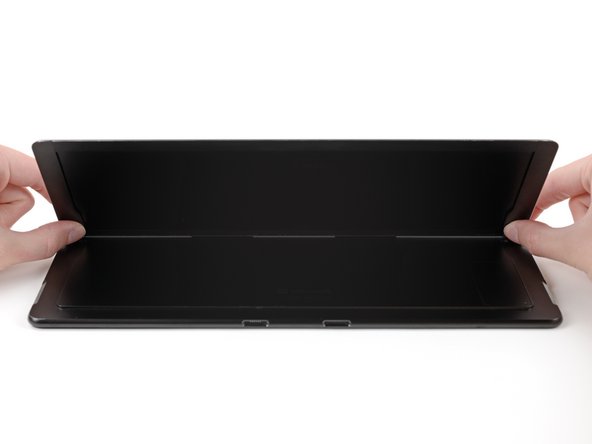
    • Lift the kickstand to at least a 90° angle, so that it is perpendicular to the Surface's screen. The further you open the hinge, the easier it is to access the SSD and SIM card door.

  2. Microsoft Surface Pro X Kickstand Replacement, Open the SSD and SIM card door: шаг 2, изображение 1 из 2 Microsoft Surface Pro X Kickstand Replacement, Open the SSD and SIM card door: шаг 2, изображение 2 из 2
    • Insert a SIM card eject tool or a paperclip into the small hole in the bottom right corner of the SSD and SIM card door, located near the bottom right corner of the Surface.

    • Press firmly to open the door.

  3. Microsoft Surface Pro X Kickstand Replacement, Remove the SSD and SIM card door: шаг 3, изображение 1 из 1
  4. Microsoft Surface Pro X Kickstand Replacement, Remove the SSD screw: шаг 4, изображение 1 из 1
    • Use a T3 Torx screwdriver to remove the 2.4 mm screw securing the SSD.

  5. Microsoft Surface Pro X Kickstand Replacement, Remove the SSD: шаг 5, изображение 1 из 3 Microsoft Surface Pro X Kickstand Replacement, Remove the SSD: шаг 5, изображение 2 из 3 Microsoft Surface Pro X Kickstand Replacement, Remove the SSD: шаг 5, изображение 3 из 3
    • Use your finger or a spudger to lift the SSD just enough that it clears the edges of its recess.

    • Don't lift the SSD more than you have to—doing so may damage the SSD or its socket.

    • Gently pull the SSD straight out of its socket.

    • When reinstalling the SSD, be sure it is properly seated before reinstalling its retaining screw.

  6. Microsoft Surface Pro X Kickstand Replacement, Place the Surface on your work surface: шаг 6, изображение 1 из 1
    • Place your Surface screen-side down on your work surface.

  7. Microsoft Surface Pro X Kickstand Replacement, Lift the kickstand: шаг 7, изображение 1 из 3 Microsoft Surface Pro X Kickstand Replacement, Lift the kickstand: шаг 7, изображение 2 из 3 Microsoft Surface Pro X Kickstand Replacement, Lift the kickstand: шаг 7, изображение 3 из 3
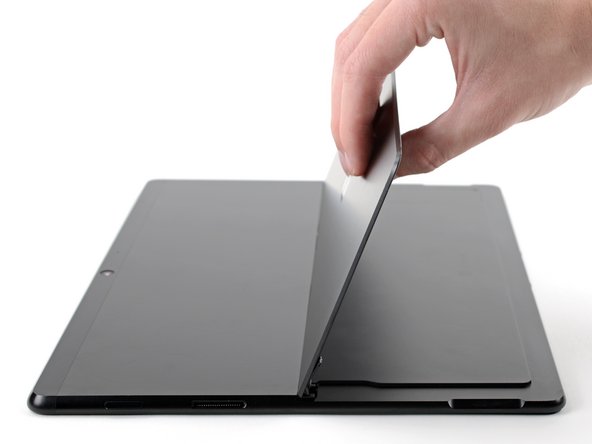
    • Lift the kickstand to about a 90° angle.

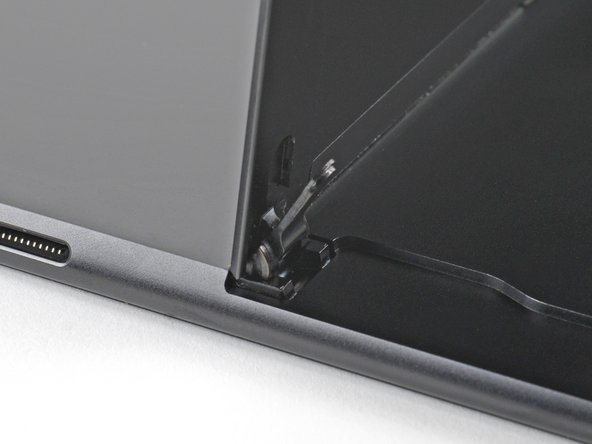
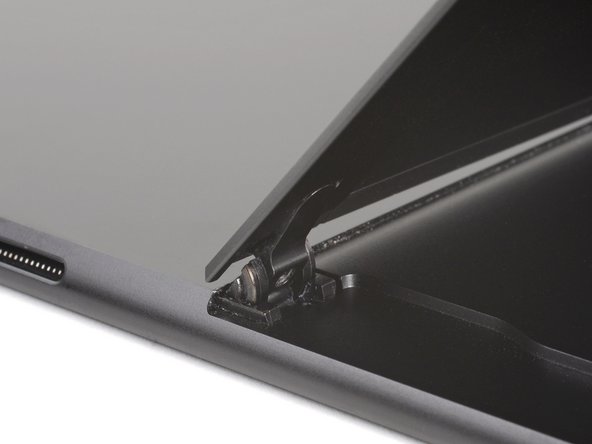
  8. Microsoft Surface Pro X Kickstand Replacement, Remove the kickstand hinge screws: шаг 8, изображение 1 из 2 Microsoft Surface Pro X Kickstand Replacement, Remove the kickstand hinge screws: шаг 8, изображение 2 из 2
    • Use a T3 Torx screwdriver to remove two 2.5 mm screws securing the kickstand to the kickstand hinges.

  9. Microsoft Surface Pro X Kickstand Replacement, Remove the kickstand: шаг 9, изображение 1 из 2 Microsoft Surface Pro X Kickstand Replacement, Remove the kickstand: шаг 9, изображение 2 из 2
    • Hold both hinges and the kickstand.

    • Move the kickstand down to a 45° angle.

  10. Microsoft Surface Pro X Kickstand Replacement: шаг 10, изображение 1 из 3 Microsoft Surface Pro X Kickstand Replacement: шаг 10, изображение 2 из 3 Microsoft Surface Pro X Kickstand Replacement: шаг 10, изображение 3 из 3
    • Hold the kickstand by the center of its bottom edge.

    • Move the kickstand up by about 10° to detach the kickstand's screw bosses from the hinges.

    • During reassembly, make sure the hinges are fully inserted into their recesses in the kickstand. Follow the instructions in the next step to reinsert the hinges.

  11. Microsoft Surface Pro X Kickstand Replacement, Hinge reassembly information: шаг 11, изображение 1 из 3 Microsoft Surface Pro X Kickstand Replacement, Hinge reassembly information: шаг 11, изображение 2 из 3 Microsoft Surface Pro X Kickstand Replacement, Hinge reassembly information: шаг 11, изображение 3 из 3
    • During reassembly, follow these steps to make sure the hinges are fully inserted into their kickstand recesses:

    • Tilt the bottom edge of the kickstand toward the hinges.

    • Insert the hinges into the kickstand recesses.

    • Check to see if the faces of the hinges are flush with the underside of the kickstand.

  12. Microsoft Surface Pro X Kickstand Replacement: шаг 12, изображение 1 из 2 Microsoft Surface Pro X Kickstand Replacement: шаг 12, изображение 2 из 2
    • There are two adhesive tabs securing the kickstand to the frame. You'll need to pull them out with a strong and steady force.

    • The two adhesive tabs are located in the middle of the kickstand edge closest to the frame.

  13. Microsoft Surface Pro X Kickstand Replacement: шаг 13, изображение 1 из 3 Microsoft Surface Pro X Kickstand Replacement: шаг 13, изображение 2 из 3 Microsoft Surface Pro X Kickstand Replacement: шаг 13, изображение 3 из 3
    • Pull slowly to avoid tearing the two adhesive tabs.

    • While holding the Surface with one hand, pull the kickstand out of the frame.

    • Be sure to insert the tabs when installing the new kickstand before replacing the screws.

Заключение

To reassemble your device, follow these instructions in reverse order.

Repair didn’t go as planned? Try some basic troubleshooting, or ask our Microsoft Surface Pro X Answers community for help.

Еще один человек закончил это руководство.

Kyle Smith

Участник с: 02/01/21

40 890 Репутация

Автор 123 руководств

3 Комментариев

How do I order the 2.5 mm screws holding kickstand on. Mine are missing.

kaption93 - Ответить

The hinge replacement guide is vague, there should be one that's more specific. It'd be cool if you gave a link to the kickstand replacement in case the kickstand screw taps are stripped or unusable (sheered screw half in hole).

Otherwise, I thank you for what you do, much appreciated..

Joe M - Ответить

Where can the replacement kickstand be purchased?

DMos - Ответить

Добавить комментарий

Просмотр статистики:

За последние 24часов: 4

За последние 7 дней: 12

За последние 30 дней: 39

За всё время: 1,148