Перейти к основному содержанию

Mitsubishi Diamondpoint NXM76LCD Speaker Replacement

Выберете то, что вам нужно

  1. Mitsubishi Diamondpoint NXM76LCD Speaker Replacement, Removing the stand.: шаг 1, изображение 1 из 3 Mitsubishi Diamondpoint NXM76LCD Speaker Replacement, Removing the stand.: шаг 1, изображение 2 из 3 Mitsubishi Diamondpoint NXM76LCD Speaker Replacement, Removing the stand.: шаг 1, изображение 3 из 3
    • Lift the black cover off.

    • Remove all 4 Phillips #2 screws.

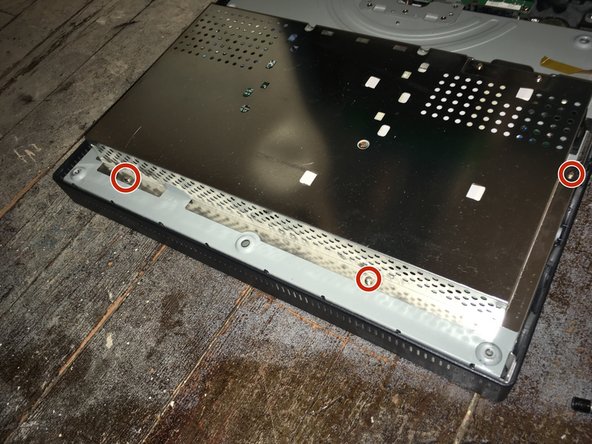
  2. Mitsubishi Diamondpoint NXM76LCD Speaker Replacement, Remove the 5 screws: шаг 2, изображение 1 из 1
    • Remove the two 24mm Phillips #2 screws.

    • Remove the three 8mm Phillips #2 screws.

  3. Mitsubishi Diamondpoint NXM76LCD Speaker Replacement, Remove the back panel: шаг 3, изображение 1 из 3 Mitsubishi Diamondpoint NXM76LCD Speaker Replacement, Remove the back panel: шаг 3, изображение 2 из 3 Mitsubishi Diamondpoint NXM76LCD Speaker Replacement, Remove the back panel: шаг 3, изображение 3 из 3
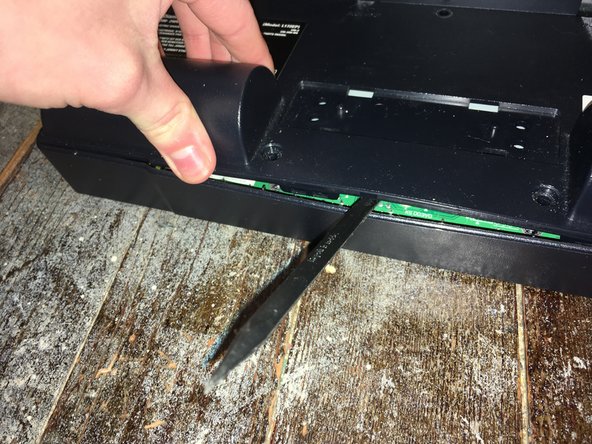
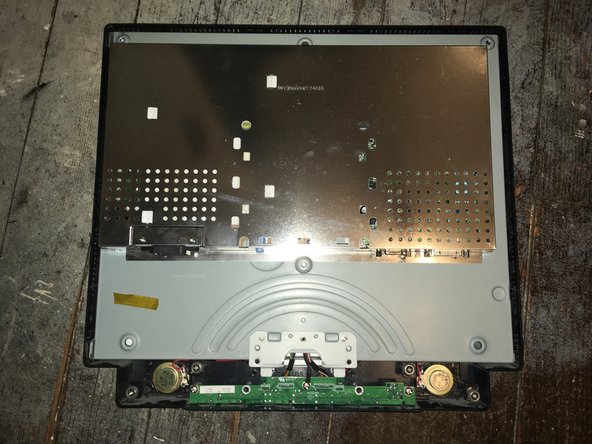
    • Lift the back and pry the back off.

    • The panel is held in with clips on the side. It needs a lot of force the take it off.

  4. Mitsubishi Diamondpoint NXM76LCD Speaker Replacement, Remove the four screws: шаг 4, изображение 1 из 2 Mitsubishi Diamondpoint NXM76LCD Speaker Replacement, Remove the four screws: шаг 4, изображение 2 из 2
    • Remove the four 5mm nut screws.

  5. Mitsubishi Diamondpoint NXM76LCD Speaker Replacement: шаг 5, изображение 1 из 2 Mitsubishi Diamondpoint NXM76LCD Speaker Replacement: шаг 5, изображение 2 из 2
    • Remove the seven Phillips #1 screws.

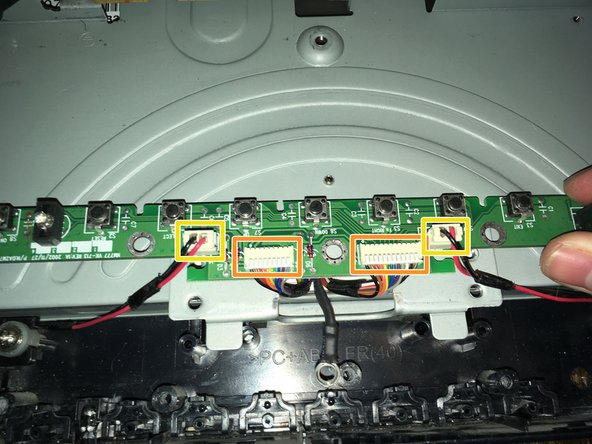
  6. Mitsubishi Diamondpoint NXM76LCD Speaker Replacement, Remove the front board: шаг 6, изображение 1 из 2 Mitsubishi Diamondpoint NXM76LCD Speaker Replacement, Remove the front board: шаг 6, изображение 2 из 2
    • Remove the three Phillips #2 screws.

    • Remove the two data/power cables.

    • Remove the two speaker cables.

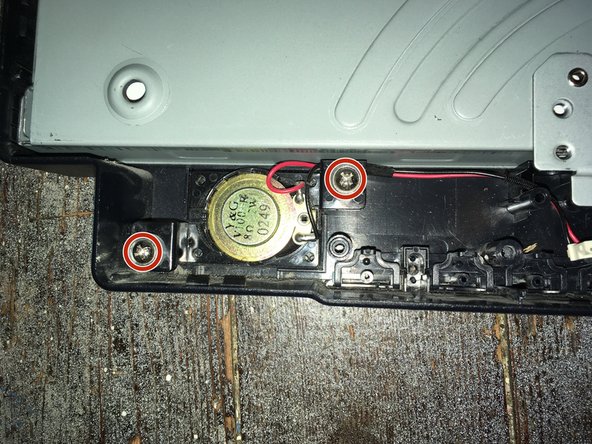
  7. Mitsubishi Diamondpoint NXM76LCD Speaker Replacement: шаг 7, изображение 1 из 2 Mitsubishi Diamondpoint NXM76LCD Speaker Replacement: шаг 7, изображение 2 из 2
    • Remove the Phillips #2 screws from the speaker(s).

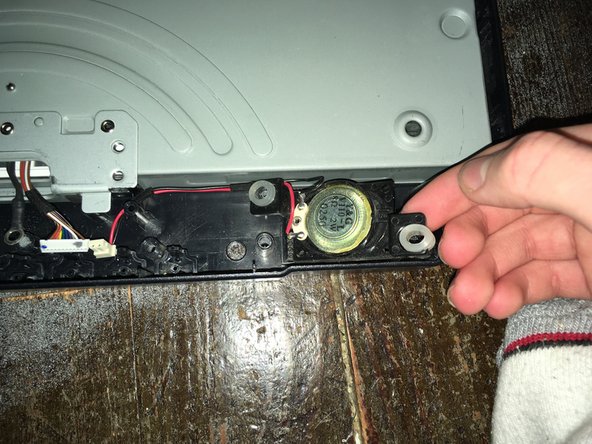
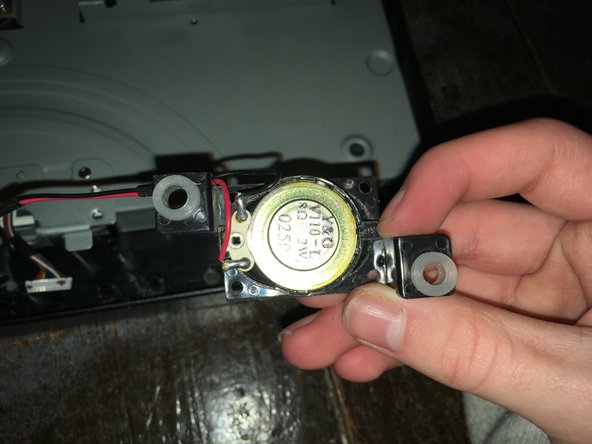
  8. Mitsubishi Diamondpoint NXM76LCD Speaker Replacement: шаг 8, изображение 1 из 3 Mitsubishi Diamondpoint NXM76LCD Speaker Replacement: шаг 8, изображение 2 из 3 Mitsubishi Diamondpoint NXM76LCD Speaker Replacement: шаг 8, изображение 3 из 3
    • Pull the speaker off the slots.

Заключение

To reassemble your device, follow these instructions in reverse order.

Еще один человек закончил это руководство.

Padraic Hoselton

Участник с: 08/22/17

4 180 Репутация

Автор 12 руководств

Команда

Master Techs Участник Master Techs

Community

322 членов

Автор 2 521 руководств

0 Комментариев

Добавить комментарий

Просмотр статистики:

За последние 24часов: 0

За последние 7 дней: 0

За последние 30 дней: 0

За всё время: 81