Введение
1. Open Case
2. Remove Battery, SD Card, SIM Card
3. Remove 11 screws around perimeter
4. Peel back sticker from below battery
5. Remove back of phone
6. Remove SIM board from mother board
7. Disconnect three ribbon cables
8. Separate mother board from screen assembly
9. Remove LCD display from screen assembly
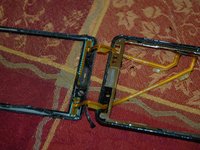
10. Separate glass/digitizer from top frame
11. Replace glass/digitizer and re-assemble
Выберете то, что вам нужно
-
-
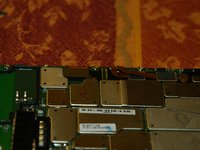
Peel back label half way, far enough to expose shields from the motherboard.
-
There also is a white barcode sticker that will keep the back from coming off.
-
The spudger tool works great for lifting the edge of the stickers to get a finger hold.
-
The labels can be easily lifted and replaced without damage.
-
-
-
-
Remove the back casing by carefully inserting the spunger into the gap between the casing and the rest of the phone. Carefully pry around the perimeter until the casing pops off.
-
-
-
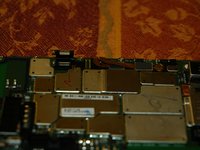
Remove two T5 Torx screws and remove the SD/SIM card board.
-
There is a black plastic spacer bar between the two screw lugs that can also be removed.
-
-
-
Disconnect three ribbon cables from the mother board EDIT Under the Black Spacer Bar is a Fourth Ribbon cable.
-
One of them is from the LCD screen and the other two are for the digitizer. EDIT Looks like it goes to the forward facing camera.
-
-
-
Remove the mother board from the screen assembly.
-
Be careful not to get the spunger between the glass and the LCD because the ribbon cables are still holding the glass and LCD together.
-
-
-
Remove the LCD Screen from the frame
-
The LCD can be lifted out of the frame. Be careful to keep it clean and free from dust.
-
-
-
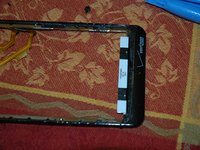
Separate the glass from the frame.
-
The two are stuck together with double stick tape. Be careful in prying them apart because the frame appears fragile. The blue plastic opening tools work well.
-
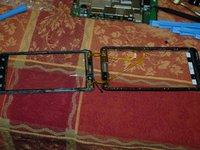
Slip the new glass/digitizer's two ribbon cables through the holes in the frame and stick the new glass to the frame.
-
There are also rubber gaskets around each opening in the glass.
-


To reassemble your device, follow these instructions in reverse order.
Отменить: Я не выполнил это руководство.
11 человек успешно провели ремонт по этому руководству.
3 Комментарии к руководству
What a royal pain in the a$$... haha it actually was pretty simple, you guys left out that when removing the motherboard from the LCD, the earphone part is stuck together with sticky stuff and has to be pried apart carefully, so not to damage the small cable, I also used a hairdryer to help remove the "lens" from the frame, I salvaged most of the two sided tape but it was stretched out so I had to trim and tuck a little, overall it went back together very simple and everything works great!! Thx for the help!
piece o' cake... thanks for the helpful guide.
Thank you. Helped to have photos. I agree with the other post - you left out the step to pull up the orange cable near the sim card holder (earphone). It does take a bit of wrangling to get it up, but I found that instruction on a video so all is good. The lens I bought came with tools and 3M tape so I didn't have to reuse the old tape from the phone.