Введение
This guide demonstrates how to remove the battery from a Motorola Moto G Power (2020) cellphone.
Before you begin, download the Rescue and Smart Assistant app to backup your device and diagnose whether your problem is software or hardware related.
If you have been dealing with issues related to your phone holding a charge consistently, this guide will help breathe some new life into your phone with a new replacement battery!
This guide will walk you through the process of extracting all of the hardware necessary to replace the battery while also helping you to avoid any potential damage that occur.
*Some knowledge of technical terms for the inner hardware of electronics may be helpful.
*On step 8 pay careful attention as there is a risk of damage to your skin and clothing.
Выберете то, что вам нужно
-
-
Place a suction cup on the back of the device.
-
Then open up the back of the device by sliding the opening pick into both sides of the phone.
-
-
-
Put pressure on the fingerprint sensor with your finger to detach it from the back panel.
-
-
-
-
Carefully use the spudger to lift the sensor cable, disconnecting the fingerprint sensor from the motherboard.
-
-
-
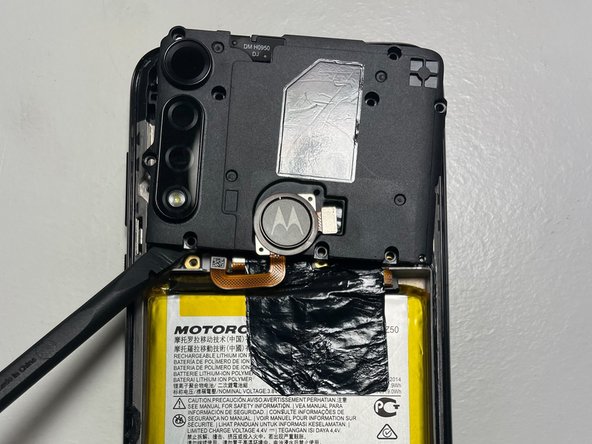
If present, carefully remove the protective tape using a plastic spudger as shown, ensuring the delicate flex cable is not torn in the process.
-
-
-
Use a plastic spudger or non-conductive tweezers to disconnect the battery cable from the motherboard.
-
-
-
Slide an opening pick under the battery and gently work it back and forth to separate the adhesive from the battery.
-
-
-
Remove the old battery and insert the replacement battery, connecting it to the motherboard.
-
To reassemble your device, follow these instructions in reverse order, excluding the battery removal, of course.
To reassemble your device, follow these instructions in reverse order, excluding the battery removal, of course.
Отменить: Я не выполнил это руководство.
5 участников успешно повторили данное руководство.
4 Комментариев
THIS OS THE WRONG BATTERY!!!!! IT's ABOUT 1/4" TOO LONG!!! WTF?!?!?!
You link to the 'replacement" battery all say it's for the G Power (2022) but the GUIDE AND MY PHONE ARE THE 2020!!!!!
Your link goes to the JK50 battery.... but my Motorola g Power (2020) uses a KZ50 !!!! - OM<G I NEED MY PHONE!!!! AND NOW I HAVE TO WAIT TO SEND IT BACK, GET THE REFUND, AND THEN WAIT FOR THEM TO SEND BACK THE RIGHT ONE?!?!?!? - As you can tell because I OWN A CHEAP P.O.S. phone I CANNOT AFFORD TO 'just buy another one" ARRGGHHH!!!!!
Oh and my finger print sensor even broke off too... I tried SOOOO HARD not to break the wire... but it moved less than a 1/2" away and had already split.....
DO NOT BUY THIS PHONE!!! - Now I have no fingerprint sensor, the phone is NO LONGER WATER PROOF, AND IT DOESN'T EVEN WORK RIGHT NOW!!!!! AAARRGGGGHHHHH!!!!!!!!!!!! :'(
How hard would it be for phone manufacturers to create a back cover to access battery for replacement...but NO, they make it as difficult as possible so they can make money selling new phones and/or sell repair services.
I purchased my "not Motorola" KZ50 battery from an eBay seller, it was a drop-in replacement for the original battery. I did have to do my own "fold" for the flex cable, not a big deal. I used my own T3 screwdriver, the "free" tools included with the battery are worth what I paid for them.


