Перейти к основному содержанию

Эта версия возможно содержит некорректные исправления. Переключить на последнюю проверенную версию.

Выберете то, что вам нужно

  1. Этот шаг не переведен. Помогите перевести

    : шаг 1, изображение 1 из 2 : шаг 1, изображение 2 из 2
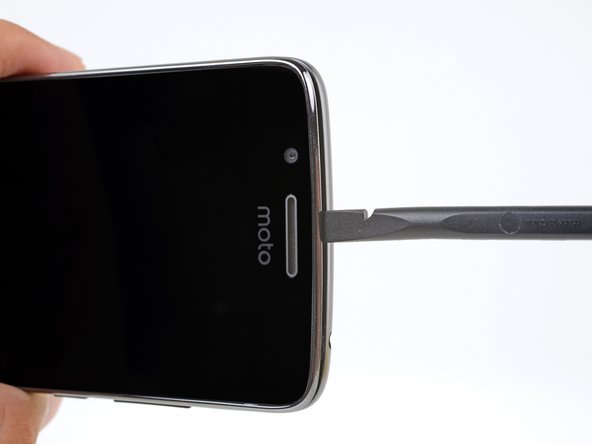
    • Insert your fingernail or the flat end of a spudger into the notch on the bottom edge of the phone near the charging port.

    • Pry with your fingernail or twist the spudger to release the back cover from the phone.

  2. Этот шаг не переведен. Помогите перевести

    : шаг 2, изображение 1 из 3 : шаг 2, изображение 2 из 3 : шаг 2, изображение 3 из 3
    • Insert the flat end of a spudger into the seam and slide it along the bottom edge to release the clips holding the back cover to the phone.

  3. Этот шаг не переведен. Помогите перевести

    : шаг 3, изображение 1 из 3 : шаг 3, изображение 2 из 3 : шаг 3, изображение 3 из 3
    • Continue sliding the flat end of the spudger along the seam for the remaining sides of the phone.

  4. Этот шаг не переведен. Помогите перевести

    : шаг 4, изображение 1 из 2 : шаг 4, изображение 2 из 2
    • Lift the back cover and remove it from the phone.

    • To reinstall the back cover, align the cover with the phone and squeeze along the edges to snap the clips back into place.

  5. Этот шаг не переведен. Помогите перевести

    : шаг 5, изображение 1 из 2 : шаг 5, изображение 2 из 2
    • Insert your fingernail or the flat end of the spudger into the notch below the battery.

    • Pry with your fingernail or spudger until you free the battery from its recess.

  6. Этот шаг не переведен. Помогите перевести

    : шаг 6, изображение 1 из 1
    • Remove the battery.

    • When installing the battery, make sure the battery's contacts line up with the three gold pins on the top right.

  7. Этот шаг не переведен. Помогите перевести

    : шаг 7, изображение 1 из 2 : шаг 7, изображение 2 из 2
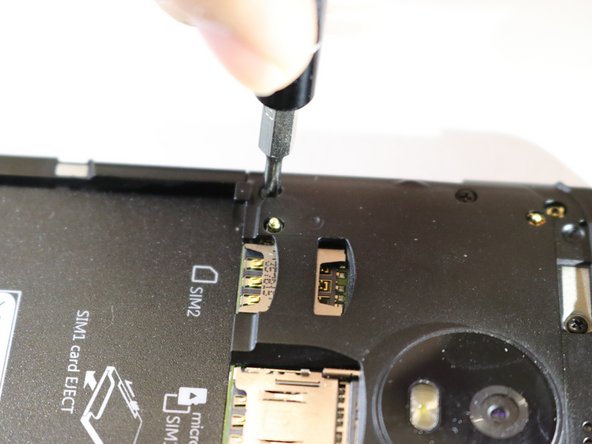
    • Remove the eight (8) 4mm screws with a Phillips screwdriver.

  8. Этот шаг не переведен. Помогите перевести

    : шаг 8, изображение 1 из 3 : шаг 8, изображение 2 из 3 : шаг 8, изображение 3 из 3
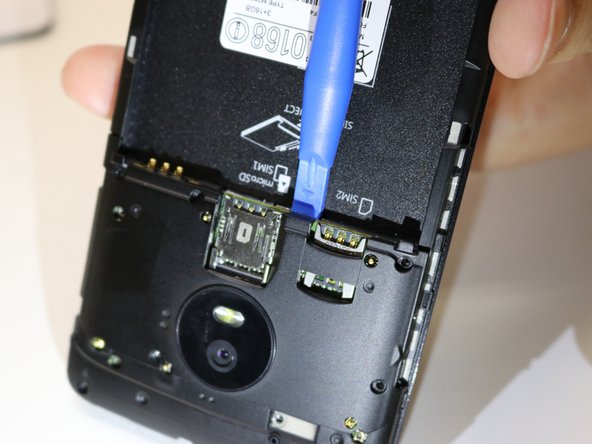
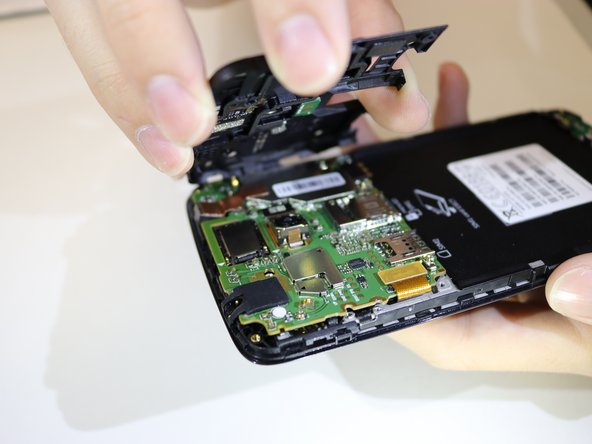
    • Pry the top motherboard cover off using a plastic opening tool.

    • When prying it open, make sure to pry it around evenly so that the cover will not snap. This will require some force.

  9. Этот шаг не переведен. Помогите перевести

    : шаг 9, изображение 1 из 3 : шаг 9, изображение 2 из 3 : шаг 9, изображение 3 из 3
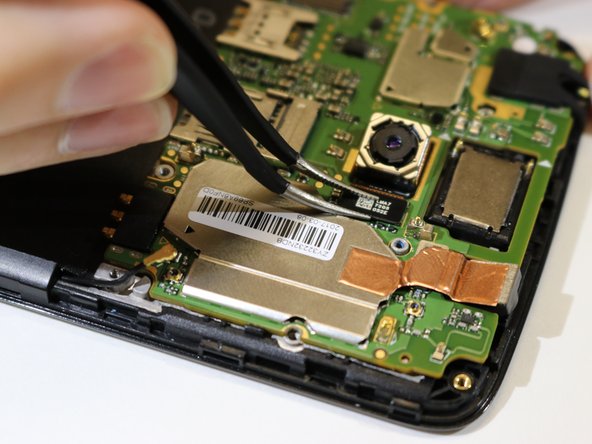
    • Disconnect the marked connector with a pair of tweezers and remove the camera piece.

Финишная черта

3 участников успешно повторили данное руководство.

Kristina Tran

Участник с: 01/24/18

559 Репутация

Автор 2 руководств

Команда

Cal Poly, Team S2-G3, Livingston Winter 2018 Участник Cal Poly, Team S2-G3, Livingston Winter 2018

CPSU-LIVINGSTON-W18S2G3

4 членов

Автор 16 руководств

0 Комментариев

Добавить комментарий

Просмотр статистики:

За последние 24часов: 3

За последние 7 дней: 6

За последние 30 дней: 12

За всё время: 1,730