Введение
Does your device not vibrate as it should? Do you think your vibration motor is broken? In this guide we will describe how to remove this part.
Before you begin, download the Rescue and Smart Assistant app to backup your device and diagnose whether your problem is software or hardware related.
Выберете то, что вам нужно
-
-
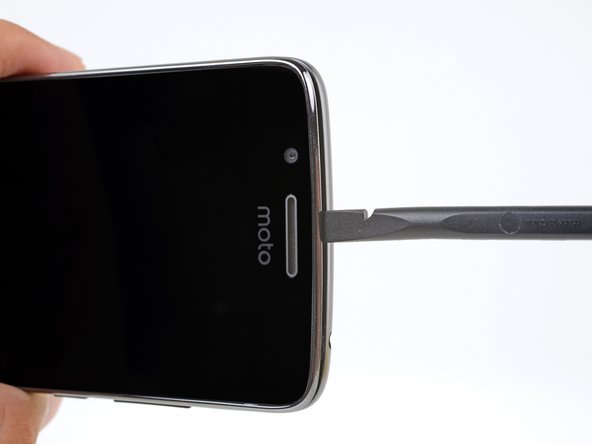
Insert your fingernail or the flat end of a spudger into the notch on the bottom edge of the phone near the charging port.
-
Pry with your fingernail or twist the spudger to release the back cover from the phone.
-
-
-
Insert the flat end of a spudger into the seam and slide it along the bottom edge to release the clips holding the back cover to the phone.
-
-
-
Continue sliding the flat end of the spudger along the seam for the remaining sides of the phone.
-
-
-
-
Insert your fingernail or the flat end of the spudger into the notch below the battery.
-
Pry with your fingernail or spudger until you free the battery from its recess.
-
-
-
Remove the nine (9) 4mm Philips screws securing the daughterboard cover.
-
-
-
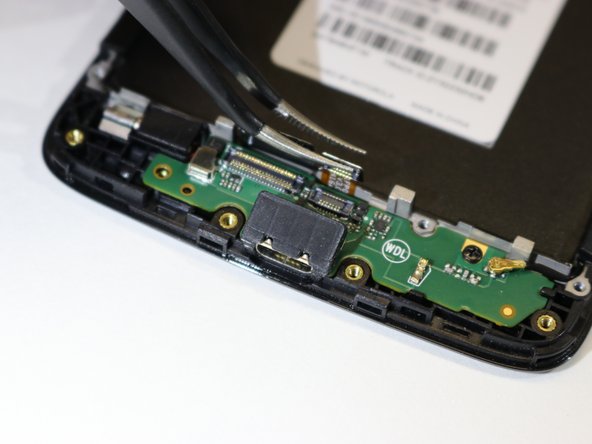
Remove the three connectors on the board below the battery slow by gently pulling on the small gold tab with a pair of tweezers.
-
-
-
Use the point of a spudger to lift the vibration motor connector up out of the socket on the I/O board.
Do not pull as shown o the picture!! Otherwise you will tear of the connector as well (actually as seen on the picture!!). You have to pull upwards so the vibration motor is unplugged an the socket stays attached to the board. If you do as shown on the picture you won't be able to reuse the charging board. Or at least I wouldn’t know how to re-attach a new vibration motor to the board as shown….
I just replaced the usb charging socket/board since my Moto G5 stopped charging. In my case I did not need the board anymore, so I could have just pulled off the vibration motor as shown above. I suggest, however, to keep the socket for the vibration motor in place by simply pulling upwards.
(But even if you broke the charging board - the replacement board cost me €10 ;-))
The procedure has been updated!
Oh boy that was very incorrect procedure! I cropped the image and changed the text to hopefully be more clear. Thanks for catching that!
-


To reassemble your device, follow these instructions in reverse order.
To reassemble your device, follow these instructions in reverse order.
Отменить: Я не выполнил это руководство.
7 участников успешно повторили данное руководство.
Команда

Cal Poly, Team S2-G3, Livingston Winter 2018 Участник Cal Poly, Team S2-G3, Livingston Winter 2018
CPSU-LIVINGSTON-W18S2G3
4 членов
Автор 16 руководств