Введение
This guide’s easy to follow steps show how to replace the rear camera of the Motorola Moto G7 Plus (model XT1965). The default camera is 16-megapixel, with f1.7 aperture, object image stabilization, and a 2160p video recording at 30 fps camera. This is denoted by the circular glass on the back of the phone.
Before you begin, download the Rescue and Smart Assistant app to backup your device and diagnose whether your problem is software or hardware related.
Before starting the repair, check the list of tools that you will need. To replace the camera, a new compatible camera will also be needed.
Ensure the device is turned off and not connected to any power sources.
Выберете то, что вам нужно
-
-
Insert an opening tool pick under the screen, starting at the top of the phone.
-
Slide the pick around the entire perimeter of the display to break the adhesive.
-
Once enough adhesive has been removed, you should be able to separate the screen by gently lifting it from the left side of the phone.
-
-
-
Remove the three 2.7 mm screws that surround the base of the display cable using the Torx T5 screwdriver.
-
Gently remove the metal piece that covers the base of the display cable.
-
-
-
Underneath this metal piece is the base of the cable. Use a spudger to vertically lift the connection out of its port.
-
-
-
-
Use the spudger to lift up the right side of the speaker and remove the speaker from the device.
-
-
-
Use the spudger to carefully slice through the black adhesive.
-
Use a Torx T5 screwdriver to remove the four 2.7mm screws.
-
-
-
Use the SIM card ejector tool to remove the SIM card tray where circled.
-
Completely remove the SIM card tray from the phone as shown in the picture.
-
-
-
Use a Torx T5 screwdriver to remove the six 2.7mm screws and one 3.0mm screw.
-
Remove the plate from the phone.
-
-
-
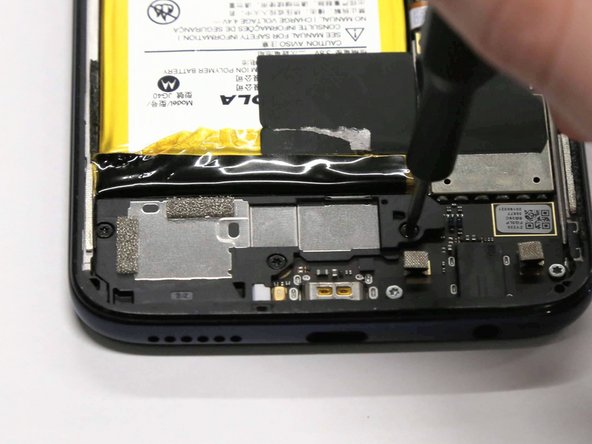
Gently lift up the piece either with your fingers or a spudger.
-
Use the reverse tweezers to gently remove the piece from underneath.
-


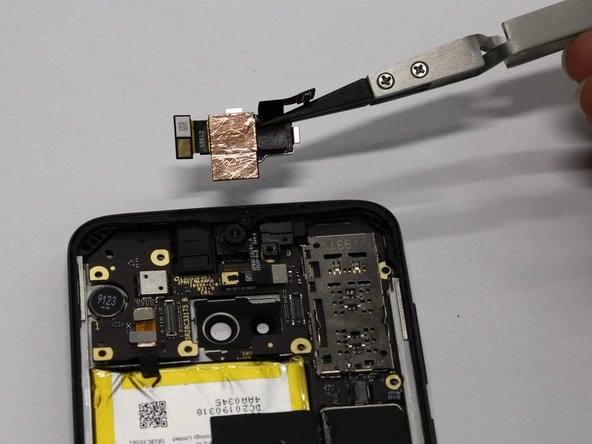
To reassemble your device, follow these instructions in reverse order.
To reassemble your device, follow these instructions in reverse order.
Команда

Cal Poly, Team S22-G5, Regan Winter 2020 Участник Cal Poly, Team S22-G5, Regan Winter 2020
CPSU-REGAN-W20S22G5
5 членов
Автор 17 руководств