Перейти к основному содержанию

Motorola W385 Camera Replacement

Выберете то, что вам нужно

  1. Motorola W385 Camera Replacement, Battery: шаг 1, изображение 1 из 1
    • Using your finger, press down on the clip holding the back cover on.

  2. Motorola W385 Camera Replacement: шаг 2, изображение 1 из 1
    • Using the spudger or your finger, gently pull the battery out from the top.

  3. Motorola W385 Camera Replacement, Front Casing: шаг 3, изображение 1 из 1
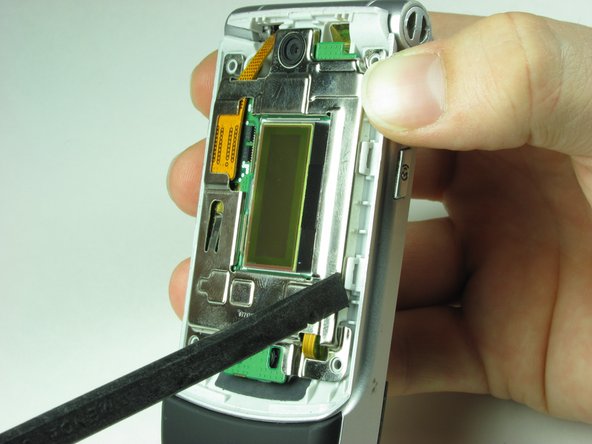
    • Remove the four rubber pieces from the face of the phone using the sharp end of the spudger.

    • The rubber pieces are held in with a mild adhesive.

  4. Motorola W385 Camera Replacement: шаг 4, изображение 1 из 1
    • Remove the four Torx-6 screws from underneath the rubber pieces.

  5. Motorola W385 Camera Replacement: шаг 5, изображение 1 из 2 Motorola W385 Camera Replacement: шаг 5, изображение 2 из 2
    • Close the phone before proceeding.

    • Using the flat end of the spudger, insert it under the plastic at the top left of the phone.

    • Gently, although a small amount of force is required, use a twisting motion to pull the plastic casing away from the body of the phone.

    • Continue to move around the phone counter clockwise until the casing is separated from the body.

    • It is not unusual for it to pop off before making it back to the starting point.

  6. Motorola W385 Camera Replacement: шаг 6, изображение 1 из 1
    • If the casing has not popped off of the body, remove it carefully from the the phone.

  7. Motorola W385 Camera Replacement, Top Logic Board: шаг 7, изображение 1 из 1
    • After completing Steps 3-6 in the casing repair guide, your phone should look like this.

  8. Motorola W385 Camera Replacement: шаг 8, изображение 1 из 3 Motorola W385 Camera Replacement: шаг 8, изображение 2 из 3 Motorola W385 Camera Replacement: шаг 8, изображение 3 из 3
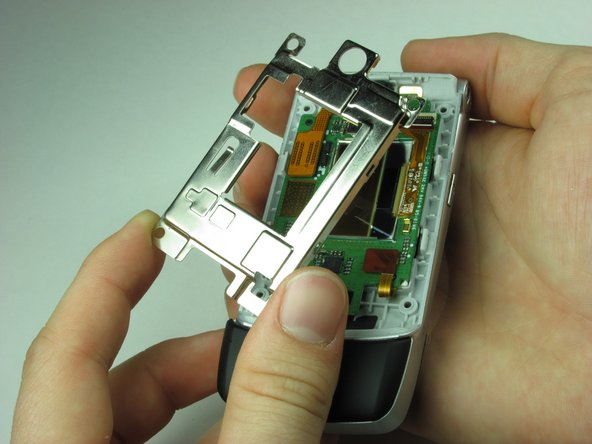
    • Use the spudger to unhinge the four clips around the metal casing of the top logic board.

    • Gently take off the metal casing of the logic board.

  9. Motorola W385 Camera Replacement: шаг 9, изображение 1 из 3 Motorola W385 Camera Replacement: шаг 9, изображение 2 из 3 Motorola W385 Camera Replacement: шаг 9, изображение 3 из 3
    • Use spudger to gently disconnect the ribbon cable from phone.

    • Gently remove Logic Board making sure not to damage any other components.

  10. Motorola W385 Camera Replacement, Camera: шаг 10, изображение 1 из 1
    • Find the camera on the board.

  11. Motorola W385 Camera Replacement: шаг 11, изображение 1 из 2 Motorola W385 Camera Replacement: шаг 11, изображение 2 из 2
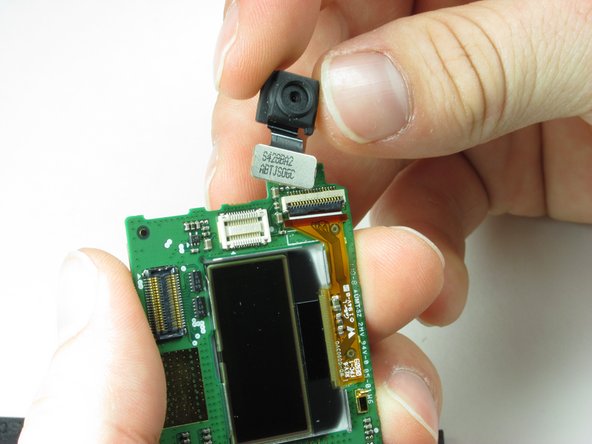
    • Take your spudger and place it just under the camera as shown.

    • With a small force, the camera should remove easily.

Заключение

To reassemble your device, follow these instructions in reverse order.

Еще один человек закончил это руководство.

Koedy Brant

Участник с: 01/26/10

41 Репутация

Автор 2 руководств

Команда

Cal Poly, Team 8-50, Regan Winter 2010 Участник Cal Poly, Team 8-50, Regan Winter 2010

CPSU-REGAN-W10S8G50

3 членов

Автор 14 руководств

0 Комментариев

Добавить комментарий

Просмотр статистики:

За последние 24часов: 0

За последние 7 дней: 1

За последние 30 дней: 2

За всё время: 2,145