Перейти к основному содержанию

Motorola XOOM 2 Media Edition Touch Screen Replacement

Выберете то, что вам нужно

  1. Motorola XOOM 2 Media Edition Touch Screen Replacement, Motorola XOOM 2 Media Edition Disassembly: шаг 1, изображение 1 из 2 Motorola XOOM 2 Media Edition Touch Screen Replacement, Motorola XOOM 2 Media Edition Disassembly: шаг 1, изображение 2 из 2
    • Power off the device before beginning disassembly.

    • Remove six 2.7mm Torx #3 screws.

  2. Motorola XOOM 2 Media Edition Touch Screen Replacement: шаг 2, изображение 1 из 2 Motorola XOOM 2 Media Edition Touch Screen Replacement: шаг 2, изображение 2 из 2
    • There is adhesive attached to the underside of the back panel. Gradually lift the panel to avoid bending it out of shape.

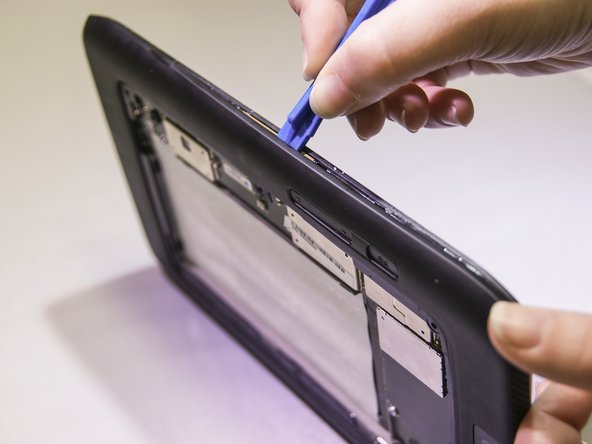
    • Pry off the back panel using a plastic opening tool.

    • Using a plastic opening tool, slide the tool gently around the back cover to lift the cover off.

  3. Motorola XOOM 2 Media Edition Touch Screen Replacement: шаг 3, изображение 1 из 3 Motorola XOOM 2 Media Edition Touch Screen Replacement: шаг 3, изображение 2 из 3 Motorola XOOM 2 Media Edition Touch Screen Replacement: шаг 3, изображение 3 из 3
    • Pry off the black cover gradually using a plastic opening tool.

  4. Motorola XOOM 2 Media Edition Touch Screen Replacement, Touch Screen: шаг 4, изображение 1 из 2 Motorola XOOM 2 Media Edition Touch Screen Replacement, Touch Screen: шаг 4, изображение 2 из 2
    • Remove thirteen 2.55mm Torx #4 screws with Torx T4 screwdriver.

  5. Motorola XOOM 2 Media Edition Touch Screen Replacement: шаг 5, изображение 1 из 1
    • Use tweezers to pull up the white rubber cover.

  6. Motorola XOOM 2 Media Edition Touch Screen Replacement: шаг 6, изображение 1 из 3 Motorola XOOM 2 Media Edition Touch Screen Replacement: шаг 6, изображение 2 из 3 Motorola XOOM 2 Media Edition Touch Screen Replacement: шаг 6, изображение 3 из 3
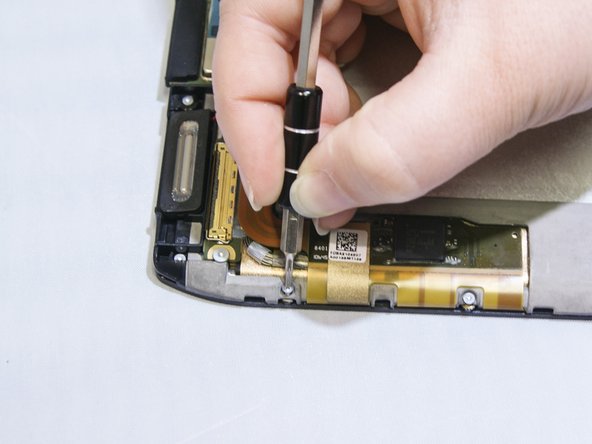
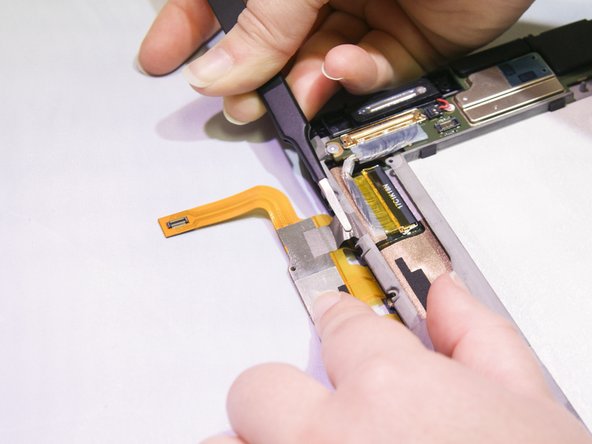
    • Use the tweezers to pull up the small chip from its receiver.

    • Use the tweezers to pull up the larger chip from its receiver.

    • There is adhesive attached to the back of the larger chip on the touchscreen controller strip.

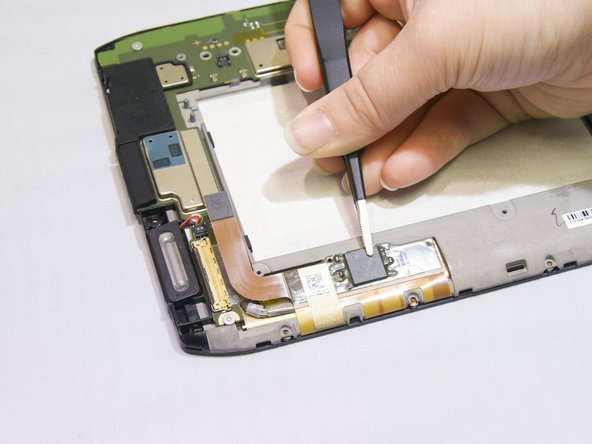
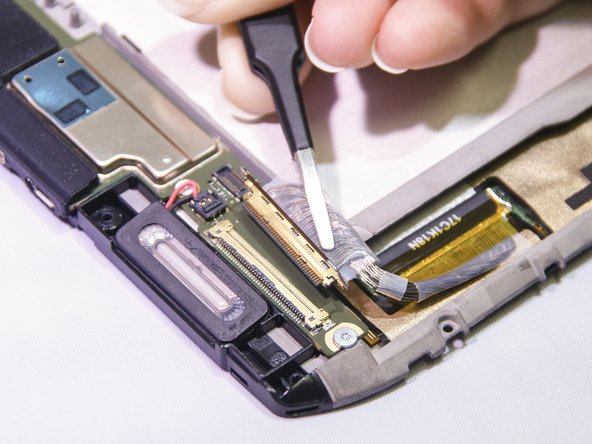
    • Use the tweezers to pull up one end of the small piece of tape that is holding the touchscreen controller.

  7. Motorola XOOM 2 Media Edition Touch Screen Replacement: шаг 7, изображение 1 из 2 Motorola XOOM 2 Media Edition Touch Screen Replacement: шаг 7, изображение 2 из 2
    • Use the tweezers to pull up and release the thin handle that is attached to the LCD connector.

    • Use the tweezers to pull out the LCD connector from its receptor.

  8. Motorola XOOM 2 Media Edition Touch Screen Replacement: шаг 8, изображение 1 из 2 Motorola XOOM 2 Media Edition Touch Screen Replacement: шаг 8, изображение 2 из 2
    • Use a plastic opening tool to gradually separate the screen from the device.

Заключение

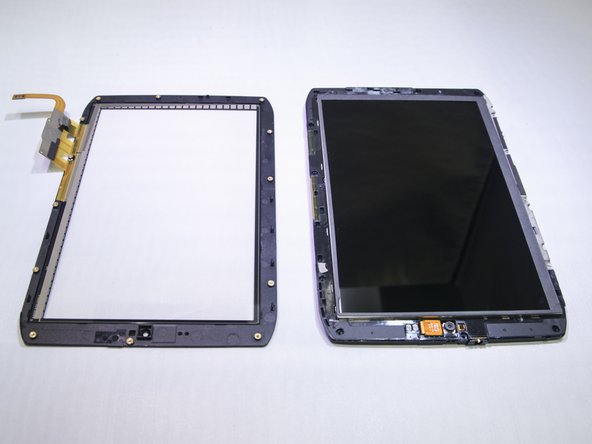
To reassemble your device, follow these instructions in reverse order.

Еще один человек закончил это руководство.

Lacie Broten

Участник с: 09/28/16

271 Репутация

Автор 2 руководств

Команда

Eastern Washington University, Team 2-2, Mathisen Fall 2016 Участник Eastern Washington University, Team 2-2, Mathisen Fall 2016

EWU-MATHISEN-F16S2G2

4 членов

Автор 12 руководств

0 Комментариев

Добавить комментарий

Просмотр статистики:

За последние 24часов: 0

За последние 7 дней: 1

За последние 30 дней: 2

За всё время: 635