Введение
Common problems with the Xoom 2 is a gradually forming looseness in the charging port assembly or even a bent or broken charging port. Follow this guide to replace or fix your charging port assembly.
Note: We will be using a Torx T5 screwdriver for all of the steps in this guide.
Выберете то, что вам нужно
-
-
Pry off the silver top back cover (the panel around the camera) with iFixit opening picks or a similar implement.
-
-
-
Using a T5 screwdriver, unscrew the four 1.5mm screws holding the main back cover. These screws are arranged in a line across the top of the back of the device.
-
-
-
Turn the device over and using a pry tool and the opening picks, gently apply pressure between the outside edge of the seal marked with the arrow. Slowly move around the edges of the device, applying even pressure, and separate the back plate from the display.
-
-
-
-
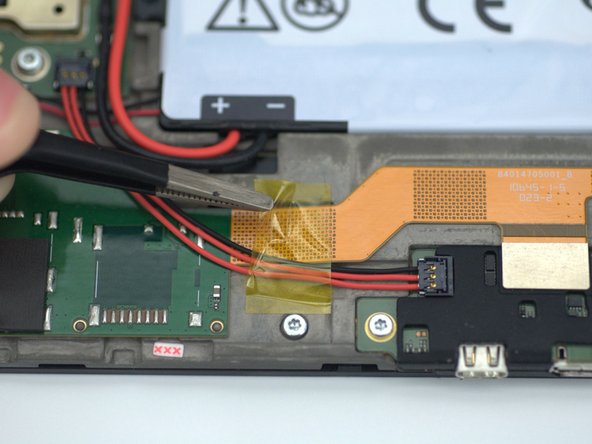
Using tweezers, gently pry up the piece of yellow Kapton tape that is holding several cables in place.
-
-
-
Using a spudger, carefully disconnect the 3 pin cable.
-
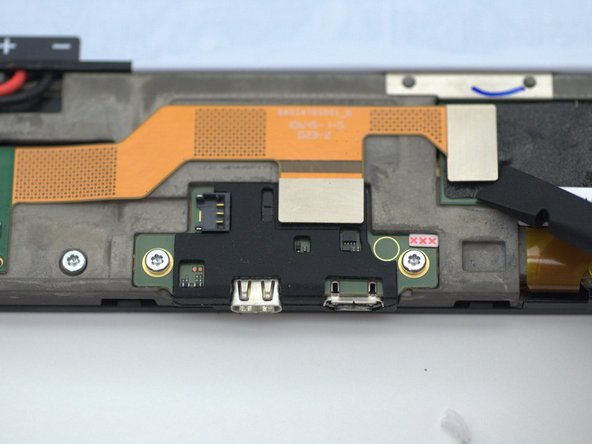
Then carefully disconnect the flat yellow ribbon cable at both connection points.
-
-
-
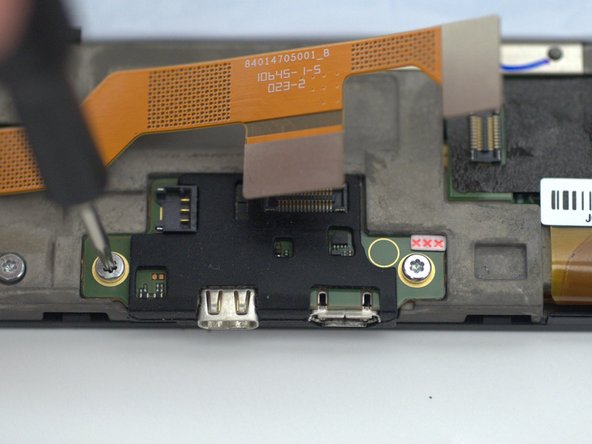
Using a Torx T5 driver bit, unscrew the two 1.5mm screws holding down the charging port assembly.
-
-
-
Using a spudger, gently apply pressure between the chassis and charging port assembly to remove it.
-


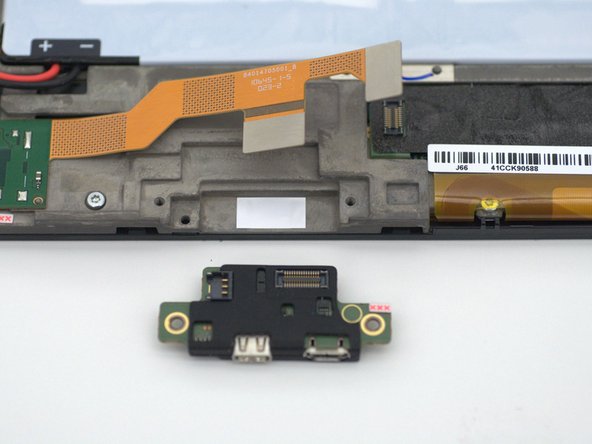
To reassemble your device, follow these instructions in reverse order.
To reassemble your device, follow these instructions in reverse order.

Команда

Embry-Riddle Aeronautical University, Team S13-G6, Lamothe Fall 2019 Участник Embry-Riddle Aeronautical University, Team S13-G6, Lamothe Fall 2019
ERAU-LAMOTHE-F19S13G6
4 членов
Автор 7 руководств