Введение
The speakers in your device function as the medium for noise to travel from the device to your ears. When the volume is set too loud over an extended period of time, your speakers may produce distorted sounds and noises. In addition, any debris within the speakers may disrupt the sounds coming out of the speakers.
If the speakers of your Motorola Xoom 2 are not working, damaged, punctured, or otherwise non-functional, this guide can help you replace them.
Выберете то, что вам нужно
-
-
Pry off the silver top back cover (the panel around the camera) with iFixit opening picks or a similar implement.
-
-
-
Using a T5 screwdriver, unscrew the four 1.5mm screws holding the main back cover. These screws are arranged in a line across the top of the back of the device.
-
-
-
-
Turn the device over and using a pry tool and the opening picks, gently apply pressure between the outside edge of the seal marked with the arrow. Slowly move around the edges of the device, applying even pressure, and separate the back plate from the display.
-
-
-
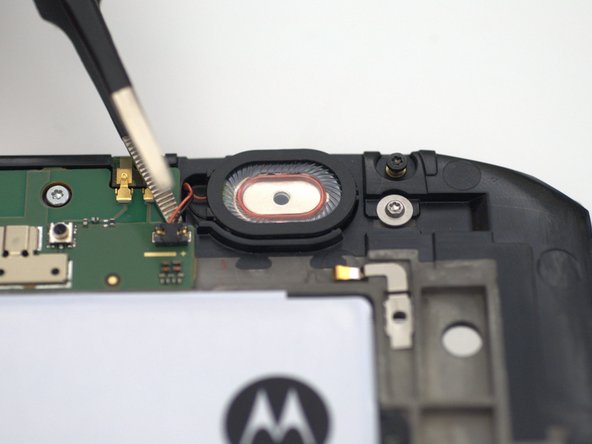
Using tweezers or a prying tool, gently disconnect the speaker connector cable from the motherboard.
-
-
-
Using a prying tool or a spudger, gently apply pressure to the gap between the speaker and the plastic chassis and lift the speaker out of the device.
-


To reassemble your device, follow these instructions in reverse order.
To reassemble your device, follow these instructions in reverse order.
Отменить: Я не выполнил это руководство.
Еще один человек закончил это руководство.

Команда

Embry-Riddle Aeronautical University, Team S13-G6, Lamothe Fall 2019 Участник Embry-Riddle Aeronautical University, Team S13-G6, Lamothe Fall 2019
ERAU-LAMOTHE-F19S13G6
4 членов
Автор 7 руководств