Введение
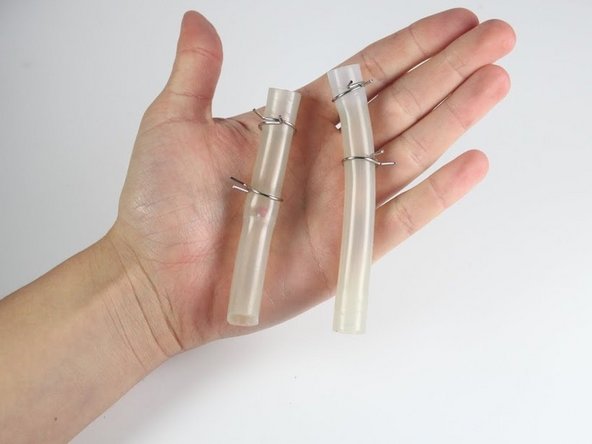
Then you will remove the base of the coffee maker, a couple small wires and with a little tug the tubing will pop right out.
Выберете то, что вам нужно
-
-
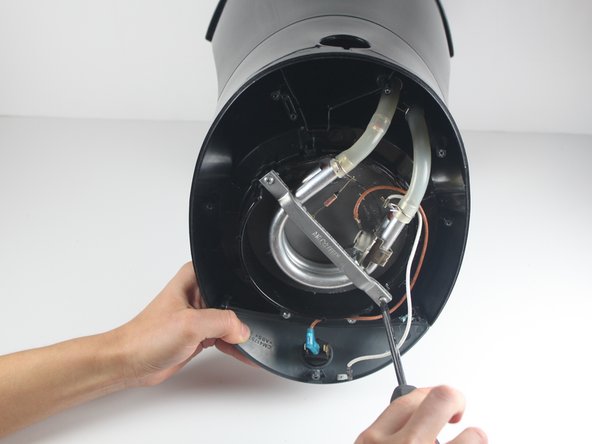
Flip the Mr. Coffee DW13 over so that the lid is facing away from you and the base is facing toward you.
-
-
-
Remove the eight 11 mm screws that secure the base of the machine with a Phillips Head #2 screwdriver.
-
-
-
Gently lift the base cover to expose the inside of the coffee machine.
SO interesting! I love fixing things, myself. Many things are so
easy, if looked at logically, and/or long enough.
Nice site!
I don't have a clue how I came here to it.
-
-
-
-
Identify and remove the two 13mm screws securing the silver support bracket using a phillips head screw driver.
-
-
-
Gently lift the silver support bracket freeing the heating plate from the heating coil.
-
-
-
Separate the tubing from the heating coil by grasping the tubing in one hand and the heating coil in the other and gently pulling apart.
-


To reassemble your device, follow these instructions in reverse order.
To reassemble your device, follow these instructions in reverse order.
Отменить: Я не выполнил это руководство.
3 участников успешно повторили данное руководство.
Команда

Cal Poly, Team 10-31, Maness Winter 2014 Участник Cal Poly, Team 10-31, Maness Winter 2014
CPSU-MANESS-W14S10G31
4 членов
Автор 6 руководств
8 Комментариев
Great photos. I've done this on another mr coffee model twice. Once for lime buildup, once for a coffee ground clogging it. Make sure you are gentle with the soft tubing. I split the hose at one end. The clamps now barely covers the split, but I'm looking for a replacement tube and ball valve.
I did not have to detach the heating coil from the plate in order to remove the tubing.
I found that the check valve was clogged with debris on my unit. Blowing it out cleared the clog. My unit's check valve is built into the tube that goes from the reservoir to the coil, so I only had to remove that tube to solve my issue.
Where does the tube with the check valve attach?
latimert36@windstream.net
Water inlet tube from the tank on my model Mr. Coffee BVMC-SJX33GT.
No. Still looking for tube/check valve as I had again today had to disassemble and clean the inlet tube from the reservoir and the split seems longer. I wonder if it would still work efficiently with a new tube without a check valve?
Amazon: HOS9X13 . You must transfer a valve from one of the water feed tubes and insert into the replacement hose, note the position. It has to be cut out of the old hose. This prevents backflow and the hose from collapsing from a vacuum so its generally close to the water source.
How much life you get from the repair depends on how corroded the aluminum tube is or if you are willing to live with bottom drips. While there are deposits that can be wiped out , the tube corrosion needs smooth refinishing to prevent leaks of steam which then condense on the bottom and drip out. Once you notice the dripping, the spring clips can also be rusted out, and not as tight as they used to be. The newer basic Mr Coffee similar to the above unit is at Amazon now for $15 overnight as prime, and the hose is $5, add spring clips if needed.