Перейти к основному содержанию

Native Instruments Traktor Kontrol S2 MK1: Disassembly and Jog Wheel Replacement

Архивированное руководство
Это руководство сохранено для исторических целей. Используйте его обновлённую версию, чтобы выполнить ремонт.

Выберете то, что вам нужно

  1. Native Instruments Traktor Kontrol S2 MK1: Disassembly and Jog Wheel Replacement, Jog Wheel Replacement: шаг 1, изображение 1 из 3 Native Instruments Traktor Kontrol S2 MK1: Disassembly and Jog Wheel Replacement, Jog Wheel Replacement: шаг 1, изображение 2 из 3 Native Instruments Traktor Kontrol S2 MK1: Disassembly and Jog Wheel Replacement, Jog Wheel Replacement: шаг 1, изображение 3 из 3
    • To start the disassembly, grab the channel fader slider and pull up. It will separate from the fader slide with ease.

    • Repeat previous instruction for the 5 other faders. Perform in this order: other channel fader, cross fader (the bottom fader in the middle), and the tempo faders (2 of them) on the left and right sides of the instrument.

    • Be firm, yet gentle when pulling up on the sliders.

  2. Native Instruments Traktor Kontrol S2 MK1: Disassembly and Jog Wheel Replacement: шаг 2, изображение 1 из 3 Native Instruments Traktor Kontrol S2 MK1: Disassembly and Jog Wheel Replacement: шаг 2, изображение 2 из 3 Native Instruments Traktor Kontrol S2 MK1: Disassembly and Jog Wheel Replacement: шаг 2, изображение 3 из 3
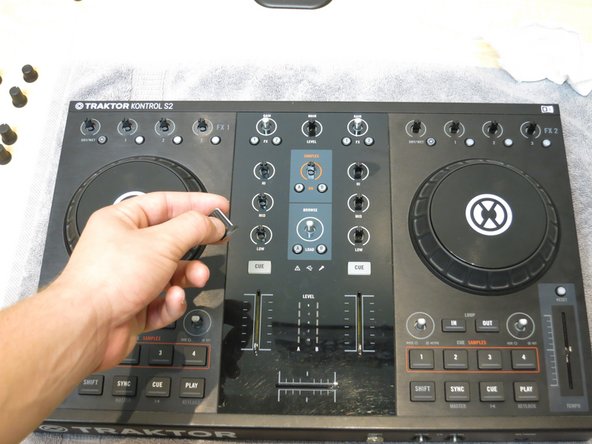
    • To remove the knobs on the controller use a flat-head screwdriver and a cloth. There are 3 different kinds of knobs (effect, browsing, and level adjustment knobs).

    • Place the cloth in the small gap between the knob and the surface of the controller.

    • Insert the flat-head screwdriver under the knob using the cloth as a protector for the surface of the controller.

    • Acting as a lever, use the screwdriver to pry the knob up and away from the controller.

    • Set the knob aside or into a bag for safe keeping.

    • Repeat with the remaining knobs on the controller.

  3. Native Instruments Traktor Kontrol S2 MK1: Disassembly and Jog Wheel Replacement: шаг 3, изображение 1 из 3 Native Instruments Traktor Kontrol S2 MK1: Disassembly and Jog Wheel Replacement: шаг 3, изображение 2 из 3 Native Instruments Traktor Kontrol S2 MK1: Disassembly and Jog Wheel Replacement: шаг 3, изображение 3 из 3
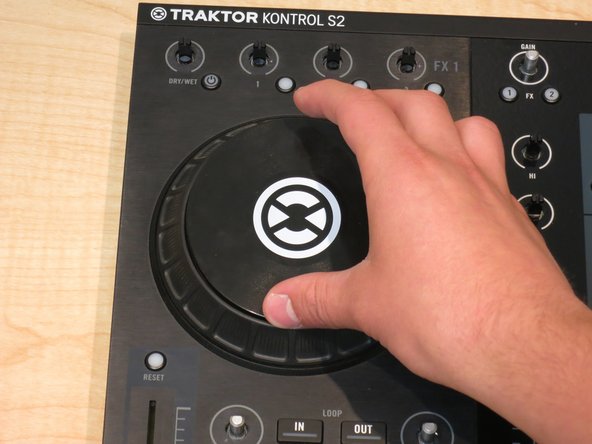
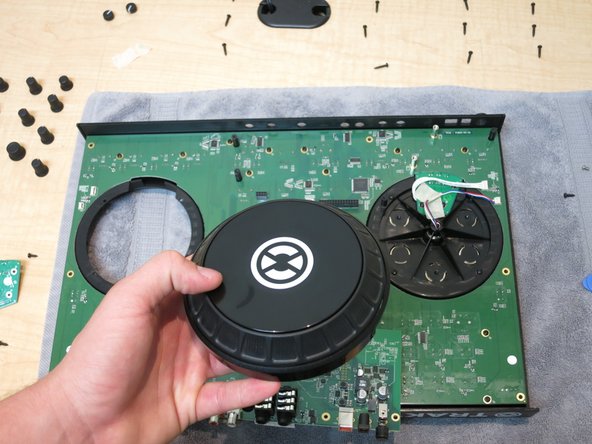
    • To remove the jog wheel cover, use your non-dominant hand to hold the jog wheel in place. With your dominant hand, press the top of the jog wheel and turn clockwise. The top should come off the jog wheel with ease.

    • Place jog wheel cover off to the side or in a bag.

    • Repeat with the remaining jog wheel.

  4. Native Instruments Traktor Kontrol S2 MK1: Disassembly and Jog Wheel Replacement: шаг 4, изображение 1 из 1
    • Checkpoint 1 - Make sure all your pieces are together to eliminate the potential for misplacement. Laying them out, or in a bag will help keep your controller pieces together.

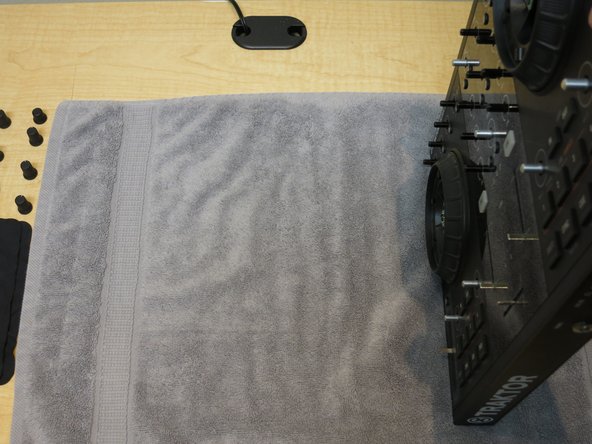
    • To prep for further disassembly, place the towel on your workstation surface, laying evenly.

  5. Native Instruments Traktor Kontrol S2 MK1: Disassembly and Jog Wheel Replacement: шаг 5, изображение 1 из 3 Native Instruments Traktor Kontrol S2 MK1: Disassembly and Jog Wheel Replacement: шаг 5, изображение 2 из 3 Native Instruments Traktor Kontrol S2 MK1: Disassembly and Jog Wheel Replacement: шаг 5, изображение 3 из 3
    • Gently flip the controller so the front of the controller is laying on the towel.

  6. Native Instruments Traktor Kontrol S2 MK1: Disassembly and Jog Wheel Replacement: шаг 6, изображение 1 из 3 Native Instruments Traktor Kontrol S2 MK1: Disassembly and Jog Wheel Replacement: шаг 6, изображение 2 из 3 Native Instruments Traktor Kontrol S2 MK1: Disassembly and Jog Wheel Replacement: шаг 6, изображение 3 из 3
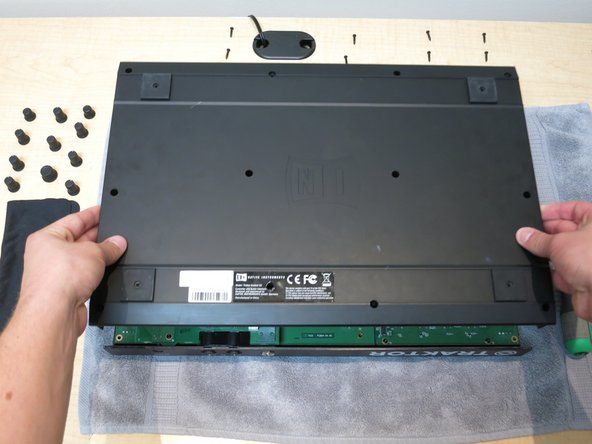
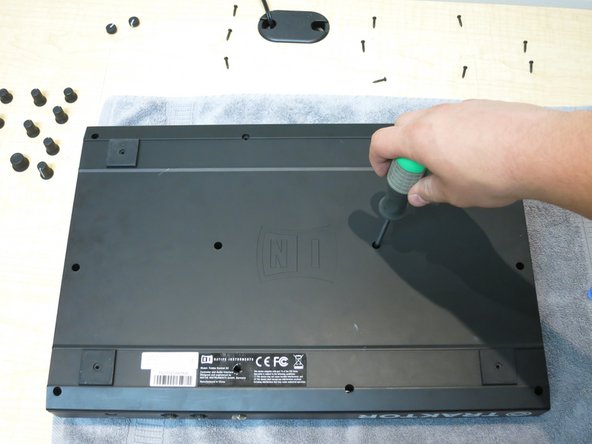
    • To access the internal components, remove the back of the controller.

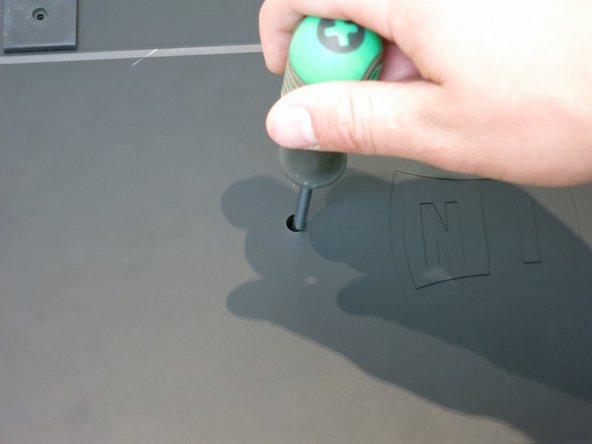
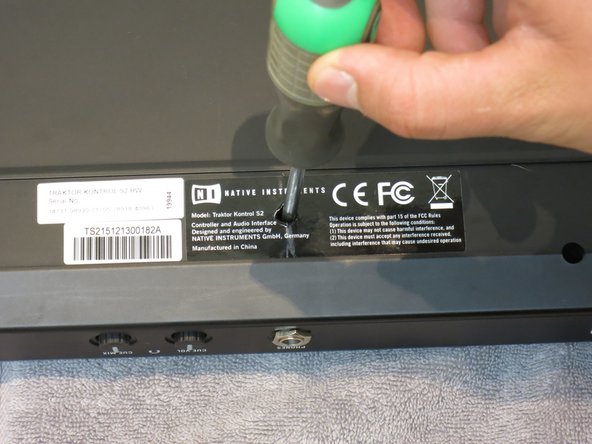
    • Using a philips-head screwdriver, unscrew the 12 screws that secure the back of the controller.

    • One out of the twelve screws is covered by a label. The easiest way to remove this particular screw is by removing the label first.

    • These screws are all the same size, be sure to keep them together.

  7. Native Instruments Traktor Kontrol S2 MK1: Disassembly and Jog Wheel Replacement: шаг 7, изображение 1 из 1
    • Checkpoint 2 - Be sure all pieces are accounted for. This checkpoint is the last point before the disassembly of the internal components.

    • Be sure to be slow and exhibit caution when proceeding. This instrument is fragile and expensive. Be sure to treat all components with care when handling, and do not force the removal of anything. Be firm but careful when removing pieces.

    • Keep track of loose screws and store in plastic sandwich bags or in an open area.

  8. Native Instruments Traktor Kontrol S2 MK1: Disassembly and Jog Wheel Replacement: шаг 8, изображение 1 из 3 Native Instruments Traktor Kontrol S2 MK1: Disassembly and Jog Wheel Replacement: шаг 8, изображение 2 из 3 Native Instruments Traktor Kontrol S2 MK1: Disassembly and Jog Wheel Replacement: шаг 8, изображение 3 из 3
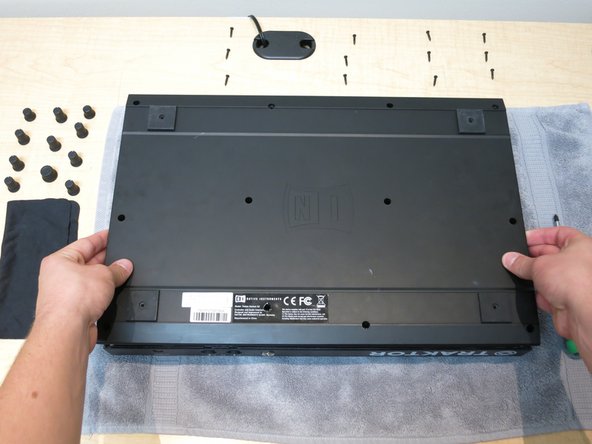
    • Next, remove the back plate of the controller. Simply grab the edges of both ends of the controller and lift up.

  9. Native Instruments Traktor Kontrol S2 MK1: Disassembly and Jog Wheel Replacement: шаг 9, изображение 1 из 1
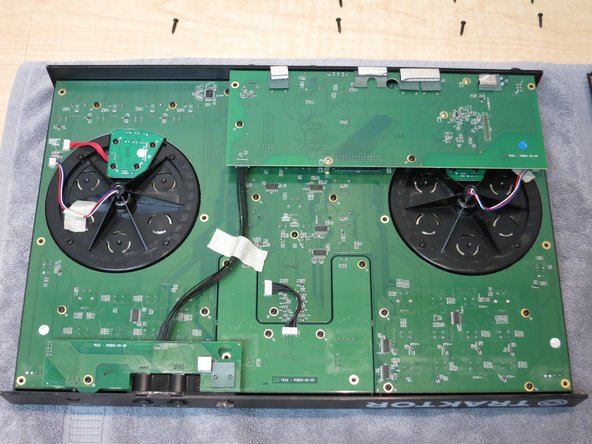
    • The sound card of the instrument will be removed next. Locate the rectangle board in the top right of the view before proceeding to disassembly instructions detailed in steps 10 and 11.

  10. Native Instruments Traktor Kontrol S2 MK1: Disassembly and Jog Wheel Replacement: шаг 10, изображение 1 из 2 Native Instruments Traktor Kontrol S2 MK1: Disassembly and Jog Wheel Replacement: шаг 10, изображение 2 из 2
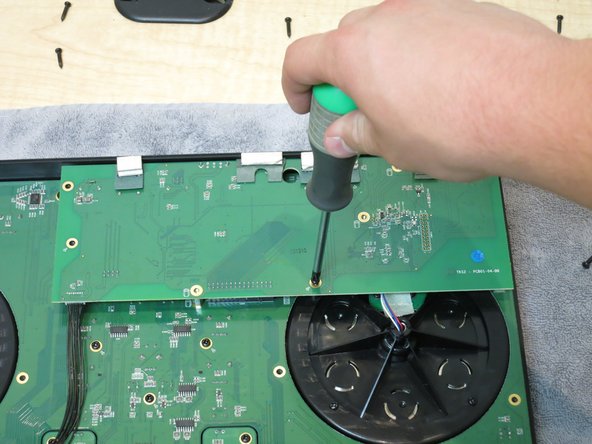
    • Using the same philips-head screwdriver from previous steps, unscrew the 2 black screws and 3 silver screws that secure the sound card to the motherboard.

  11. Native Instruments Traktor Kontrol S2 MK1: Disassembly and Jog Wheel Replacement: шаг 11, изображение 1 из 2 Native Instruments Traktor Kontrol S2 MK1: Disassembly and Jog Wheel Replacement: шаг 11, изображение 2 из 2
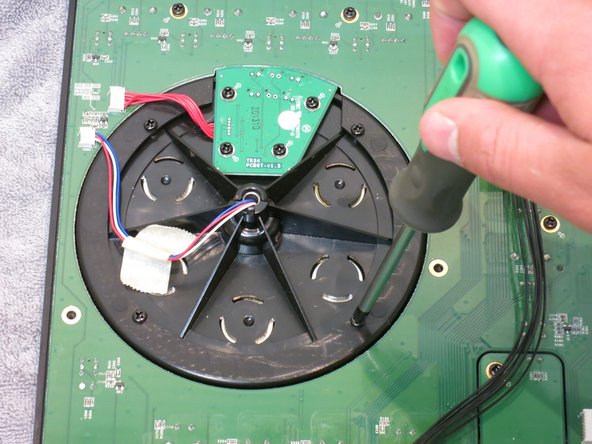
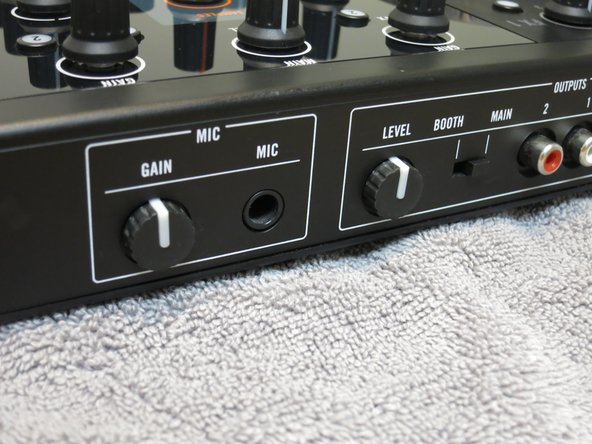
    • Before removing the sound card, the 2 gain knobs in the back of the unit will need to be removed. Using a spudger tool, a guitar pick, or a small flat-head screwdriver to gently pry the knob from the unit.

  12. Native Instruments Traktor Kontrol S2 MK1: Disassembly and Jog Wheel Replacement: шаг 12, изображение 1 из 3 Native Instruments Traktor Kontrol S2 MK1: Disassembly and Jog Wheel Replacement: шаг 12, изображение 2 из 3 Native Instruments Traktor Kontrol S2 MK1: Disassembly and Jog Wheel Replacement: шаг 12, изображение 3 из 3
    • The right jog wheel (on the left side in the current view) will be disassembled next, and removed from the unit.

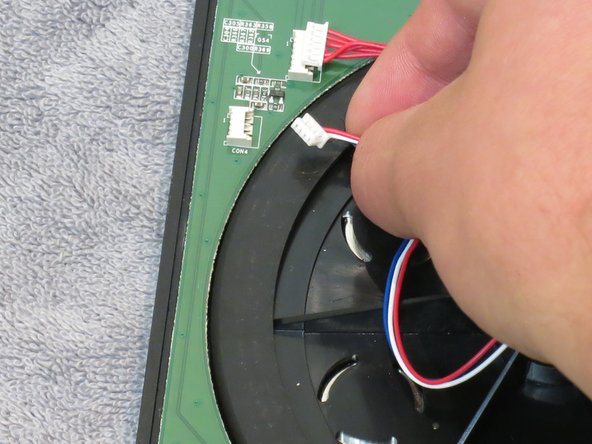
    • First, the two wires connecting to the jog wheel unit and the jog wheel sensor will need to be disconnected before removing the jog wheel.

    • Remove the masking tape holding down the red/white/blue cord bundle to the jog wheel unit.

    • Using your fingernail, carefully separate the red/white/blue cord from the motherboard connection site.

    • Do not pull by the plug, this will damage the cord and compromise the controller. Instead, gently pull the cord away by the white plug cap.

    • Repeat the same step with the red cord bundle.

  13. Native Instruments Traktor Kontrol S2 MK1: Disassembly and Jog Wheel Replacement: шаг 13, изображение 1 из 2 Native Instruments Traktor Kontrol S2 MK1: Disassembly and Jog Wheel Replacement: шаг 13, изображение 2 из 2
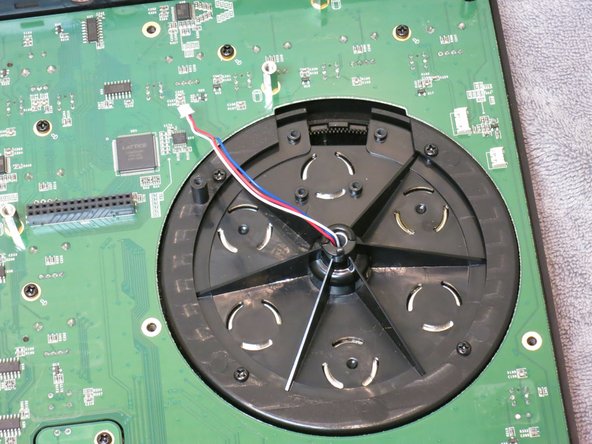
    • Using the philips-head screwdriver, unscrew the four black screws that are on the jog wheel unit. They will be on the outer edges of the circle.

    • Next, unscrew the 4 screws that secure the jog wheel sensor to the controller.

    • Set all screws and the electronic sensor in a safe place/aside

  14. Native Instruments Traktor Kontrol S2 MK1: Disassembly and Jog Wheel Replacement: шаг 14, изображение 1 из 1
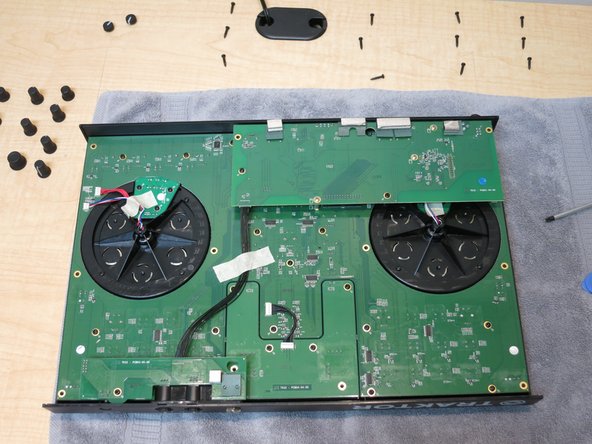
    • Gently raise the controller body. The jog wheel (now separated) will still be laying on the towel.

    • Set jog wheel aside (for discarding, recycling, or reassembly).

    • Set controller back down on to the towel.

  15. Native Instruments Traktor Kontrol S2 MK1: Disassembly and Jog Wheel Replacement: шаг 15, изображение 1 из 3 Native Instruments Traktor Kontrol S2 MK1: Disassembly and Jog Wheel Replacement: шаг 15, изображение 2 из 3 Native Instruments Traktor Kontrol S2 MK1: Disassembly and Jog Wheel Replacement: шаг 15, изображение 3 из 3
    • For this step, grab both sides of the sound card and carefully bring it straight up for removal. There are small metal prongs on the bottom of the sound card that connect with the motherboard. To eliminate the possibility of damaging the prongs, it is pertinent that the sound card is not removed on an angle.

  16. Native Instruments Traktor Kontrol S2 MK1: Disassembly and Jog Wheel Replacement: шаг 16, изображение 1 из 1
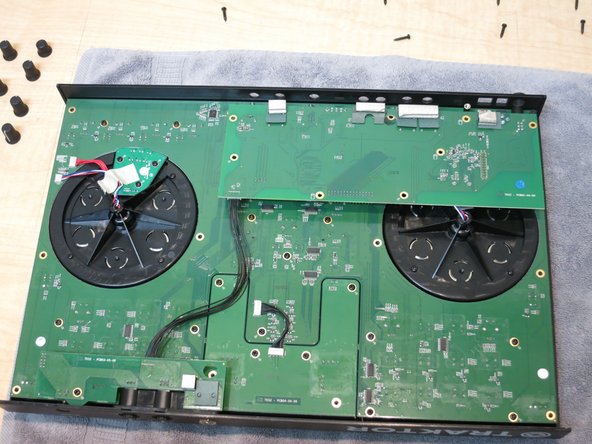
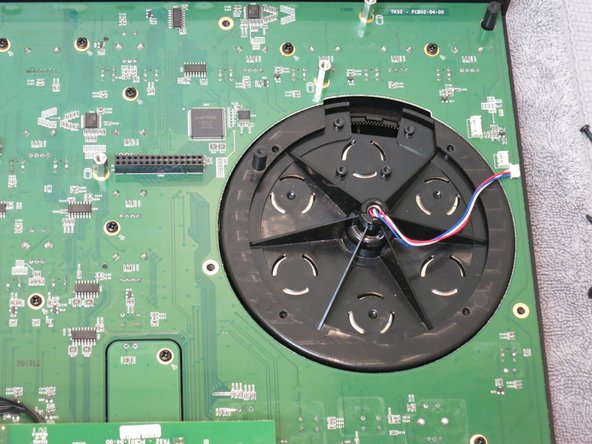
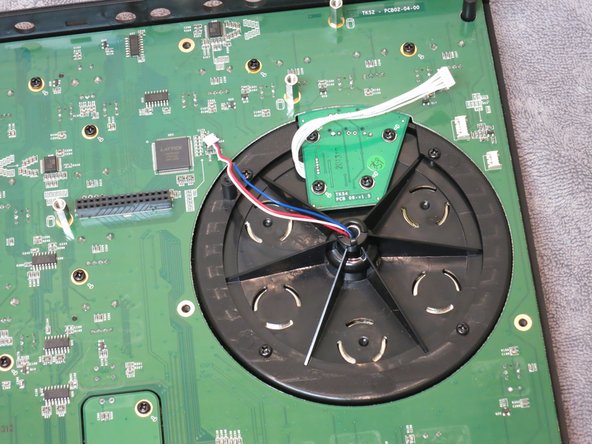
    • Fold over the sound card, and then place the sound card on the bottom of the board.

    • When moving the sound card make sure it is very close to the unit. The wires are still connected. Any pulling or stretching on these wires can cause damage to the unit or sound card.

    • A picture of the new location of the sound card can be found at Step 17.

  17. Native Instruments Traktor Kontrol S2 MK1: Disassembly and Jog Wheel Replacement: шаг 17, изображение 1 из 3 Native Instruments Traktor Kontrol S2 MK1: Disassembly and Jog Wheel Replacement: шаг 17, изображение 2 из 3 Native Instruments Traktor Kontrol S2 MK1: Disassembly and Jog Wheel Replacement: шаг 17, изображение 3 из 3
    • The left jog wheel (viewed as right on the controller) will be removed next. To remove the remaining jog wheels on the controller, repeat steps 12 and 13.

  18. Native Instruments Traktor Kontrol S2 MK1: Disassembly and Jog Wheel Replacement: шаг 18, изображение 1 из 1
    • Checkpoint 3 - Disassembly complete.

    • Look around and make sure that no screws, knobs, or any other parts have been misplaced.

  19. Native Instruments Traktor Kontrol S2 MK1: Disassembly and Jog Wheel Replacement: шаг 19, изображение 1 из 3 Native Instruments Traktor Kontrol S2 MK1: Disassembly and Jog Wheel Replacement: шаг 19, изображение 2 из 3 Native Instruments Traktor Kontrol S2 MK1: Disassembly and Jog Wheel Replacement: шаг 19, изображение 3 из 3
    • To install a replacement jog wheel, the first step is to connect the left jog wheel (viewed as right on the controller) into the empty slot.

    • Next, align the screw holes on the jog wheel unit with the holes of the jog wheel frame.

    • Now that the holes are aligned, you are going to need 4 black screws. Using a philips head screwdriver, screw the 4 black screws into the jog wheel unit.

    • After that is done, place the polygon-shaped reader back on to the unit, and screw in the other 4 black screws using the philips-head screwdriver.

    • Then gently plug in the red, white, and blue wire bundle, along with the red bundle into their respective spot on the motherboard.

    • Repeat for right (viewed as left on the controller) jog wheel.

  20. Native Instruments Traktor Kontrol S2 MK1: Disassembly and Jog Wheel Replacement: шаг 20, изображение 1 из 3 Native Instruments Traktor Kontrol S2 MK1: Disassembly and Jog Wheel Replacement: шаг 20, изображение 2 из 3 Native Instruments Traktor Kontrol S2 MK1: Disassembly and Jog Wheel Replacement: шаг 20, изображение 3 из 3
    • Next, fold the sound card back over. Now align the prongs of the sound card with the black slots of the motherboard.

    • Gently apply pressure and push the sound card down towards the motherboard, until the sound card feels snug.

    • Taking the 3 silver screws and 2 black screws, use the philips-head screwdriver to reconnect the sound card back on to the motherboard.

    • If you need help on aligning screws, see Step 9.

    • Reapply masking tape to wire bundles, and secure the wires to the motherboard.

  21. Native Instruments Traktor Kontrol S2 MK1: Disassembly and Jog Wheel Replacement: шаг 21, изображение 1 из 3 Native Instruments Traktor Kontrol S2 MK1: Disassembly and Jog Wheel Replacement: шаг 21, изображение 2 из 3 Native Instruments Traktor Kontrol S2 MK1: Disassembly and Jog Wheel Replacement: шаг 21, изображение 3 из 3
    • On the back plate, make sure the grooves line up with the grooves on the controller to put them both back together.

    • Once the grooves are in place, complete this step by screwing in the 12 black screws into the bottom of the controller.

  22. Native Instruments Traktor Kontrol S2 MK1: Disassembly and Jog Wheel Replacement: шаг 22, изображение 1 из 3 Native Instruments Traktor Kontrol S2 MK1: Disassembly and Jog Wheel Replacement: шаг 22, изображение 2 из 3 Native Instruments Traktor Kontrol S2 MK1: Disassembly and Jog Wheel Replacement: шаг 22, изображение 3 из 3
    • Flip the controller back over so it is right side up, and locate the knobs.

    • Carefully, put each knob back into its correct spot.

    • You can go back to Steps 1 and 2 to see where each knob goes back in correctly.

  23. Native Instruments Traktor Kontrol S2 MK1: Disassembly and Jog Wheel Replacement: шаг 23, изображение 1 из 2 Native Instruments Traktor Kontrol S2 MK1: Disassembly and Jog Wheel Replacement: шаг 23, изображение 2 из 2
    • Carefully, place the tempo faders, channel fader, and the cross fader, back on to controller in its correct spot.

  24. Native Instruments Traktor Kontrol S2 MK1: Disassembly and Jog Wheel Replacement: шаг 24, изображение 1 из 2 Native Instruments Traktor Kontrol S2 MK1: Disassembly and Jog Wheel Replacement: шаг 24, изображение 2 из 2
    • Finally, place the gain knobs back on to the rear of the controller. Be sure to push each knob in until they click and feel snug.

  25. Native Instruments Traktor Kontrol S2 MK1: Disassembly and Jog Wheel Replacement: шаг 25, изображение 1 из 1
    • Using windex and a microfiber cloth, clean away any smudges or visible oily patches.

    • The repair is finished. When reconnecting the controller to Traktor Pro, you may be prompted to recalibrate the jog wheel and other functions. To recalibrate these, consult the Kontrol S2 User Guide that was provided with your controller.

    • End of Guide.

Заключение

For additional support, go to: www.native-instruments.com

2 участников успешно повторили данное руководство.

Ryan Staples

Участник с: 09/29/15

136 Репутация

1 руководство автора

Команда

Cal Poly, Team 15-6, Green Fall 2015 Участник Cal Poly, Team 15-6, Green Fall 2015

CPSU-GREEN-F15S15G6

5 членов

Автор 4 руководств

2 Комментариев

hi, may i know where can we buy the jogwheel as replacement part, some shop selling fader, usb slot and knob button, but no one selling the jogwheel, thanks and forgive my broken language, thank you.

js lee - Ответить

Hello Ryan

Where can I find the jog to buy?

Do you know a virtual store where you sell the parts of the controllers?

thank you so much

crisopatrol - Ответить

Добавить комментарий

Просмотр статистики:

За последние 24часов: 0

За последние 7 дней: 0

За последние 30 дней: 0

За всё время: 1,570