Перейти к основному содержанию

Neato Botvac 80 Top Face Panel Replacement

Выберете то, что вам нужно

  1. Neato Botvac 80 Top Face Panel Replacement, Rear Bumper: шаг 1, изображение 1 из 1
    • Grab the rear bumper with both hands on either side.

  2. Neato Botvac 80 Top Face Panel Replacement: шаг 2, изображение 1 из 1
    • Pull the left and right sides away from the machine to unclip the bumper. This requires that you bend the plastic a little bit. Unclip one side a little bit and allow the prong to rest on the side of the machine. Then unclip the other side and pull off the bumper parallel to both sides

  3. Neato Botvac 80 Top Face Panel Replacement, Top Face Panel: шаг 3, изображение 1 из 2 Neato Botvac 80 Top Face Panel Replacement, Top Face Panel: шаг 3, изображение 2 из 2
    • Looking from above, remove the two 11mm screws with a torx T10 screwdriver.

  4. Neato Botvac 80 Top Face Panel Replacement: шаг 4, изображение 1 из 1
    • Begin by placing the robot on it's back and removing the six 11m screws using a Torx T10 screwdriver.

  5. Neato Botvac 80 Top Face Panel Replacement: шаг 5, изображение 1 из 3 Neato Botvac 80 Top Face Panel Replacement: шаг 5, изображение 2 из 3 Neato Botvac 80 Top Face Panel Replacement: шаг 5, изображение 3 из 3
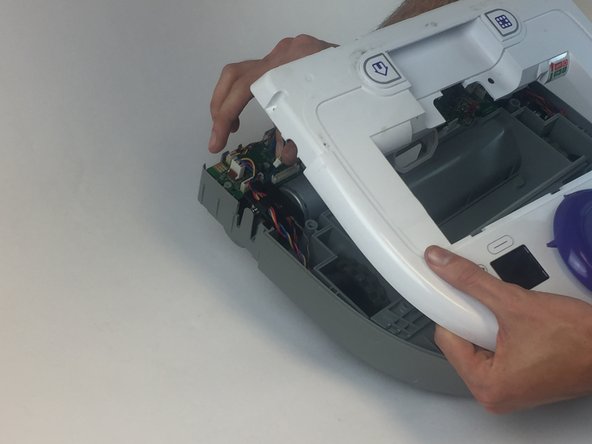
    • To remove the top, you must press in both of the clamps at the same time and push upwards.

    • When removing the top, before you can completely take it off you must unplug the LCD power cable from the motherboard.

Заключение

To reassemble your device, follow these instructions in reverse order.

2 участников успешно повторили данное руководство.

Brandon Blank

Участник с: 02/02/17

675 Репутация

Автор 5 руководств

Команда

USF Tampa, Team 17-5, Blackwell Spring 2017 Участник USF Tampa, Team 17-5, Blackwell Spring 2017

USFT-BLACKWELL-S17S17G5

3 членов

Автор 12 руководств

0 Комментариев

Добавить комментарий

Просмотр статистики:

За последние 24часов: 1

За последние 7 дней: 2

За последние 30 дней: 5

За всё время: 886