Эта версия возможно содержит некорректные исправления. Переключить на последнюю проверенную версию.
Выберете то, что вам нужно
-
Этот шаг не переведен. Помогите перевести
-
Place the blaster on its side with the handle to the right and loosen all screws so the shell can be opened. (Not all screws are visible in the provided pictures.)
-
Avoid the fake plastic screw, which is merely decorative.
-
-
Этот шаг не переведен. Помогите перевести
-
Gently remove the yellow and grey shell pieces from the blaster to display the blaster's motherboards and motor.
-
-
-
Этот шаг не переведен. Помогите перевести
-
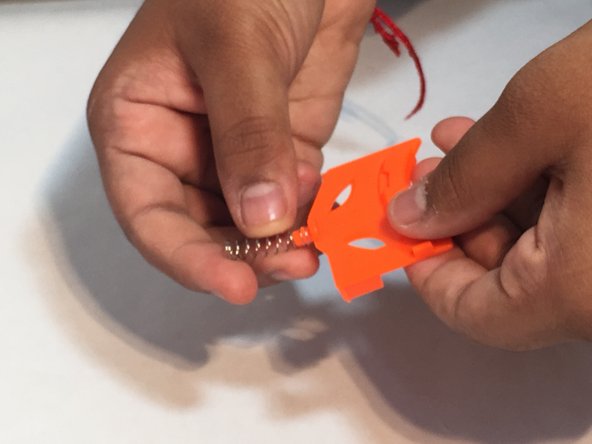
Locate the orange trigger (dark blue if it's the newer version).
-
Slide the trigger out of place and check the spring. It should be corrosion-free and fitted to the knob on the back of the trigger.
-
-
Этот шаг не переведен. Помогите перевести
-
If it is damaged, pull the spring off the trigger, then push the replacement spring onto the knob so it catches and doesn't fall off.
-
If the spring is not damaged, it is possible the spring was installed incorrectly. Ensure the spring is attached to the knob so it sticks straight out and doesn't fall off.
-
-
Этот шаг не переведен. Помогите перевести
-
Put the trigger back into place with the trigger spring pressed into the small slot behind the trigger well. It should fit into place straight with slight compression.
-


Отменить: Я не выполнил это руководство.
Еще один человек закончил это руководство.
Команда

University of Memphis, Team 2-3, Kim SU 2016 Участник University of Memphis, Team 2-3, Kim SU 2016
UM-KIM-SU16S2G3
4 членов
Автор 3 руководств