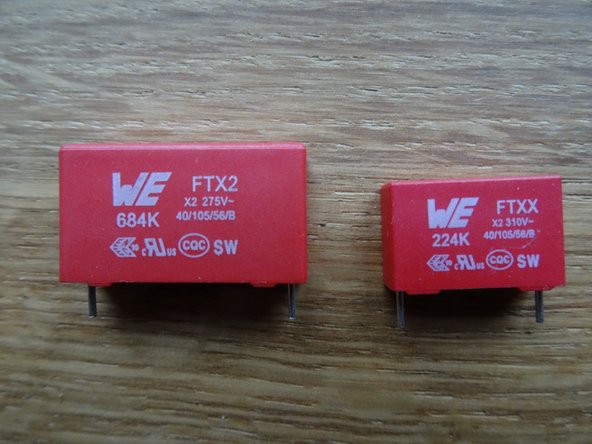
Перейти к основному содержанию

Nespresso CitiZ Capacitors Replacement

Выберете то, что вам нужно

  1. Nespresso CitiZ Capacitors Replacement, Dismantle Nespresso CitiZ: шаг 1, изображение 1 из 1
    • Never forget: pull the plug!

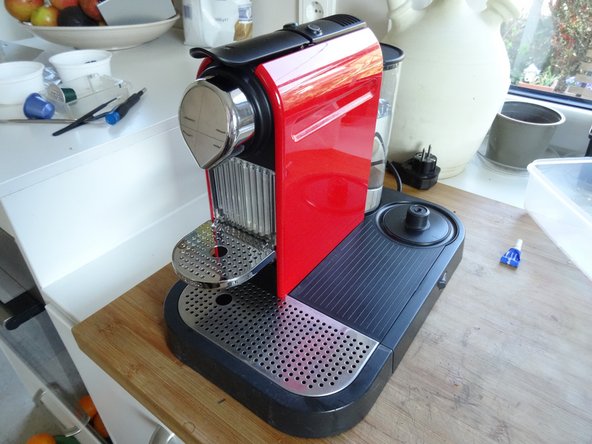
    • Remove all attachments: Water tank, capsule and cup drawer, drip tray.

    • The model shown is also equipped with a milk frother, remove that too.

  2. Nespresso CitiZ Capacitors Replacement: шаг 2, изображение 1 из 2 Nespresso CitiZ Capacitors Replacement: шаг 2, изображение 2 из 2
    Инструмент, используемый на этом этапе:
    iFixit Precision 4 mm Screwdriver Bit
    $2.99
    Купить
    • The bottom is secured by oval head screws.

    • These screws have an oval head that makes them look like rivets (picture 2). You need to use a special bit - also available at iFixit - for their removal. Here a DIY guide. If the right bit is not available, it could be done with a pair of needle nose pliers. Nespresso wants to keep us out of our own machines!!!

    • Remove five oval head screws securing the large bottom panel.

    • Note: this panel is smaller on models without milk frother.

  3. Nespresso CitiZ Capacitors Replacement: шаг 3, изображение 1 из 3 Nespresso CitiZ Capacitors Replacement: шаг 3, изображение 2 из 3 Nespresso CitiZ Capacitors Replacement: шаг 3, изображение 3 из 3
    • The bottom panel is just snapped into place. Insert a metal spudger into the slots and lift the panel out. It sits quite tightly and you might use some force to get it out.

  4. Nespresso CitiZ Capacitors Replacement: шаг 4, изображение 1 из 1
    • Remove the large bottom panel.

  5. Nespresso CitiZ Capacitors Replacement: шаг 5, изображение 1 из 1
    • Use a spudger to slide off the two silicon tubes.

  6. Nespresso CitiZ Capacitors Replacement: шаг 6, изображение 1 из 2 Nespresso CitiZ Capacitors Replacement: шаг 6, изображение 2 из 2
    • Disconnect the two spade plugs on the blue and brown wires from the power switch. The two left ones remain.

  7. Nespresso CitiZ Capacitors Replacement: шаг 7, изображение 1 из 1
    • Remove four oval head screws from the small bottom panel.

    • Remove the main device from the base. It´s still connected with some wires, but this doesn´t bother much.

  8. Nespresso CitiZ Capacitors Replacement: шаг 8, изображение 1 из 3 Nespresso CitiZ Capacitors Replacement: шаг 8, изображение 2 из 3 Nespresso CitiZ Capacitors Replacement: шаг 8, изображение 3 из 3
    • The two colored side panels are only snapped into place. However, the latches sit very tight. You really need a lot of force. First lift the lower edge using a plastic opening tool.

    • Depending from the model it might help, when you first pry off the coffee spout. (See next step)

    • Unfold each of the side panels upwards and remove them.

  9. Nespresso CitiZ Capacitors Replacement: шаг 9, изображение 1 из 1
    • Insert a opening tool in the gap on the bottom of the coffee spout. Pry it off carefully.

  10. Nespresso CitiZ Capacitors Replacement, Expose PCB: шаг 10, изображение 1 из 1
    • Geht the wires out of the holder.

  11. Nespresso CitiZ Capacitors Replacement: шаг 11, изображение 1 из 2 Nespresso CitiZ Capacitors Replacement: шаг 11, изображение 2 из 2
    • The plastic cover over the brewing unit is secured by two clips on each side. Use a metal spudger to pry them off.

    • Lift the cover slightly, but don't remove it, it is still connected by some cables.

  12. Nespresso CitiZ Capacitors Replacement: шаг 12, изображение 1 из 1
    • Open the lever and lift the cover out over the lever. Make sure that the cables are not strained too much.

    • Put the cover aside, but leave the cables connected.

  13. Nespresso CitiZ Capacitors Replacement: шаг 13, изображение 1 из 1
    • You will find the capacitors on the motherboard in the lower part of the device. The motherboard ist protected by several plastic covers.

  14. Nespresso CitiZ Capacitors Replacement: шаг 14, изображение 1 из 2 Nespresso CitiZ Capacitors Replacement: шаг 14, изображение 2 из 2
    • Carefully pull out the motherboard backwards.

  15. Nespresso CitiZ Capacitors Replacement: шаг 15, изображение 1 из 3 Nespresso CitiZ Capacitors Replacement: шаг 15, изображение 2 из 3 Nespresso CitiZ Capacitors Replacement: шаг 15, изображение 3 из 3
    • Flip off the white cover.

    • Take note of the colors of the wires. Pull the spade connectors and seperate the wires from the motherboard.

    • The wires on the other end of the motherboard cannot be removed.

  16. Nespresso CitiZ Capacitors Replacement, Capacitors replacement: шаг 16, изображение 1 из 2 Nespresso CitiZ Capacitors Replacement, Capacitors replacement: шаг 16, изображение 2 из 2
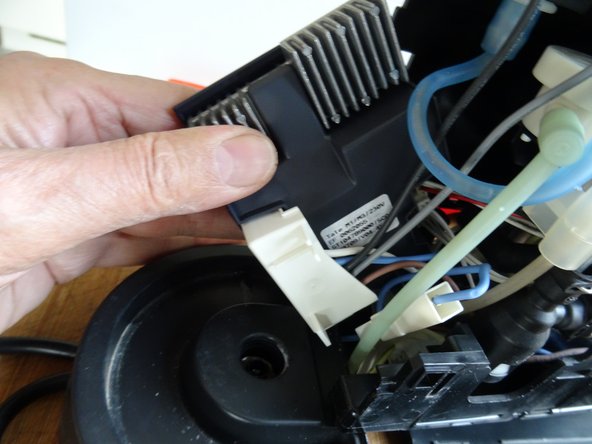
    • The black plastic cover ist only snapped into place. Lift it up.

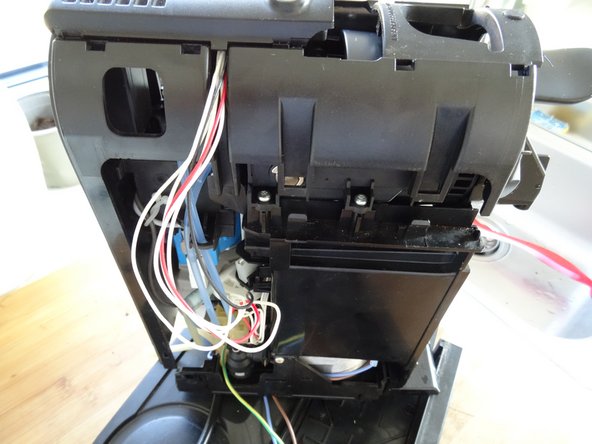
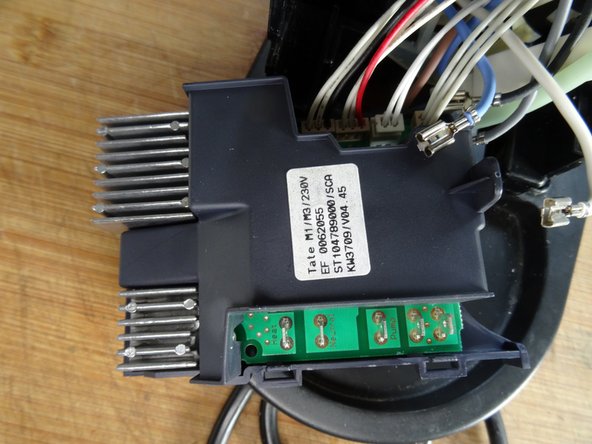
    • The motherboard now ist exposed. Lift it out of its black plastic case.

  17. Nespresso CitiZ Capacitors Replacement: шаг 17, изображение 1 из 2 Nespresso CitiZ Capacitors Replacement: шаг 17, изображение 2 из 2
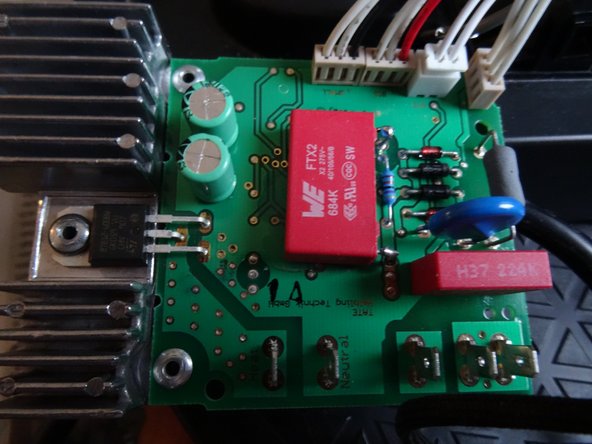
    • The two blue capacitors must be replaced. The larger one is slightly glued to the motherboard.

    • Use a metal spudger to separate the larger one from the motherboard and fold it upwards.

    • The replacement capacitors have only very short connection wires. The 680 nF capacitor was therefore cut off so that it could be reconnected lying on its side.

  18. Nespresso CitiZ Capacitors Replacement: шаг 18, изображение 1 из 2 Nespresso CitiZ Capacitors Replacement: шаг 18, изображение 2 из 2
    • Desolder the two capacitors from the bottom side of the motherboard (or cut them off on the top side) and replace them with the two new ones.

  19. Nespresso CitiZ Capacitors Replacement: шаг 19, изображение 1 из 1
    • The picture shows the two new capacitors.

  20. Nespresso CitiZ Capacitors Replacement: шаг 20, изображение 1 из 2 Nespresso CitiZ Capacitors Replacement: шаг 20, изображение 2 из 2
    • ... soldered to the board.

    • The Nespresso immediately starts to work.

Заключение

To reassemble your device, follow these instructions in reverse order.

2 участников успешно повторили данное руководство.

Особая благодарность этим переводчикам:

de en

100%

VauWehпомогает нам починить мир! Хотите внести свой вклад?
Начните переводить ›

VauWeh

Участник с: 10/19/15

203 741 Репутация

Автор 246 руководств

Команда

Repair is War on Entropy Участник Repair is War on Entropy

Community

25 членов

Автор 1 126 руководств

2 Комментариев

Thank you for an excellent repair guide. I replaced the two capacitors in accordance with the instructions and my Nespresso CitiZ works again.

John Francis - Ответить

Congrats! I'm glad that I could help.

VauWeh - Ответить

Добавить комментарий

Просмотр статистики:

За последние 24часов: 1

За последние 7 дней: 12

За последние 30 дней: 82

За всё время: 2,637