Введение
If you are not receiving video, or the picture is blurred or discolored, then a faulty camera may be the issue. If troubleshooting has led you here, then this guide will help you change the camera in your Nest Hello. Disassembly will require the iFixit opening picks, Phillips #000 screwdriver, and tweezers. It is easy to damage the waterproofing O-Ring while removing the faceplate and device housing, so [|plan on replacing that as well.]
Выберете то, что вам нужно
-
-
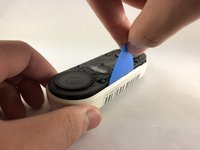
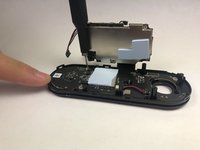
Insert the pick between the black faceplate and white casing of the Nest Hello.
-
Pry the faceplate away from the device with the opening pick.
-
Completely remove the faceplate from the device, do not be afraid to pull hard.
-
-
-
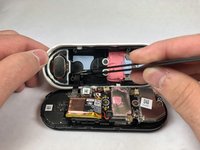
Peel back the cover stickers and use the Phillips #000 screwdriver to remove the four screws.
-
-
-
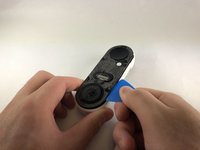
Insert opening pick between the white casing and the black internal circuitry and pry it out.
-
-
-
Use the Phillips #000 to remove the two screws holding the ribbon cable to the white casing.
-
-
-
Инструмент, используемый на этом этапе:Tweezers$4.99
-
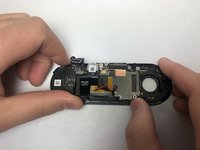
Grip the connector with the tweezers as shown and pull it away from the casing.
-
-
-
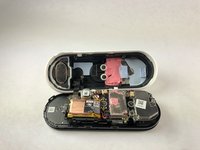
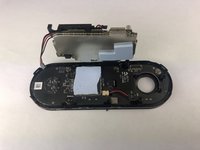
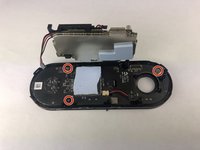
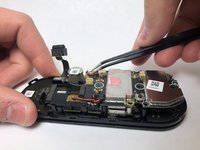
Remove the six smaller screws shown with the Phillips #000 screwdriver.
-
Remove the three larger screws shown with the Phillips #000 screwdriver.
-
-
-
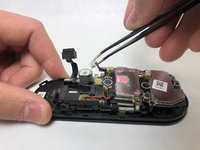
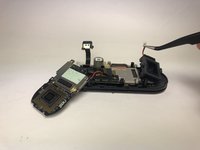
Holding the device as shown push the circuit board away from you and up to free it from the clips.
-
-
-
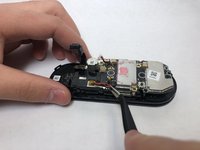
Use the Phillips #000 screwdriver to remove the three screws holding the last circuit board to the black plastic housing.
-
-
-
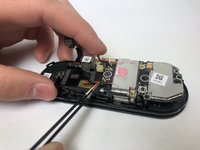
Insert the pick underneath the black connectors and pry them upward to disconnect them from the circuit board.
-
Work your way around the device, prying the circuit board away from the housing.
-
-
-
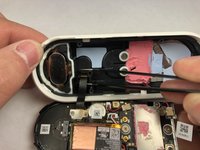
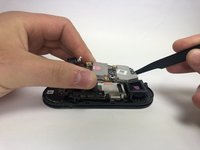
Lift the top layer of circuits to reveal the unplugged camera.
-
Lift up the camera and remove it from the device.
-


To reassemble your device, follow these instructions in reverse order.

Команда

Embry-Riddle Aeronautical University, Team S1-G7, Cromer Twal Spring 2020 Участник Embry-Riddle Aeronautical University, Team S1-G7, Cromer Twal Spring 2020
ERAU-CROMER TWAL-S20S1G7
4 членов
Автор 27 руководств